Free Stock Photos to help you beautify your brand - Welcome to the CGScreative Resource Library

Free Stock Photos to help you beautify your brand - Welcome to the CGScreative Resource Library

What do you do if you just can't seem to figure out your camera? What happens when you spend hours and hours snapping photos on your phone for your latest blog post, but all the photos you've taken leave you feeling frustrated?

This is where I step in my friend!

You see, I understand that we can't do #ALLTHETHINGS when it comes to our blogs, and so, I created the CGScreative resource library.

I created the library to help creatives, just like you. When I first started blogging, there was nothing like this available to me, and because we all have to start somewhere, I have made this pretty online space, absolutely free.

Read More

Why you need to build an email list: Email Marketing for Beginners

Why you need to build an email list: Email Marketing for Beginners

If you've been blogging for some time and especially if you've been looking into how you can make money from blogging, I'm sure you will have come across the term 'email list'. I'm sure you have heard loads of other bloggers and business owners talking about 'list building' and how 'the money is in the list' but perhaps you've been wondering not just why on earth you need a list for your blog but also what on earth you'd be sending those people. Can't your readers just follow you through Bloglovin' or Feedburner? Why do you need to invest your time into another form of marketing?

If you're anything like me, you've been pondering those questions. It's time to stop wondering and start doing & so today I'm going to tell why you definitely DO need an email list for your blog or business, plus I'm going to show you how you can start building yours today.

Read More

My Favourite Tools for Blogging - Awesome Programs, hosting, apps and software to help grow your blog

My  Favourite Tools for Blogging - Awesome Programs, hosting, apps and software to help grow your blog

I'm coming up to my 6th year of blogging (what?!) and so I can safely say I know a thing or two about tools that help you blog better. Most of what we need to know about growing our blogs can be found on Pineterest, right? This is all very well, and I don't know about you but whenever I head to Pinterest to search for blogging resources I get sucked into images of beautiful quotes, cute puppies and ways to save space in my home (tell me I'm not the only one?). 

So I thought I'd create this post for you, with a list of all the resources and tools I use when blogging. I've also created a useful printable cheatsheet of all these resources for you to print out to help you in your blogging journey. You can get your paws on this checklist in my *FREE* Resource Library (which is filled with stock photos and loads of other blog & biz resources) and which you can join below.

Read More

Beautiful Free stock photos for bloggers and business owners

Beautiful Free stock photos for bloggers and business owners

When I first started blogging back in 2010 (6 years ago...eeek!) I used to shamelessly copy and paste images from We Heart It, which was kind of the OG of the visual world before Pinterest came along. I had no idea about copy-write (in fact, I couldn't even really spell that word properly) never mind understand the legal ramifications of using someone else's work without giving them full credit.

It wasn't until 2012 when I came across an article from a blogger who had been sued for a HUGE amount of money after using someones photograph on her blog. The blogger had actually given the photographer credit in her blog post, but she hadn't asked him for permission to re-post his image and so she ended up going to court and was found guilty of intellectual property theft! Can you imagine being charged with a criminal offense for using an image on your blog? Madness!

I was terrified after reading that blog post and promptly set out to learn how to take my own photographs so as not to have to worry about image copy-right ever again! I ended up falling in love with photography, and have since gone onto to freelance and now go under the title 'professional photographer'. I understand that not everyone has the time, or the desire, to pursue photography full time, especially if their interests lie somewhere else, in writing for example or making or drawing or painting. This is where stock photographs come in and this is where I wave a little (pink) flag that says I've got you covered and have FREE STOCK PHOTOGRAPHS JUST FOR YOU!

Read More

A beginners guide to Blog Photography & Styling - What you need to get started

A beginners guide to Blog Photography & Styling - What you need to get started

I've been blogging for about 6 years now, and I do so because I genuinely love providing free, useful content for people. This blog is not a diary showcasing my life but rather I hope that it is a platform for you to learn new things (like my blogging tipstravel guides and posts about owning a dog in Korea) as well as a place to be inspired (by my travel posts, recipes and my photography). 

One thing that I have learned from all these years of tapping away at my keyboard is that the images on your blog can make or break your brand. 

These days technology has advanced so much, there really is no excuse for anyone to have poor quality images on their blog. This doesn't mean you have to own the fanciest camera on the market, your cellphone/ipad/tablet will work just fine.

In this post I'm going to be sharing with you what I use to style & take photographs for my blog. 

Read More

My top 15 insanely useful tips for bloggers

My top 15 insanely useful tips for bloggers

I've been thinking of ways to condense all of the useful posts I've written on blogging, and so created this insanely useful list for bloggers of all niches and topics. Whether you've been blogging for years or whether you've just started your journey & are feeling a little overwhelmed, these tips are bound to help you on your way.

1. Read, re-read & update your About page.  

When I look at the traffic stats on this site, my About page is one of the most popular pages. And I know that when I visit other blogs, I always click on their about/welcome pages to find out more about who they are as a person. Don't let the thought that is has to be perfect put you off editing yours (or even making one if you don't already have one). I am constently updating and editing mine, adding in or taking out information that is no longer relevant to my blogging journey. Your About page should grow with your blog, as should your profile picture (mentioned above).

Here are some tips for your About Page.

Read More

How to create a custom landing page in Squarespace

How to create a custom landing page in Squarespace

While creating my recent e-course, I've spent a lot of time researching the best tools and resources to use to ensure a smooth launch. Today I want to share with you how you can use your Squarespace site to create your own, customized landing pages without having to make use of a landing page generator site like Leadpages.

One of the benefits of blogging with Squarespace is the ability to create Cover Pages (just like this one that I made for BeautifyYourBlog.

But

Cover Pages are designed to be super simple landing pages, with just one or two call to actions. If you are looking for something a little heftier to be able to add in more images & your own custom sign up forms (currently if you want to connect Squarespace Cover Pages & their Forms blocks to Convertkit, you need to use a site like Zapier to run an integration) then a custom landing page is what you're after. I've found some super simple tweaks that you can do to a regular Squarespace page to make it look like a fancy landing page.

If, you're like me, and not quite ready to make the jump to LeadPages, then creating your own landing pages on Squarespace is a great workaround, and with just a few coding tweaks you can make it look like an actual landing page, as opposed to the rest of the pages on your Squarespace site which have things like your menu bar & header image. Convertkit (which I just LOVE!) does offer a few options for landing pages, but the customization is very limited, and I like to make my pages look as pretty as can be. That's why I have been playing around with using Squarespace pages as customized landing pages.

Read More

How to avoid the overwhelm in your creative business + a Helpful Checklist

How to avoid the overwhelm in your creative business + a Helpful Checklist

About 3 months ago I started dipping my toe into the world of online business and passive income, and goodness me, it's a whole other world out there.

The idea of online businesses isn't new, people have been producing online courses and selling information products ever since the internet first began in 1969. What has changed dramatically is the people behind the courses. No longer do you have to have a doctorate in computer programming or some other fancy sounding degree, regular people like you and me are making money selling their social media strategies in the form of webinars, workshops and coaching packages.

Sounds wonderful doesn't it? Being able to make money doing what you love. Isn't that so many people are striving to do? Striving to free themselves from their 9-5's to make more money and have more time to do the things they love?

Read More

How to Create a Style Guide for your blog + Free Template

How to Create a Style Guide for your blog + Free Template

I know I know, blogging these days is definitely not for sissies. If you have a blog and want to stand out amongst the masses, you have to up your game & make your blog look as fancy & professional as possible.

That doesn't mean spending a fortune, or betraying you own personal sense of style. There is space enough for all of us (from the pastel pink lovers to those who go nuts for shades of neon yellow & black) and it's your own unique sense of style that you should be portraying through your blog in the first place. You just need to do it in the best way possible to make your blog stand out while still looking polished.

So how do you do that I hear you ask?

Well, apart from hiring a fancy smancy graphic designer to do your branding, you can start by creating your own style guide for your blog. I would still suggest getting a professional to create your logo (although you could definitely create something yourself using a free online design site like Canva).

Once you have your logo, it's all downhill from there! You can then work on the rest of your branding yourself and take your blog from drab to fab. Having a style guide as a reference for your branding will make your life so much easier, and will help you to keep your blogs look & feel cohesive.

Read More

Creating a Media Kit for your Blog - Designing the perfect Media Kit + FREE Template

Creating a Media Kit for your Blog - Designing the perfect Media Kit + FREE Template

Media kits.

Those scary things that only the big & successful bloggers have.

Those intricate pieces of design that must have cost a fortune for a graphic designer to whip up.

Are these the things that come to mind when you think of the term 'Media Kit'? Some might view media kits in this way, but I try and view a media kit as a simple 'CV' for your blog.

If you have no idea what a Media kit is or why you need one, then click here for a great post by Glamorous Glitter 

No matter whether you are a newbie blogger with only 5 fans on Facebook, or someone who has been around for a while and has thousands of followers, you need a Media Kit.. You might be a mix of the two, having been blogging for years but struggling to grow your readership & social media following. No matter where you are in the blogging game, having a media kit shows you take your blog seriously, that you are professional, and that you mean business (even with your 5 Facebook likes!).

Read More

How to easily make photo collages for your blog and Facebook: A Blogstomp Tutorial

How to easily make photo collages for your blog and Facebook: A Blogstomp Tutorial

In order to build a cohesive brand, it's important to make sure the images & graphics you share are aligned with the look and feel of your business. An easy way to do this is to share groups of images (collages) that tell a story. 

I use collages here on my blog when I want to share a lot of images, but I don't want to slow down my site loading speed. 

Using full sized images in a blog post means lots and lots and lots of scrolling for your readers. Creating beautiful collages is an easy way to make your blog posts look better, and it helps the back end of your site by making it faster to load.

In today's blog post I'm sharing with you how I create collages for my blog and Facebook page using Blogstomp.

Read More

Why you need a 'START HERE' page for your blog

Blog Tips Citygirlsearching Why you need a Start Here page on your blog

Have you ever clicked a link for something on Pinterest, and then been redirected to the home page or blog of that site only to have no idea what you're looking at? So many times I get lost on blogs, looking for something in particular that I saw on Pinterest, only to give up a few seconds later and click away. You may think your blog is incredibly user friendly, but that's because you designed it and know where everything lives.

If someone was visiting your blog for the first time, would they know, just from the first few seconds, what it is you do and what you offer or sell? It's so hard to look at our own blogs objectively, so why not make it super easy for people to find their way around your site by adding a START HERE page (see image below):

Why you need a start here age for your blog

Your Start Here page is another opportunity (just like your About Page & Home Landing Page if you choose to have one) for you to tell your readers what is is you do, and to give them a brief summary of your business or blog. I use my Start Here page as a place to show my blog categories, and as a way to have people sign up for a particular email. I am starting a new email list of people interested in improving their photography for their blog or business, and so use this page as a place for them to sign up. Some people use their Start Here page to sum up their previous blog posts, to answer FAQ's or to share more about themselves.

A few months ago I found a platform called Peek that allows you to submit your website to a panel of random testers who visit your site and answer specific questions about your sites usability. Once you enter your web address and email address up (it's free!) you are then sent a 5 minute video of people testing out your site, their first impressions and their answers to a few questions about the functionality of your site as well as whether you can improve on anything. 

My site was sent first to an older gentleman who really had no idea what I was writing about. At first I was so frustrated watching him make his way around my blog, but then I realised that my site was confusing. He thought the beauty reviews I did were for products I actually sold, and kept trying to find where to buy them. As the first blog post he saw when he clicked on my site was a review for a beauty product, he thought I was a selling skincare & makeup.


PRO TIP: Your latest Blog Posts conveys a lot to your readers and can influence their decision to stay or leave your site


I was happy to see he was actually interested in buying the product after my review, but I was disheartened as I soon realised he had no idea what my site was all about. At that time I even had a Home or Landing page set up, but as I use a lot of images in my design, it took so long for the Home page to show the images that he quickly clicked straight to my blog. I realised very quickly that you need to assume everyone who arrives at your blog (whether they are first time visitors or returning visitors) needs clear instructions about where to click and where to find information...


PRO TIP: This is why SEARCH BARS are so important in your blog design!


The next person to view my site was a young woman who clearly was a blogger herself. She immediately found her way to my blog and my about page, and proceeded to navigate my site with ease. As much as she liked the functionality and white space of my blog design, she did comment on how long the images were taking to load and that she found it rather frustrating. I have since learned to decrease the size of the images I upload, in the hopes that the loading time doesn't scare off my visitors!

So, by implementing a 'Start Here' page on your blog, you are giving your readers one more place to be able to find out about you and what you can offer them. It also helps them to learn how to navigate your site, and in turn, will make them more likely to stick around and come back.

Landing Page Example SquareSpace Blog

I am STILL tweaking my blog design (that's why I love SquareSpace so much as I am able to customise so much without having to know ANY code) and I think I will continue to tweak the functionality of it as I go along. I have just added a Home/Landing page back to my site (see image above). SquareSpace gives you the option to add easy-to-customize landing pages to your site in just a few minutes.  I have chosen to introduce a landing page because I have been told me that this site has so many different things going on that some of my visitors feel rather overwhelmed and unsure of where to start when they first arrive. We can't assume everyone who lands up on our site will be a well seasoned blogger. 

Do you have a Start Here page on your blog? Have you ever tried a user testing site before? How do you feel about your sites functionality and user-friendliness? I'd love to hear from you in the comments below!  

How to get your first 1k followers on Instagram (+ 2 Free Printables!)

How to grow your instagram and how to get your first 1000 followers

I've been on Instagram for about 3 years now, and have only seen any kind of noticeable growth in my following in the last 6 months. I KNOW how frustrating it is to put so much effort and time into something, and then receive the bare minimum amount of engagement (especially when you know that at least half of those likes come from family and your best friends!). It took me a long time to get where I am today (and I'm still a baby in the big bad world of Instagram!) but I want to encourage you on your journey, wherever you may be right now.

While there is no secret, overnight trick to go from 0 - 1000 over night, today I want to share with you my strategies over the past year which got me to my first 1k.

1. Start tracking your numbers

Free-Social-Media-Stats-Tracker-from-CGS.png

First things first. Grab a pen and paper (or even better, print out the free stats tracker I made just for you...it's waiting for you in The #CGScreative Resource Library) and write down exactly where you are right now. It doesn't matter if you have 5 followers on Instagram or 5000. You need to start somewhere and today is a good a day as any to begin YOUR journey.

I have also included place for you to write down your stats for Facebook, Twitter, Pinterest & your email list. It makes life easier having all your social media stats in one handy place. Then keep adding your stats every month (or even every few weeks). When I first started tracking my stats, I counted all numbers every week. It was very encouraging to see the numbers slowly creep up. I have included space for the 12 months of the year on the free printable above, but you can print a many as you need if you want to do it by week instead of month.

2. Write down your goals

As with any journey you need to know where you are going. You write down your 'dream' numbers and keep them small and easily attainable, or you can shoot for the stars and write down something outrageous. Don't get disheartened if you don't reach this number in a week, a month or even a year. The point of this exercise is to know where you are heading and where you want to be. You can put a date a date on your goals, but I find this doesn't end up motivating me, and I end up feeling like a failure if I haven't reached my goals by a certain date. I like to keep my goals open ended, as I want to keep growing and not stop what I'm doing even when I hit a target. Here's a free goal tracker printable to help you. You can write down whatever goals you have for your social media channels; things like hosting a giveaway/joining group boards on Pinterest are great goals to start growing your channels too.


3. Hashtags, Hashtags, Hashtags!

Hashtags WILL help you grow your following by making sure your photographs show up on searches. Before you tag your photo, think about what your photograph is showing/telling people. You want to make sure you use the right hashtags so that the right people find your feed. If you're little unsure of where to start, read this post on using different hashtags.

4. Be Social & Share the Love

If someone takes the time to comment on your photo, make sure to first reply to that comment, and then take a minute to head on over to their profile. If you like what you see, leave them a comment or two, or at the very least go and show their feed some love by liking some of their photographs. If you aren't actively engaging with other people, you're missing out on creating real, authentic connections with potential clients and potential business/blogging buddies. Think about your own feed. When someone simply likes one photo, how many times do you click on over to their feed? But think about when someone likes 5, 10, 20 of your images? How does that make you feel? Okay, it can sometimes feel like they are being a little spammy, but if they comment on your images as well as like them, chances are they genuinely enjoy what you are putting out there. So why not return the favor? It will increase your chances of being remembered by your followers as someone who is genuine and authentic, ie. they are more likely to then click over to your blog and read your content.

When you like an image on Instagram, that person gets a notification. If they have a big following, changes are they get so many notifications that your little like fades into the abyss. If you go and like 10 of their images, your name will appear 10 times in their notifications, making you stand out. I know that I click on profiles that leave me lots of likes (and I definitely click on profiles that leave comments). So why not use this to your advantage and make people want to click on your profile and follow you to see more.

5. Be Consistent with your brand

This step is the most important. Maintaining a consistent feed is what will help you stand out amongst the million of other users out there. Branding is a whole other kettle of fish, but on a basic level, if you want to convey your brand (whether that is the brand you are growing for your blog business or even just your own personal brand of who you are) you need to be consistent. 

When I first started using Instagram I was all about the Valencia filter; you know that brown, sepia filter that gave a vintage edge to every photo? That was all very well and good, but since then my own style has developed into something more feminine, clean and pretty. I now use a white (or at least a light) background for all my photographs and put more thought into what I want to share. If you are serious about growing your brand, you need to think hard about the image you want to convey to your followers. 

To give you an idea of what I'm talking about I want to share with you what happened to my Instagram followers a earlier this year.


At the beginning of May this year (2015)  I decided to take Instagram seriously. I wanted to use it as a tool to grow my blog, not just as a place to share photos of my dog. I started styling my photographs, using a white background, and just putting a bit more thought into my images. I also started to introduce more of my own photography work (you can see this in below image on the left). Slowly, I started gaining lots of new followers. By the end of July I had gained about 200 new, actively engaging followers. 

Then I went on holiday to Borneo

I wanted to share the exciting places we were seeing and things we were doing with my readers. I changed the hashtags I was using to fit in with travel, and even though I was getting more likes on my photographs, I lost nearly 50 followers in 2 weeks. I had no idea what was going on. Yes, Instagram does go through purges where they delete inactive & spam accounts, but to loose so many people had to mean that my followers weren't interested in what I was posting.

You see, people were following CityGirlSearching the lifestyle blogger who posted photographs of makeup, stationery and other pretty things. They hadn't chosen to follow CityGirlSearching the global traveler who posted photographs of beaches & exotic foods. 

It was hard to realise how fickle people can be, and to see such a decline in followers when I thought I was posting interesting new content. I realised I had to start thinking about my Instagram account as an extension of my brand, and not as a personal account. 


Lots of bloggers I follow have ended up creating multiple Instagram accounts to use for different purposes and I have been contemplating doing the same. They have one account for their blog or business, and another one to share personal photographs for family and friends. Right now I have enough social media channels to juggle without adding in a personal IG account, but it is something you may want to consider to help streamline your brand.

How to Grow your instagram following plus free printables by CityGirlSearching

There are a number of free apps to tell you how many people follow/unfollow you but I have just found they make me feel horrible about Instagram. I downloaded Trackgram which has a paid and free features, and I found it took all the love out of Instagram for me. When I actively see who has un-followed me, it makes me want to unfollow them, regardless of whether I like their Instagram account or not.It leaves a bad taste in my mouth being able to see who un-follows me, and it has made me feel very negative towards certain bloggers who I used to love and admire. So I would say us it with caution, or rather, don't use it all. You don't need to be reminded who exactly un follows you, you can get a broad overview of this yourself by looking at your Instagram numbers on your profile yourself.

I hope this post inspired you to tackle the big bad world of Instagram! If you have any questions about it, please feel free to leave me a comment below, I promise to get back to you.

Periscope & Blogging: Using Periscope to Grow your Blog

how to use periscope and using periscope to grow you blog

Hello. My name is Roxy, and I'm a Periscope addict.

I downloaded the live streaming app on Sunday night, and feel rather sheepish to say I have put myself out there, in live time, at least twice a day. It's only Wednesday and the fact that I have 11 broadcasts in 4 days is rather crazy. I had no idea that it would be so addictive, and SO MUCH FUN. I starting 'scoping' (yes, that's a thing) on a whim and hadn't put much thought into it but I have realised it's potential as a powerful tool for bloggers & business owners.

So what is Periscope?

Periscope is an app (recently purchased by Twitter) which lets you live video stream from your smart phone or tablet. It also lets your audience engage with you through a chat system, that you can respond to in real time. Viewers can also give you 'hearts', much like the Facebook 'like' button, if they agree with you or are enjoying what your are saying or doing.

Using Periscope to grow your blog

Your 'scopes are available for 24 hours before they are deleted. This means viewers can catch up anything they missed, and new viewers can watch you if they missed your broadcast. People can still give you hearts on the replay, which then get added to your overall heart count. The more hearts you get during a broadcast, the more chance you have of being featured. But please don't be that person who spends their entire time online begging for hearts, that's just not cool.

How to use Periscope to grow your blog

Here is a snap shot of my profile. Even though I only have a small following so far, I have received loads and loads of hearts...I told you there were nice people out there. Also, make sure you utilise your profile space well. When you first create your profile, you can choose to log in with Twitter. If you do this, it will automatically upload your twitter profile. Just like twitter, Periscope has a limit on the amount of characters you can use in your profile. Use them wisely and tell people what it is you do and why they should be interested in following you. 

What I have loved so much about Periscope is the fact that it's live, real, and not staged/edited/rehearsed like youtube videos. This means you literally just press a button, and you're live! There is no editing, no hours spent making a studio etc it's literally you and your phone and your viewers. This means people can ask you questions right then and there and you can answer them on the spot. 

As with any social platform, there will always be the trolls (those people who have nothing better to do than to write obscene comments and just be generally annoying) but it's super easy to block people with a swipe of the screen.

There are A LOT of Russians on Periscope, as well as many Eastern Europeans who ask me things in their language and I have no idea what they are saying, but for the most part I have had really nice people join me for my 'scopes'. 

How can Periscope Help Grow your Blog?

There are so many ways that Periscope can be used as a tool to help you grow your blog audience and readership, as well as a tool for growing the rest of your social media platforms. Here is a screen shot of my blog stats for the past month. 

Using Periscope to grow your blog

I usually hit a spike in traffic on days when I publish a blog post. I published a blog post on the 30th November but yesterday (1st December) I did not. And yet I saw a HUGE jump in traffic from my average of 377 page views a day, I got 539 yesterday. That's nearly double the amount. 

The only thing I did different? I placed a white board behind me while I was 'scoping which had my website & Instagram profiles written on it. Nothing fancy, literally a piece of white foam board with my details quickly scribbled on it. 

So you can see the potential right? 

I am really excited to delve deeper into Periscope and to start using it to grow my blog and my online stationery store.

Live streaming can be very daunting. The first 'scope I did I really had no idea what I was doing. I was in my pyjamas, in bed, with the camera facing my dog for most of the time, answering questions people were asking me about life in South Korea. The most asked questions was definitely 'Where are you from' as people were trying to work out my accent. But on that 'scope alone (ie the first one I ever did) I had nearly 300 people watch me. I had no makeup on, there was nothing interesting about my background, it was literally me in bed, drinking tea, and my dog sleeping on the floor. Now imagine I was doing something interesting like putting on makeup, walking around the streets in Korea, showing off items in my stationery store, imagine how many people would join me then?

In my third 'scope I had my husband and friend join me while we ate baked apples and drank tea. I named the broadcast  Apple Pudding & Zombie Brains as we were about to watch the latest episode of The Walking Dead (every time you go live you give your broadcast a title so people can read what your 'scope will be about...ie make it interesting!).Within 5 minutes we were TRENDING! This means that out of all the thousands of people online, our broadcast went to the top of the list! And we weren't doing anything other than eating food and talking about Zombies.

Some tips of what to talk about on Periscope.

So apart from talking about zombies and eating, there are lots of other things I'd suggest doing on Periscope. Things that can be used for actually growing your blog or business. Periscope is not like the other social media platforms. It's also not supposed to be scripted, it's supposed to be raw and real. Here are some things you can use it for if you're a blogger or business owner:

1. Q & A session.

Ask your viewers to ask you questions. Talk about where you are, what you do, what you blog about and let the conversation happen naturally. You'll be surprised how many people will be interested in knowing what you just ate/what your favorite colour is or why you chose to paint your nails electric blue.

2. Behind the Scenes

Use Periscope to show your viewers some behind the scenes footage of where you work. If you have a work studio where you put together stationery orders/take photographs/package orders/cook/teach show your viewers. It's always interesting seeing the other side of the creative scene. The side where everything is a mess, people will be able to relate to you and you'll be showing people a much more authentic side to you and your business.

3. Show off your pets

If baring your face to the whole wide world terrifies you then why not start by sharing your pets? Everyone loves animals, so why not share with the world your furry friend. I was amazed at how many people were interesting in seeing my dog, I even had requests from viewers to bring him on camera. 

4. Show off your products

Do you sell physical products? Show them to your viewers, ask them which ones they like best. Show them how they can use your products and how your products can be used around the house. This gives people a much more in depth look into what you're selling, making them more inclined to buy from you.

5. Show off your talents (or what you love doing)

Do you love baking? Are you an illustrator? Put on some music and invite people to watch you draw/cook/bake/paint your nails. It gives you something to do rather than staring into the screen blankly and people can enjoy your broadcast and still ask you questions.

Some general Periscope Tips

  • When you download Periscope, spend some time customising your profile. Include a link to your website/blog/online store and use an eye catching profile picture to help you stand out.
  • Spend a few minutes watching other people to get a better idea of what to do and what not to do.
  • The first thing you point your camera at when you start broadcasting will be the thumbnail for your 'scope. Make sure your camera is pointed at something interesting and eye catching. You can even make use of your branding/logo here to build up your brand. Your camera will, by default, be pointing away from you. This is why you should use a placeholder image (like your logo) or point your phone at something interesting rather than having it pointing at a blank wall while you wait to be able to turn the camera around. The blank wall will then be what people see when the scroll through their feed. 
  • Use interesting titles for your broadcast. Your title is super important as it is the first thing people will see when scrolling through the feed. Use emoticons and capital letters to draw attention.
  • Ask people to share your 'scope with their followers. You'd be surprised how many people will do this. It's really easy to do and just involved swiping to the right (for IOS ro swiping up for Android users).
  • Greet people as they join your stream. It's polite and helps them feel appreciated.
  • Follow other users and share the love by giving them hearts. 
  • Double tapping your screen while broadcasting changes the direction of your camera, so you can show people your face (if you want to) and you can show people what you are looking at. 

Most importantly have fun. Periscope is meant to be a fun platform for engaging with people. Don't get so caught up in trying to sell your blog/product that you forget about your audience and why they are there. People want to be entertained (and I don't mean the dodgy way here) so be real, be you and just relax. My first scope I was a shivering wreck, I couldn't even keep the phone straight as I was shaking so much. Within a few minutes I realised that it didn't matter if I said the wrong things. It takes a little while to warm up, so play some music in the background, and just have a good time.

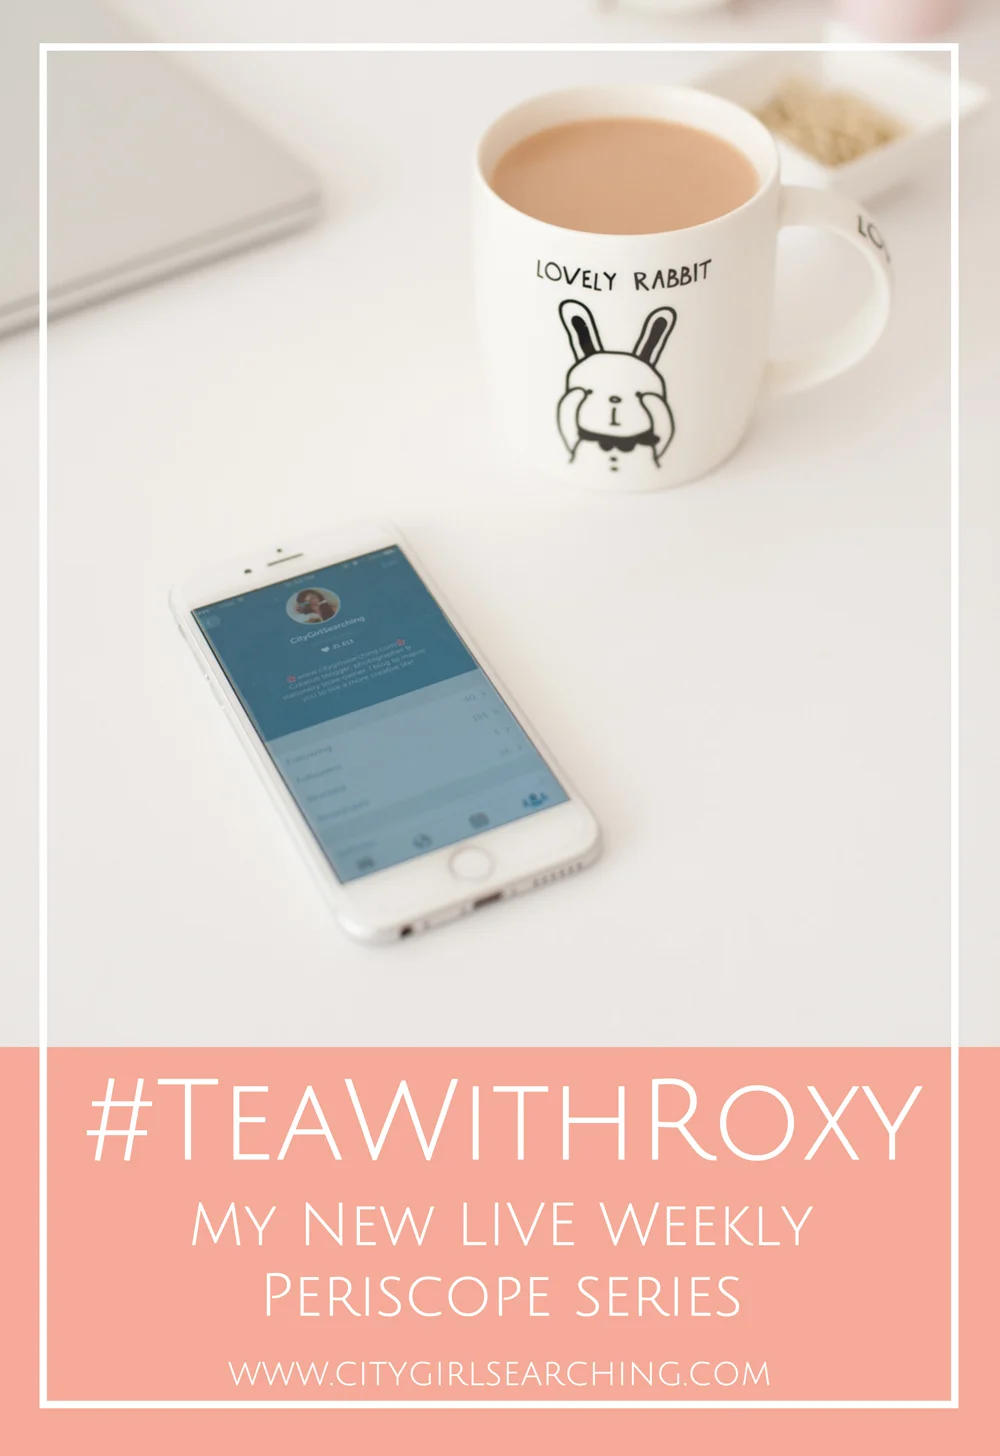
Come and find me on Periscope (@RoxyHutton) and join in the fun.

5 ways Buffer will change the way you blog forever!

How Buffer Will Change The Way You Blog Blogging Tips

I've been using Buffer for about a year now, but it's only been in the last few months that I have come realise just how powerful it can be when fully utilised to grow your blog. For those who have never heard of Buffer, let me break down what exactly it is.

"Buffer is the best way to drive traffic, increase fan engagement and save time on social media" Buffer

Basically, Buffer is a platform for you to schedule twitter statuses & Facebook posts (LinkedIn & Google plus too and Pinterest for their paid upgrade) ahead of time. For those of you who wonder how it is that I am able to post things on all my social media platforms while living in a different time zone to the majority of my readers this is how I do it. Once I publish a post on my blog, I head straight to buffer to make sure it gets posted to my social media platforms at times that are optimised for my chosen time zone.

If you are just diving into the world of social media marketing for your blog, you may have noticed that some of your posts are getting more attention on different days or at particular times of the day. According to research, weekdays at lunchtime are said to be the best time to post content on Facebook ('best time' meaning your posts are more likely to get the most likes, shares & comments).  This is quite a simple thing to understand if you think about your own personal use of Facebook. When do you spend the most amount of time on Facebook? Most people are asleep/busy in the early morning and so it makes sense that the lowest engagement on Facebook posts is before 6am right? Buffer has all sorts of fancy tools to do all the hard work for you, suggesting optimal posting times for your social media platforms based on your timezone and your past reader engagement.

Here are 5 ways that Buffer has changed the way I blog. Buffer itself is free and I think if you're serious about your blog, this tool can really help you take it to the next level. 

Blogging Tips CityGirlSearching

Analytics

Once your post has been published on your chosen platform, Buffer will give you a breakdown of how well it did. It will show you how many likes/shares/comments/retweets you got. This helps you to see what sort of content your readers are engaging with, and especially what you are posting when. Buffer also adds a little star to posts that have done the best (calling them 'Top Posts') so you can easily scroll through and see what has worked best for your content. This helps you to determine when your followers are online and when they are engaging.

In the image below you can see how the following Facebook post performed (you can see how many comments/likes/clicks on the link I posted/shares and also how many people the post reached). From this post I can see that it only reached 380 people. I know that I have 1800+ fans on Facebook and yet only 380 of them saw this post. Interesting. Some of the analytical elements are for paid for members of Buffer (such as the 'Most Popular' tab but I have yet to need any of their added features and am very happy with the free version so far!).

Buffer review CityGirlSearching

For me, I have readers in many different timezones; I am South African (so many of my readers are there), I live in Korea (a lot of my makeup reviews are seen by people in Asia as these products are more widely available here) and finally a lot of my readership is based in the US and Europe too. This means in order to make sure that everyone sees my content, I need something that allows me to schedule my posts for these different timezones (refer to point 3 below!). I use the free analytics section of my own blogging platform (Squarespace) and I use Google Analytics to get a better breakdown of the countries where my readers are based. Once I know where they are based, I can then schedule my posts for optimal times in those timezones.

Scheduling

I mentioned this at the start of this post but scheduling is what Buffer is built to do. Buffer has a new tool for optimizing your posting times. You can either choose your own times and how often you want posts to go out for your different platforms or you can let buffer do the hard work for you with their Optimal Timing Tool. When you add content in the 'Content' tab, those posts will then be added to a list that will publish those posts at the times you have chosen above or let Buffer choose for you: 

Buffer App Review

When I click the above 'Want Buffer to optimize your schedule? Try our Optimal Timing Tool' I get directed to the following page where I can choose which platform I want my optimal times to show:

Once you choose your platform, and the number of times a day you want to post, Buffer uses it's fancy algorithms and spits out a graph like this: 

Buffer App review

From the graph above I can see that if I want to post to Facebook twice a day, the optimal times are between 2pm & 8pm for my chosen time zone (Asia/Seoul). You can then have Buffer automatically replace your exisitng schedule or you can do it yourself in the schedule tab in your dashboard.

Buffer is super easy to add content to. Simply choose which profile you want to add content to, click on the 'Content' tab and begin writing and uploading images. Right now you can see I have zero posts scheduled:

Buffer App Social Media Scheduling review

What's also handy is you can write one piece of content and set it to be posted to all of your social media platforms linked to Buffer. I usually schedule short posts for twitter, and more image based content for Facebook. Although I have noticed that the images I have shared to Twitter get more re-tweets than my written posts (thanks to the analytics tab!).

Buffer Blog

One of my favourite features of Buffer is, funnily enough, their own blog. They have such great articles and guides to all elements of social media and constantly post tips for making the most out of Buffer. Their blog is definitely worth checking out if you want to learn more about the science behind social media. It's a no-frills place to learn more about Social Media.

Blogging Tips CityGirl Searching

TIME SAVING

Because I can post my content ahead of time, it saves me from having to be at my computer and manually post each bit of content, as well make sure I have an image for each one. My brand is very image based and so being able to sit down once a week and schedule social media posts to go out throughout the week saves me so much time. It also means I can turn my phone off when I am out and not worry about posting content. Buffer does all the work for me.

SHORTEN LINKS

This is a big benefit to Buffer. I was using Bitly to shorten my web links, especially for twitter. I actually still use Bitly on the odd occasion when I want to manually post something to Social Media but having a platform that shortens links and schedules posts for me just saves me more time, and that's the point really isn't it. Shortening your links helps you keep to the strict 140 characters for Twitter, and it also helps Buffer to provide you with analytics for the number of people who clicked on your link. And to be honest which of the following looks better on the eye and more 'click worthy':

https://sticky9.com/?pid=117&referral_code=FRIEND2JNT&utm_content=buffer17f3b&utm_medium=social&utm_source=facebook.com&utm_campaign=buffer

or

http://buff.ly/1JumpJ9

Blogging Tips Tricks CityGirlSearching

I have more thing to say about Buffer. While scheduling your posts is a massive time saving tool, do remember that social media is about being social. It's about engaging with people. Don't just set up a bunch of posts and then hope your blog will grow magically. As with any blogging tool, it is designed to be used in partnership with you. You are the person behind the blog and you are not a machine. Here is a really great guide to Social Media automation by the Buffer Blog. It's definitely worth a read. 

Do you use Buffer? Have you found that it's saved you time and helped grow your own blog or website? I'd love to hear from you in the comments below.

Happy blogging!

*I have not been asked by Buffer to write this post or been paid to do so. I simply want to share with you how this great site has helped me become a better blogger.*

Inspirational Instagram Profiles

InstagramInspiration.png

Instagram has been my favourite social media platform for a while now. When I first started I was following all sorts of random people. As the months went by I realised just how powerful Instagram is as a networking tool and I began to look for fellow creatives in my field (lifestyle/travel/beauty bloggers) to follow and I've built real friendships with a lot of them. I even collaborated with someone I met via Instagram on this Boho Bridal styled Wedding shoot (click here to see my photographs). 

A basic search will turn up loads of interesting new brands and people to follow, but I'm not so much interested in the huge corporations as I am the smaller business owners and creatives. I find the people who are in the same boat as I am, trying to take our blogs and businesses out into this big bad world and so much more real, more genuine, and ultimately so much more likely to spend time following you back or commenting and actively engaging in your work. I'm not sure about you but I know that I'd rather have 100 engaging followers than 100 000 fans who simply follow without knowing a single things about who the person is behind my brand. 

I find that the more relatable creatives I follow, the more I am inspired to create better content for my own feed and more my blog. Are there any Instagram profiles you absolutely love? Share them with me in the comments below. Even better than that, share your own profile below and I'll pop by and say hello. 

Here is small list of some of my current favourite profiles on Instagram, simply click each image to find them on Instagram.

Enjoy!

Fall For DIY

How To Start A Blog

Blog Tips How To Start a Blog: a Beginners Guide by CGScreative

A while ago I was part of  Caitlyn DeBeer's Creative Business Series, a really great creative series in which a bunch of us bloggers got together and each wrote about something we specialised in. It's a little out of date and there seem to many broken links as most of us have updated our blogs since then but what I shared about blogging then still holds true! And so today I'm going to re-post my tips for those who want to start a blog but have no idea where to gegin. I hope you enjoy this post and find it helpful. I have a number of other posts on blogging that you might like too, click here to read more.

What is a Blog?

A blog is a 'mini-website' in that you ideally are able to run by yourself, without having to have designers make changes for you. A blog is a space for you to share what you love with the world, to journal, to keep memories and of course as a space for you to market and sell your product.

Here are some of the most popular blogging platforms, all of which cost nothing to set up:

Wordpress (to be clear I am referring to the free version of Wordpress, click here for more info), BloggerTumblr

My blog used to be on "Blogger" and that is why it had the 'blogspot' segment on the end. It is completely free and was my favourite platform due to it being so very user friendly and easy to navigate around. Also, it is implemented with Google so if you use Gmail/Google Plus etc everything works seamlessly.

Wordpress is another favorite in the blogging world, but I find it isn't as user-friendly as Blogger. But, if you have to time to fiddle and play around it can be a lot more powerful!

To go "dot com" and drop the 'blogspot/wordpress" you have to buy a domain name through a site like GoDaddy for Blogger, and through Wordpress.com for Wordpress (to learn more about the difference between Wordpress & Wordpress.org click here).

I launched my new website (this one) last year on a relatively new platform called SquareSpace (see image above). It doesn't have a free version (only a 14 day trial for users to test to see if they like it) but with the paid for package it includes a domain name, so you don't have to worry about going through an external site like GoDaddy. And the templates are just gorgeous! Have a look for yourself...click here. Their target markets are artists (photographers, designers, small business owners and bloggers) and their platform is built on providing users with a media rich experience. Think clean lines, and beautiful design. I am so happy with them! My blog looks a lot more professional with SquareSpace and I am able to change all the design myself without any coding!

At the end of the day, what platform you choose is all about personal preference. I know people are often very interested in Wix as their marketing is very good and you often see their adverts all over Facebook, but I found Wix was to hard to make changes an their free platform is very limiting. I would stick with bloggger or make the move straight away to Squarespace if you want to be taken seriously. 

HowToStartABlog

Why Blog?

This is a really important question to ask yourself before you even think about starting as it will form the building blocks of your business/brand. This is different for everyone. Some people enjoy seeing their words and thoughts come alive on the page, others enjoy the feeling of affirmation that comes from gaining another follower or like on Facebook. I have loved meeting new friends through my blog, as well as the outlet it has given me to be creative, something I never dreamed was possible.

Whatever your reasons are for first wanting to start your blog, write them down (I've created a fun brainstorm printable for you to download and print out to help you along your way), so when you start to feel guilty for not having written a post in months don't beat yourself up about it. Instead, go back to your list and remind yourself of the real reasons you wanted to blog in the first place, I'm sure you will feel inspired to get started again. You will go through times of frustration with your blog, and sometimes all thats needed is a little time off to feel inspired again.

BUT if the main motivation behind why you want to start a blog is to make money or to get sent items to review, then I am terribly sorry to bust your bubble but this only happens to a tiny amount of bloggers. If your main goal is to make money, your readers will very quickly pick up on this and stop reading. Your readers want to be entertained, inspired and motivated, so give them that. If you are passionate about your content your readers will be too!

Your Blog Name & Branding

As important as the why is behind your blog, your branding is what differentiates you from everyone else and makes your blog special. If you take your blog seriously, so will everyone who reads it. One way to make that leap into the realm of 'seriousness' is by building a brand around your blog. To help you with this, you need to create a consistent message, and have everything you do, on and off the blog, send the same message. Think email signatures, blog headers, blog side bars, business cards, stamps, personalized stationery...the list is endless. And all of this needn't cost a fortune. The simplest way to build the foundation for your brand is with choosing a particular colour scheme, fonts and a basic design. You can get the help of a graphic designer if you really want to go that extra step, but the majority of the basic blogging platforms like Blogger, offer loads of customization options built into them. Think about your target audience (are they young and funky, in which case bright colours would work well. Or are they slightly older and more conventional in their thinking? Then a modern, clean and classic design and layout would probably work better).

By filling in the free mind map printable found below, you will be able to build your brand around the 'What do you love' section. If you love nature and the outdoors, your chosen colour scheme might revolve around earthy colours like khaki and emerald. Here is a great website to get your mind around colour combinations...Design Seeds. Here are a few more tips for the basic design of your blog to help you formulate your brand {click here}

After you've given some thought to your branding, now here comes the hard part. Picking a name for your blog. Your blogs' name sets the tone for your brand (and of course will have implications for showing up in google searches) so pick carefully. See who already has your name, or anything similar to it with a basic google search. Choose something that won't be outdated in a few years (and you should definitely be seeing your blog in terms of the future and "In a few years time" kind of way. 

Don't let this overwhelm you. We all have to start somewhere (click here to see my first few blog posts, eek...I'm glad I have them to look back on!) we learn by experience and our tastes change as we get older. Embrace that and let your blog grow with you into something you are proud of. 

HowToStartABlog

How to Find or Create Content

I find I am at my least creative when I stare at other peoples awesome blogs all day. I find I am unable to think of anything new or original to write about. How I deal with this (and I have my incredibly creative husband to thank for most of my ideas) is to go for a walk, camera in hand, and snap away at anything and everything that takes my fancy. Sometimes I take a notebook and jot down notes about my day, about the people I see around me, about the things I want to do with my life. Pretty soon I have a messy jumble of potential content for my blog. Look around your world, your office, your family, your community for idea's. Do you work with some strange and fascinating people, what about interviewing them on your blog? What about doing a post about a day in your life (with photo's of everything that makes your day unique)? The world around us is so rich with colour and life, its an endless supply of idea's if we just take the time to look.

Your Blog Photographs

I used to think that my blog would become popular by just reposting great content I found on sites like We Heart It and Pinterest. I've now come to realise that there are too many mediocre blogs out there that just repost other peoples creative content. That's why I try to post original content on my blog. That doesn't mean I don't 'borrow' idea's from other bloggers, but it does mean that if I want to showcase an awesome DIY lampshade, I will try to make that lampshade myself, take my own photo's and write in my own words how to go about making one yourself. And I always make sure to link back to the original source of the idea, as a way of saying thank you for the idea.

But now I'm getting distracted...the title of this tip is to take your own photographs. You really don't have to have an amazing camera to take incredible photo's. You just need to play, and fiddle with your camera and the angles to get your photograph just right. This is how I started getting into photography. Etsy has a great article on taking better product photographs, click here to have a read. And I also wrote a post on styling photographs for your blog using just your phone. Click here to read more. 

Don't Over think things

Most bloggers would probably think I'm crazy for saying this, but for me it works. I am a very organised person, I love to plan EVERYTHING and my favourite past time is making lists (can you say *nerd*). But I find that if I spend too long planning a blog post, I lose interest in it and it stays in my draft box for weeks, even months without ever seeing the light of day. If an idea comes to mind, I straight away log onto my blog, start a new post, and I just roll with it. I try not to leave it till the next day to finish it, as I often get distracted by the next post. In some ways I find this helps me stay inspired as I am always putting new content up, and my readers know that they can come back every day or so for something new. This pressure helps me to stay motivated to continue putting posts out there!

HowToStartABlog

Always Be Yourself

Your readers want to know about you, so be true to yourself. This doesn't mean gushing about each and every last detail of your day and how depressed you feel after finding out that your local Woolies Food was out of fresh basil. But rather, this means writing in your own voice and letting your personality shine through the page. Don't be scared to put yourself/your business/your idea's out there, your readers will respond to your 'genuineness'.

Gaining Followers

This is the question I get asked the most by my readers, and it's what I still ask myself! But, I'm afraid there is not secret. There is no hard and fast way to gain 100 new followers on twitter, or to get 1000 new page views in minutes. 

You just have to be patient. You have to provide content that your readers will enjoy, and you have to do so constantly. There is nothing worse than stumbling onto an awesome blog only to see they haven't updated since last year January. A good way to share the blog love is to leave comments on other blogs that you enjoy reading. It's a wonderful feeling getting just one comment on my blog (I am speaking from my own experience here) and if that is the case with you too, then why not take some time to leave thoughtful and meaningful comments on some of your favourite blogs. Don't feel that your one comment may mean nothing if there are 999 others on the blog, as a blogger I can tell you that each and every single comment leaves me with a warm and fuzzy feeling.

Take some time to connect with your favourite bloggers on Twitter and Instagram, reply to each and every tweet your receive, as well as to each comment you may get on Instagram. This helps to build meaningful and long lasting relationships with your readers and followers.

Find your niche, whatever that may be, and stick with it. I have had a real hard time in narrowing down my focus here on CityGirlSearching, I was trying to do too much and was scared to commit myself to one box. I'm not a beauty blogger, but I like writing beauty reviews, I am not a travel blogger, but I do go to some amazing places and I want to share the photographs with my readers, I'm not an expert in fashion but I do like sharing the odd outfit post. All of these different elements led me to define myself as a 'lifestyle blogger' but I still don't let that term fully define who I am here on the blog. This blog is a space for me to share pretty-ness...be it in fashion, beauty, in the home or in another country.

HowToStartABlog

Inspiring Blogs

Here are some of my favourite bloggers (some are local South African ladies, and others are International). Use this list as a guide & to learn from what these ladies are doing right. Focus on their blog design, their photographs, their content, see how they engage with their followers, and then apply it to your own blog:

Nadia vd Mescht beautifully crafted blog by Durban (South Africa) creative Nadia

EmmaJaneNation one of the first blogs I ever started following by lovely local SA blogger Emma (her photography is gorgeous!

Vivianna Does Makeup one of my all time favourite beauty blogs written by Vivianna

A Beautiful Mess a funky and fresh lifestyle blog by Emma & Elsie

MilkTeef lovely beauty and lifestyle blog by the sweet Emma

WishWishWish fashion done right! A gorgeous blog by Carrie

SuperficialGirls another local SA lady; Carlinn, who focuses on fashion & beauty

PinkPeonies lovely Luzanne writes this beautiful beauty blog

PuglyPixel design tips and tutorials from the fabulous Katrina

Lost in Travels a travel blog to inspire your wonderlust (and lots of tips for traveling with your hubby, as well as keeping on a budget!) by Chelsea

I also recently shared a post on my favourite Creative Business inspiration bloggers, click here to see it. 

I could go on for days about starting up your first blog, but the biggest piece of advice I can leave you with today is don't ever give up. I {often} have days where I feel like no one reads this blog, and that I put so much time and effort into it and I get so little back. Other days I want to high five ever person I see because I got more than 3 likes on a photograph on Facebook. So keep at it!

HowToStartABlog

Above is a freebie printable I've created to help you in your blogging journey.

Try to fill it in before you start your blog, to give you more focus and direction. Here is mine, filled out and taped onto the wall, to help remind me of where I am and where I want go. Below is more detail to help you fill in the blog brainstorm printable.

  • Why blog: jot down all the reasons you want to blog, from wanting to be a superstar celebrity to wanting to create a place to journal your thoughts and dreams. Nothing is too small or insignificant.
  • What do you Love: write down all the things you love (eg family, friends, God, nature, fashion, beauty, design, interiors, photography...) then cross off those that are too personal, or those you wouldn't want to publish all over the interweb. What you are left with is a list of elements that make up you! This will help you with later on with your branding.
  • Sharing your Love: list the ways in which you want to blog (through photographs, by writing, by drawing and illustrating, by creating cartoons and other graphic based content). This is how you will express yourself on your blog.
  • Creating Content: List some of the ways I have outlined above here, and any others you can think of (reading other blogs, going for walks, photographing random events and elements, journaling...etc)
  • Growing Readers: List some of the ways I have outlined above (networking, leaving comments on other blogs, tweeting, Facebook mentions, emailing potential clients/others in your industry) and add your own ideas too.
  • Your branding: create a board on Pinterest (you can make it secret if you don't want anyone to see it just yet) and start pining every thing that takes your fancy from colours to fonts, to design, to blog layouts. Have a look at this board for some inspiration. You need to choose a maximum of 3 or 4 colours, then 2 fonts that you want to use to help keep your brand cohesive.

I hope you have enjoyed my post on blogging, and I hope that some of it has been useful to you. If you have any questions, please drop me a comment below and I'll get back to you as soon as I can.

Happy blogging everyone

x

My favourite Go to blogs for Creative Business Inspiration

When I'm in a bit of a blogging rut I often turn to Pinterest in the hopes of being inspired by all the beautiful imagery and creativity on display. One of my favourite boards to pin to is Blogging Resources (click here to see all the awesome posts I've lined up for future reading) and it's been while scouring content for this board that I've come across some pretty fabulous bloggers. These bloggers have helped me to feel inspired again with their business advice and the overall awesomeness they exude.

Today I want to share their blogs with you so that you too can feel motivated to take your blog to the next level while gleaning from their infinite bloggy wisdom. 

download (1).png


First up is Lauren who blogs over at Elle & Company.  I check out the Elle & Company blog at least 3 times a week and I actually look forward to her newsletter instead of hitting the delete button as soon as it hits my inbox. 


Lauren is a fellow SquareSpace blogger who is completely open with her business and shares the how's and the why's behind her blogs success. She also offers great tips on blogging with SquareSpace and has really some really awesome posts on branding. I have learnt so much from Lauren with regards to my own branding for CityGirlSearching and since implementing her tips & advice I have noticed real growth in my readership.

Two of my favourite post she's done so are Why and How to Brand Photos & Why Branding Matters.  Speaking of branding, how gorgeous are her blog images? It's no wonder I was hooked as soon as I first saw her posts on Pinterest.

Elle&CompanyBlogTips

Next up is Regina who blogs over at ByRegina. Every time I head over to By Regina I am once again filled with an intense passion for my blog and I am reminded of all the reasons why I started blogging in the first place. ByRegina is for anyone who needs a little push in following their creative dreams and making those dreams a reality. Regina writes so well, and with each and every blog post she'll have you feeling as if she's talking directly to you and that the two of you are best buds. She is also hilarious and her blog makes for a fun read.

Below are two of my favourite posts which have both inspired me and really pushed my boundaries in terms of how I see myself and my blog as a business.


I have only recently stumbled upon Francesca's blog, Fall For DIY and have spent the last few days scouring through each and every beautiful post. Her posts are all accompanied by gorgeous photographs and graphics that tell a story.

Her DIY's seem so easy to do (unlike a lot of other Pinterest posts I find) and I can't wait to start making some of them. Her blog leaves me feeling inspired and ready to get creative with my camera.

I love the clean look and feel of FallForDIY, and I am especially drawn to her styling and use of lovely elements. I loved her post on making your Instagram feed more loveable, as it was filled with really useful ideas for growing my own account. I loved the idea she mentions of becoming a collector of objects or textures to shape your Instagram feed.

Another of my favourite posts from FallForDIY is about how to get stuff done when you're having an off day. We all have off days and the 5 practical steps she outlines in her post will have you feeling rejuvenated and ready to take on the world with your to do list in no time at all.


You may have seen me mentioning Melyssa from The Nectar Collective my Weekly Wishes posts. Those goal setting posts are a series Melyssa hosts weekly on her blog which helps women connect all over the world in an effort to write down our goals and then tick them off. Melyssa is super encouraging and is just such a lovely person. 

Melyssa blogs about the business side of blogging (with posts on freelancing, finance, & productivity) as well as great DIY & photography tips (like this guest post by Jessica Keller on creating colourful backgrounds for your blog posts!). The Nectar Collective was the first blog I ever found that catered to more of the business side of blogging, and it was this post How I grew My Blog that got me hooked. Also, her recent post on How & Why to Create a Media Kit is super useful for bloggers, and as she's so nice she has even included a free template so you can create your own. 


Erika is the sweet lady behind Olyvia and it was her blog tag line that first drew me in: 


BE DELIGHTFUL ONLINE


Isn't that a lovely tagline?


So much online marketing advice seems to imply throwing your brand into peoples faces and I am always worried about flooding my family & friends Facebook timelines with blog content (how else are us smaller blogs supposed to get our content seen???). Well this is exactly what Erika blogs about. Olyvia is all about showing you how to get your brand noticed online without seeming desperate. 

Erika's blog posts titles are awesome and clever in their own right and will draw you in (I have been trying to work on my own titles since noticing hers) and she writes in such a way as to keep you not only entertained but coming back for more. I loved Erika's video series,  How Do I get Noticed on Facebook and have found her tips soooo helpful for my own Facebook ages. I particularly love that she co-titled that post 'A Sleaze-Free Video Series to Help You go From Ho-HUm to Wow'. Her post on How To Get Pinterest Followers & Repins has been one that I keep going back to and is filled with practical, no nonsense tips for helping you get your Pinterest account noticed.

I hope you found this post helpful and that these wonderful bloggers help you to take your own blog to the next level.

I would love for you to share this post using the share button at the very bottom of this post so that we can help other bloggers feel inspired!

The #Hashtags you should be using on Instagram to get your photos noticed + FREE Printable Guide

When I first started using Instagram I was very afraid of the hashtag. I thought using them made me sound cheesy, like I was trying to be cool. But, having been an avid Instagram user for a while now I feel confident in saying that using hashtags will get you more likes and more followers and increase your engagement.

Why?

Well hashtags are a way of categorising your photographs so they are grouped together. This means you can look for things really easily. If you're a beauty blogger and you want to connect with and find other beauty bloggers you might use the following hashtags: #bblogger #beautyblogger #fotd (Face Of The Day)

By tagging your photographs with these hashtags you are ensuring your photo appears in anyones search for that particular subject. If you don't use hashtags, then the only people that can see your photos will be your followers. If you want to keep your photos private then you might deliberately choose not to use hashtags, but if you want to grow your blog/brand using hashtags will help your photographs be seen by more people. 

TIP: create a note on your phone with the hashtags you use most often (for me these are the hashtags under the 'lifestyle' heading below) and save it. That way you don't have to wrack your brains trying to remember all the hashtags and you can simply copy and paste them into the description box or comment below your photo.

There are hundreds of thousands of hashtags out there, and you can also make up your own like I did with #ShadowTheJindo & #WhatILoveMostAboutMarriage (although a few random people have popped on that one and started tagging their photographs with it so be open to the the idea that you can't 'own' a hashtag and anyone can tag their photographs with that particular tag and their photo will appear under it).

If you have a blog and want to create more of awareness for your brand as a blogger, why don't you consider starting a hashtag? It's not pretentious at all, see it rather as a way to connect with more people and to keep your ideas/photos categorised and easy to find. 

Here are some lists of the Hashtags I use when I post different things to Instagram. Some of them may seem obvious, but these are usually the tags that are widely used. Others I have found via searches and my own network of followers.

Beauty Products/Make up

  • #bblogger
  • #beautyblogger
  • #beautyjunkie
  • #beautyinkorea (if posting about a Korean product)
  • #southkoreanbeautyproducts
  • #skincare
  • #motd (makeup of the day)
  • #fotd (face of the day)
  • #beauty
  • #makeupaddict
  • #makeupjunkie

Nails

  • #notd (nails of the day)
  • #manimonday (when posting on a monday)
  • #manicure
  • #nailstagram
  • #instanail
  • #nailswag
  • #nailsofinstagram
  • #nailinspo

Dog

I had no idea that so many people had Jindos as pets until I started using hashtags! I found so many wonderful new friends to follow who share the same passion as I do for this unusual breed of dog. If you'd like to read more about our rescue pup, #ShadowTheJindo click here

  • #instajindo (or insta-  insert your dogs breed here)
  • #instapuppy
  • #dogsofinstagram
  • #woofwoof
  • #ilovemydog
  • #dogoftheday
  • #dogsagram 
  • #petsagram
What hashtags to use on Instagram

General Blog/Lifestyle Content

I have been using the following hashtags on all my photographs for the last 2 weeks and have noticed a general increase in engagement. These tags are really popular and are suited for lifestyle bloggers (those of use who post all sorts of content that doesn't always fit into one category).

  • #thatsdarling
  • #thehappynow
  • #petitejoys
  • #livecolorfully
  • #howyouglow
  • #myunicornlife
  • #abmlifeissweet (From the awesome blog A Beautiful Mess...there are a number of different hashtags you could use from A Beautiful Mess to connect with likeminded people)

The great thing about Instagram is that you can add new hashtags to your photographs after they have been posted and that way you can make sure to categorise even your older photographs. There are no hard and fast rules to Instagram so play around and have fun with your hashtags!

If you don't want to look like you are spamming Instagram with your hashtags you can post a few in the image description of your photo, and then post the rest of them in a comment under your photo. That way once people start commenting on your photo, your own comment with the hashtags will be pushed up to the top and hidden by the other comments. Its a little sneaky way to seem a little less brash while still getting your photos seen. 


To help you remember all of the hashtags mentioned in this post, I created a free cheat sheet just for you! This cheat sheet was created exclusively for members of my #CGScreative community. By joining this community of over 900 creatives you'll gain exclusive access to the CGScreative resource library. The resource library is filled with loads of worksheets, printables and what has made this community famous, beautiful stock photoraphs. Best of all, it's free to join! Simply click the image below to find out more:


What hashtags do you use when posting on Instagram? If you're on Instagram come by and say hello (@roxyhutton) I love making new friends there!

5 Quick Blog Makeover Tips

Blog Makeover Tips for the perfect blog by citygirlsearching

Is your blog feeling a little stale? Are you in need of a bit of a refresh when it comes to your blog design and layout? Here are 5 quick tips to help you breathe new life into your blog, quickly and easily without the need to hire a graphic designer. I found making these quick changes with my own blog really helped me to feel inspired again and I'm sure would do the same for you.

1. Change your Social Media Icons.

This could be something as simple as changing the colour of your social media icons or could even extend to changing the design of them completely. There are so many wonderful blogs offering free icons for download that you don't have to be stuck with boring icons ever again. Here is a quick list of some of my favourite ones. Just click on the images below to be redirected to the website:


2. Change your Blog Sidebar Labels.

A similar move to the tip above, but changing the design of your category/page labels can really give your blog a lift. Think about changing the font, the size of the font, the background colour, adding a photo as the background or going minimalist and just using a font. 

You can make new sidebar labels yourself using the following free online programs; Canva and PicMonkey.  When you do make your own labels just keep in mind the sizing of each one. Try and keep the size (and the design) the same to create uniformity on your blog. 

For me, I changed my image based labels to graphic based labels as I thought the images were distracting from the main content of my blog. I still like the image based labels on the left, but felt like I needed a bit of a change. Remember, it's your blog and if you make changes you don't like, you can easily go back and change them again:

3. Change your profile picture.

Update your profile picture every once in a while to keep your blog fresh. Or if you don't have one, add one! Your readers want to know who it is they are connecting with when they read your blog. Try to keep your colours in the same palette as your design theme to avoid distracting from your blog too much. I styled a few new photographs recently using items that show what it is I blog about. Be creative and most of all be you!

BlogTips

4. Remove the clutter.

Take some time to really look at your blog. Are there pages, widgets, buttons and other things in your side bar or header that you don't really need? Remove them and just keep the essentials. A great tip to implement is to include a search bar somewhere obvious on your blog. That way if people get a little lost (or if they are looking for something specific they can quickly search your blog instead of spending time getting frustrated and then ultimately leaving). Make your blog a pleasant and easy to navigate place for your readers.

5. Add a Landing page

A landing page (or home page) is the first thing people see when they get to you blog.  You may have multiple pages on your website (for example an About Page, Store Page, Contact Page, Press Page) or you might also have your blog set up as a separate page too as is the case with my blog. This can be very confusing for people who stumble across your website as they may have no idea what it is that you blog about. To make it easy for them to navigate, add a 'Home' page to your site. If you click on my logo at the top of my blog, or if you click on my actual 'Home' page you will be directed to a space that is clean and free of clutter. Your Home or Landing page needs to be very clear in stating what your webiste or blog is all about, as well as providing easy to see and use links to the different parts of your site.

BlogTips

As you can see my Home page has links to my About page, my Stationery Store, my Photography portfolio and my Contact page while also providing a sign up form for people to subscribe to my blog. Another thing to remember to include is your social media links so people can connect with you on all the platforms you use.

My site is run on SquareSpace and so setting up a landing page (or cover page as SquareSpace calls it) was super easy to do. If you blog using Wordpress or Blogger you can set up a new 'Static Page' which can act as your landing page. 

Remember at the end of the day you want your site to be easy to navigate and easy for people to find what they are looking for. You don't want people to get frustrated and end up leaving your site because they found another one that is better to navigate. People are also very visual, so try to include high quality photographs on your home page that add to the overall branding and aesthetic that you want to convey to your readers. 

Do you have any other tips for a blog makeover that you'd like to share? I'd love to hear from you in the comments below!

You might like these posts too: