How to easily make photo collages for your blog and Facebook: A Blogstomp Tutorial
/
In order to build a cohesive brand, it's important to make sure the images & graphics you share are aligned with the look and feel of your business. An easy way to do this is to share groups of images (collages) that tell a story.
I use collages here on my blog when I want to share a lot of images, but I don't want to slow down my site loading speed.
Using full sized images in a blog post means lots and lots and lots of scrolling for your readers. Creating beautiful collages is an easy way to make your blog posts look better, and it helps the back end of your site by making it faster to load.
In today's blog post I'm sharing with you how I create collages for my blog and Facebook page using Blogstomp.
Blogstomp
Blogstomp is one of my absolute favourite blogging tools. Here's what Blogstomp does in a nutchell:
- Image resizing and optimization: BlogStomp re-sizes and optimises high-res images for web use in seconds.
- Batch processing: Create unique flexible, multi-image layouts
- Creates Multi Image Layouts: Create unique flexible, multi-image layouts (collages)
- Watermarking: Easily apply your watermark to all your images in one go
- Image styling: Express your brand’s personality and style your image frames
- Post images directly to Facebook
- Share images on Twitter
- Blog from within the app
- Save pre-set style templates
The only downside to Blogstomp is that it isn't free. For me, this was one of the first blogging tools I ever bought and it has saved me so much time that what I spent on it has been 100% worthwhile. For a single user it's $49 (which you can install & use on up to 2 computers) and then it's $89 for their Studio Pack which can be installed and used on up to 5 computers. I went in with 4 other friends for the studio pack, paying only $18. Absolutely the best amount of money I have ever invested in my blog and photography business! But, for anyone wanting to try it out before buying, they do have a free trial version. The trial version puts the Blogstomp logo/watermark onto your images but it at least it gives you an idea of how the program works.
I mainly use Blogstomp for the following:
-To Quickly and easily resize my photographs (I usually shoot in RAW and so deal with huge image sizes. Blogstomp resizes my photographs, individually or in batches, within seconds). Keep in mind you can only import JPG files.
-To create collages (more on that in a moment)
-To add my watermark to my images & collages
HOW TO CREATE COLLAGES IN BLOGSTOMP
Here is a collage I created in Blogstomp. I used my own photographs (with text overlays done using the StudioApp) and then created the collage using the steps outlined below.
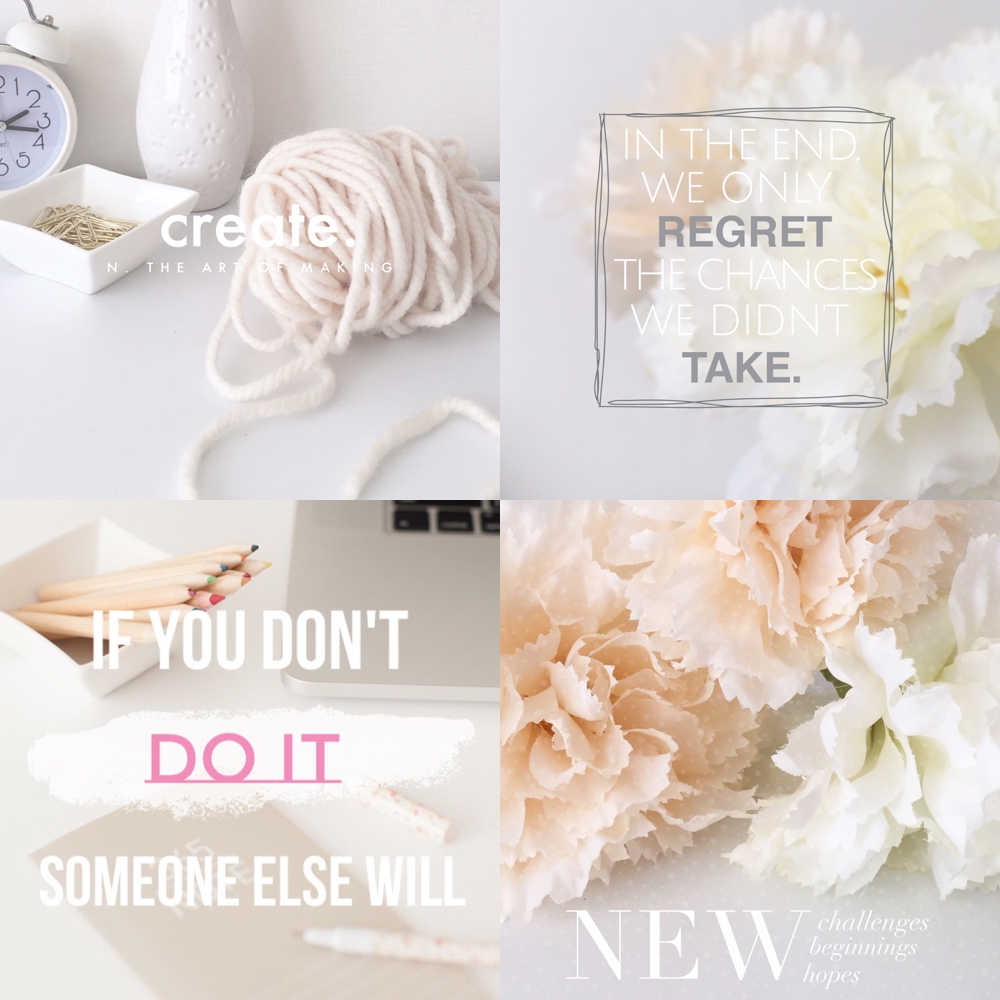
How to create collages in Blogstomp
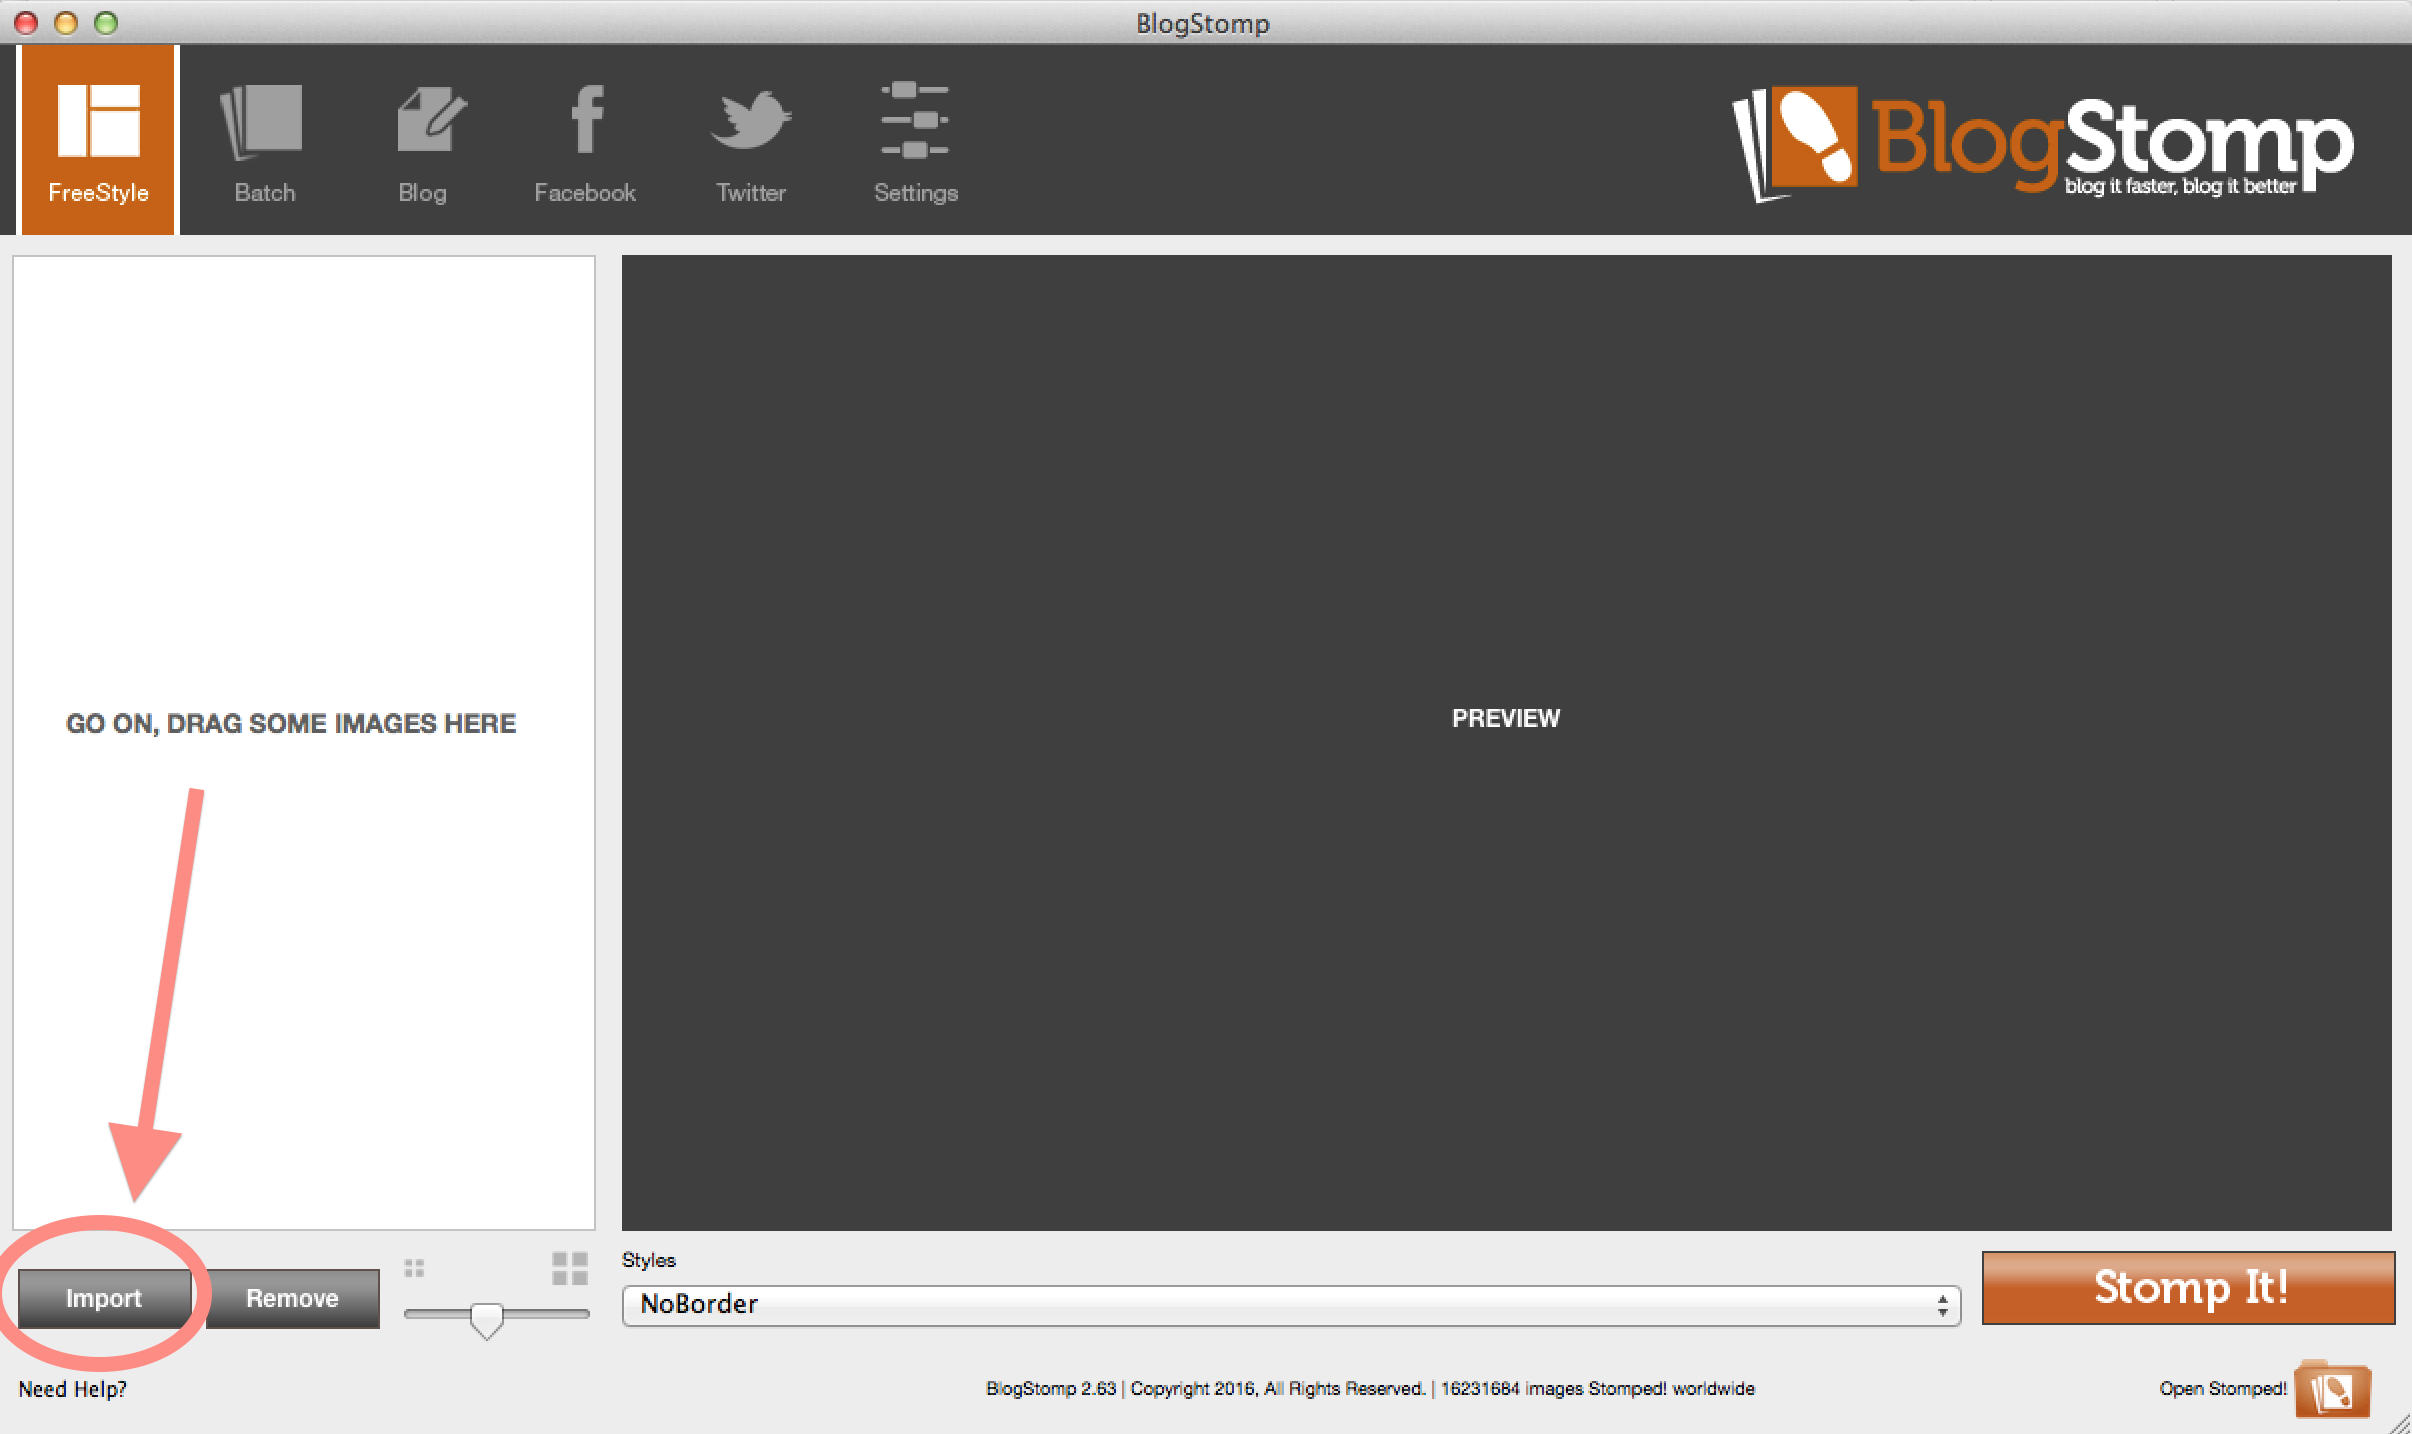
1. Import Images
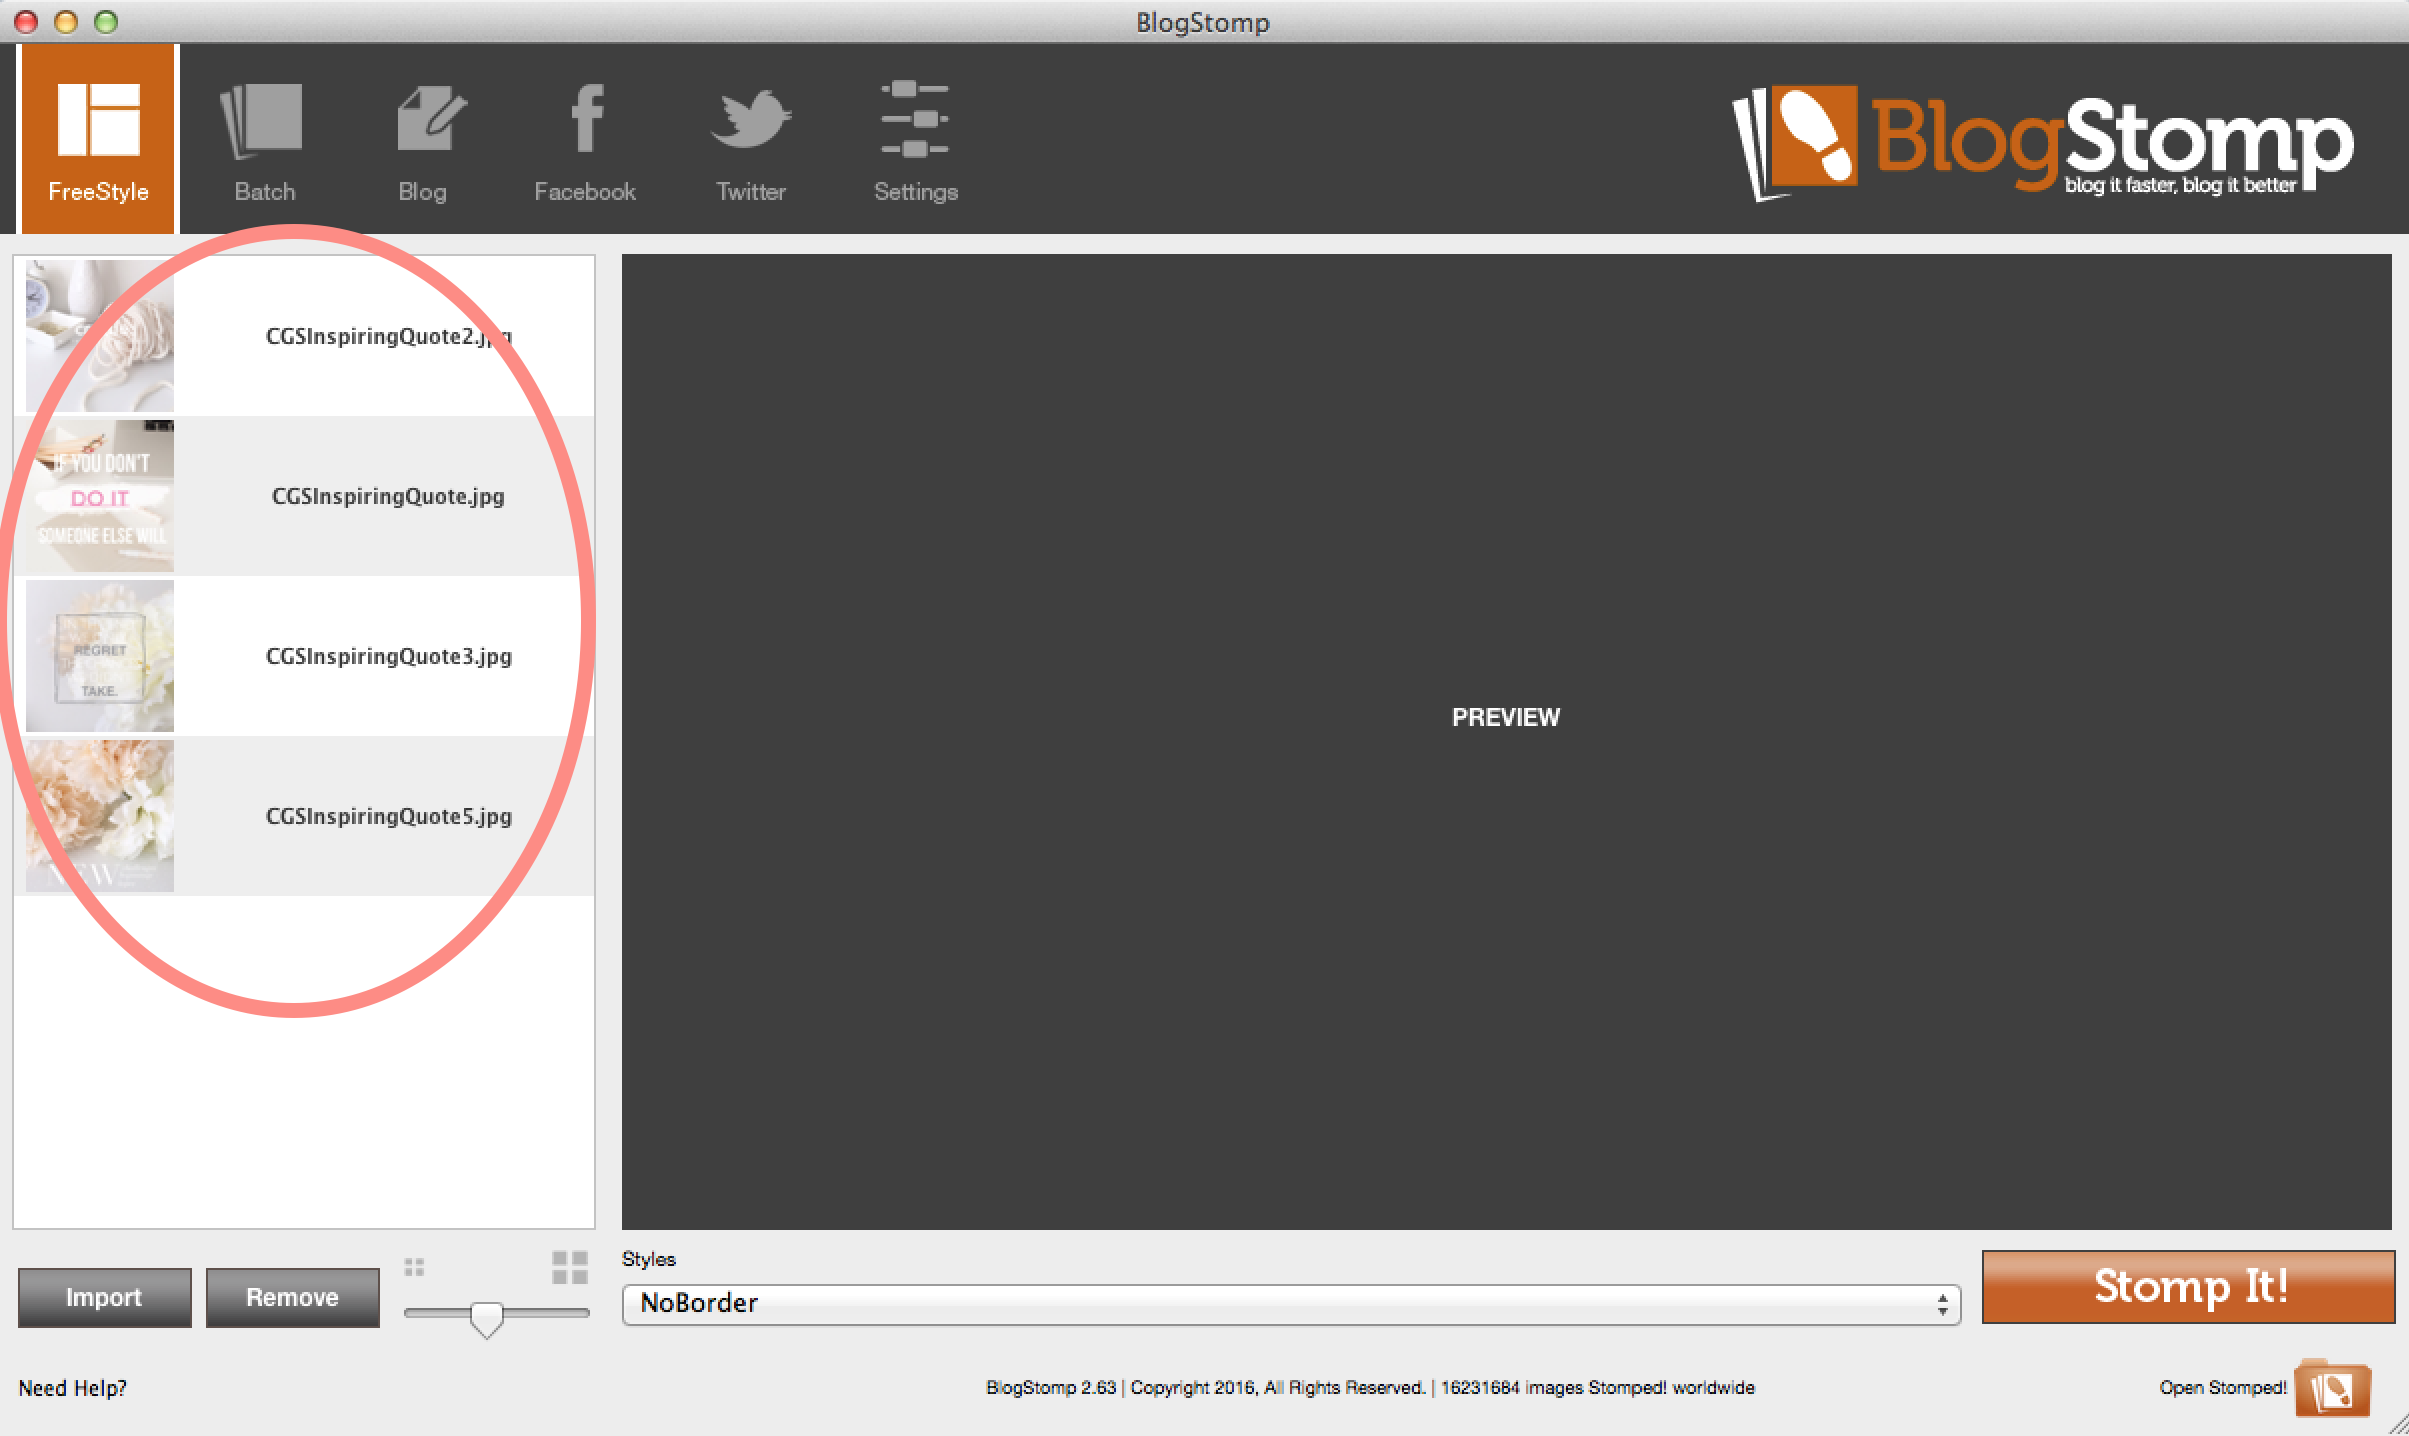
Open up the program & Import your photographs using the 'Import' button in the bottom lefthand corner.
Select the images you want to use in your collage they will be grey when selected (you can also select a group of images and then click 'Remove' to remove them from Blogstomp). Once you have selected the images, they will show up in the 'Preview' box.
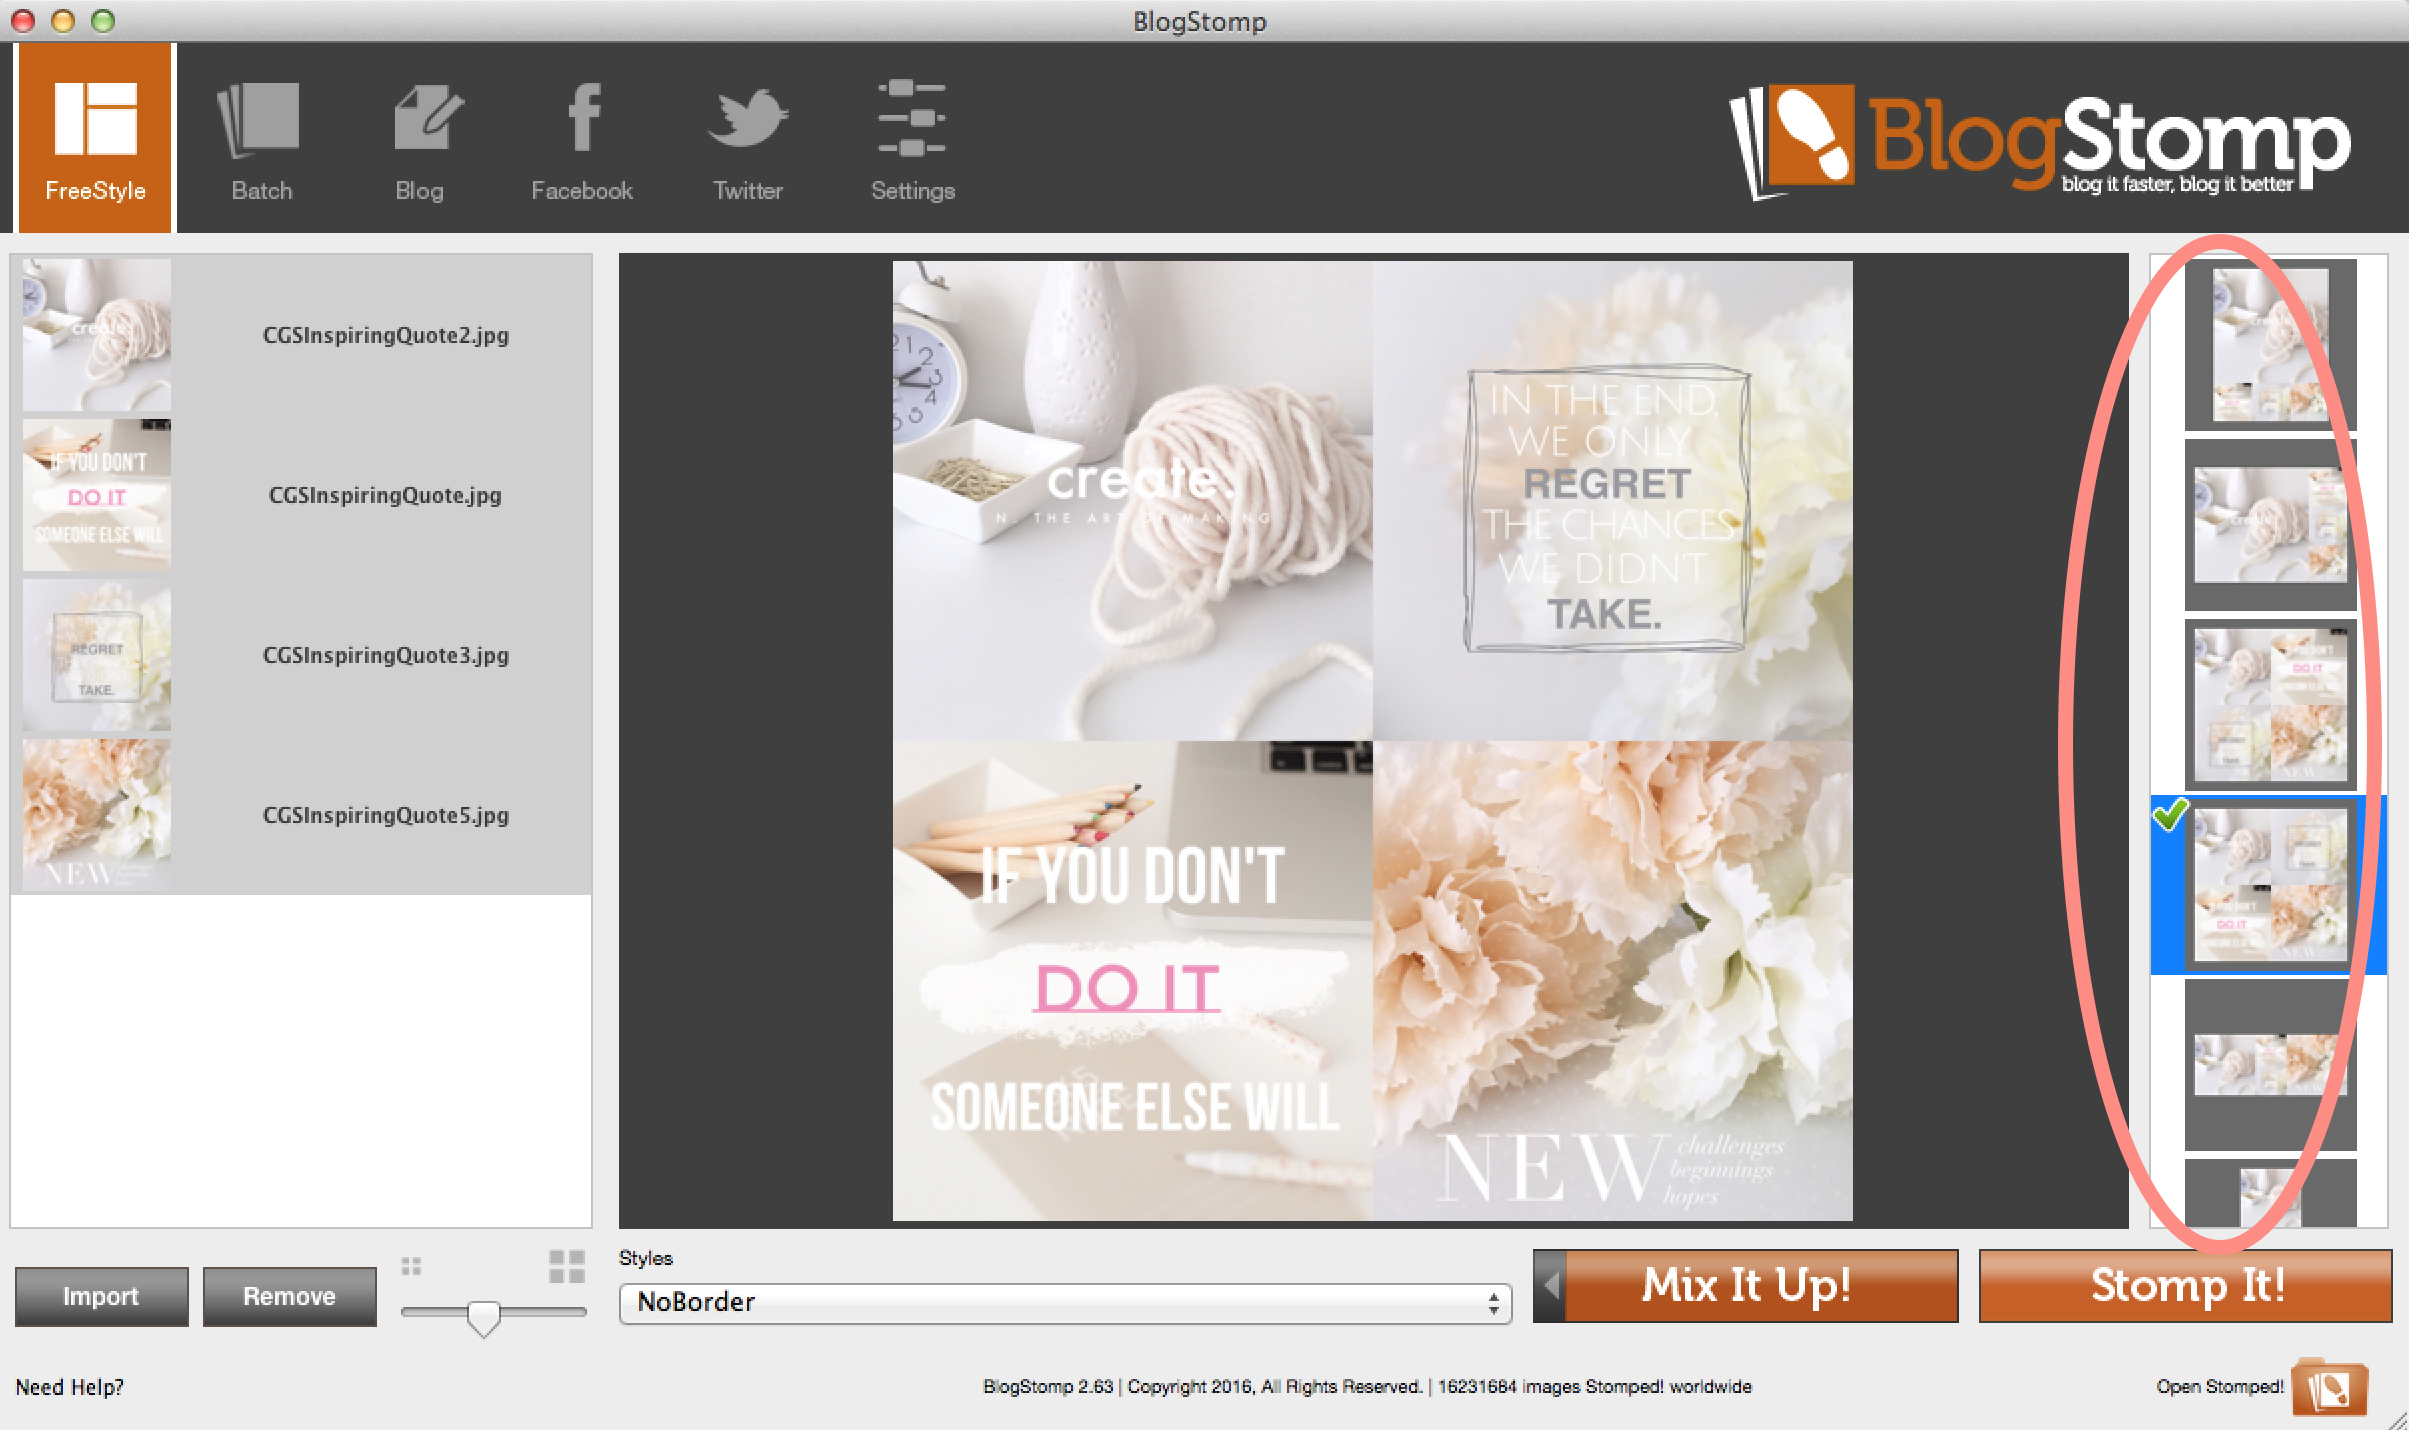
2. Choose your Collage Layout
Once your images are selected, Blogstomp puts them in a standard collage style. You change the style of collage by selecting one from the right hand side. To change the order of the photographs, click on the 'Mix It Up' button. You aren't able to actually move each image itself like you can in Photoshop. You can only select one of the styles from the right hand side (these styles or layouts vary slightly depending on the number of images you use, and the orientation of the photo ie. landscape/portrait) but I haven't found this limiting at all.
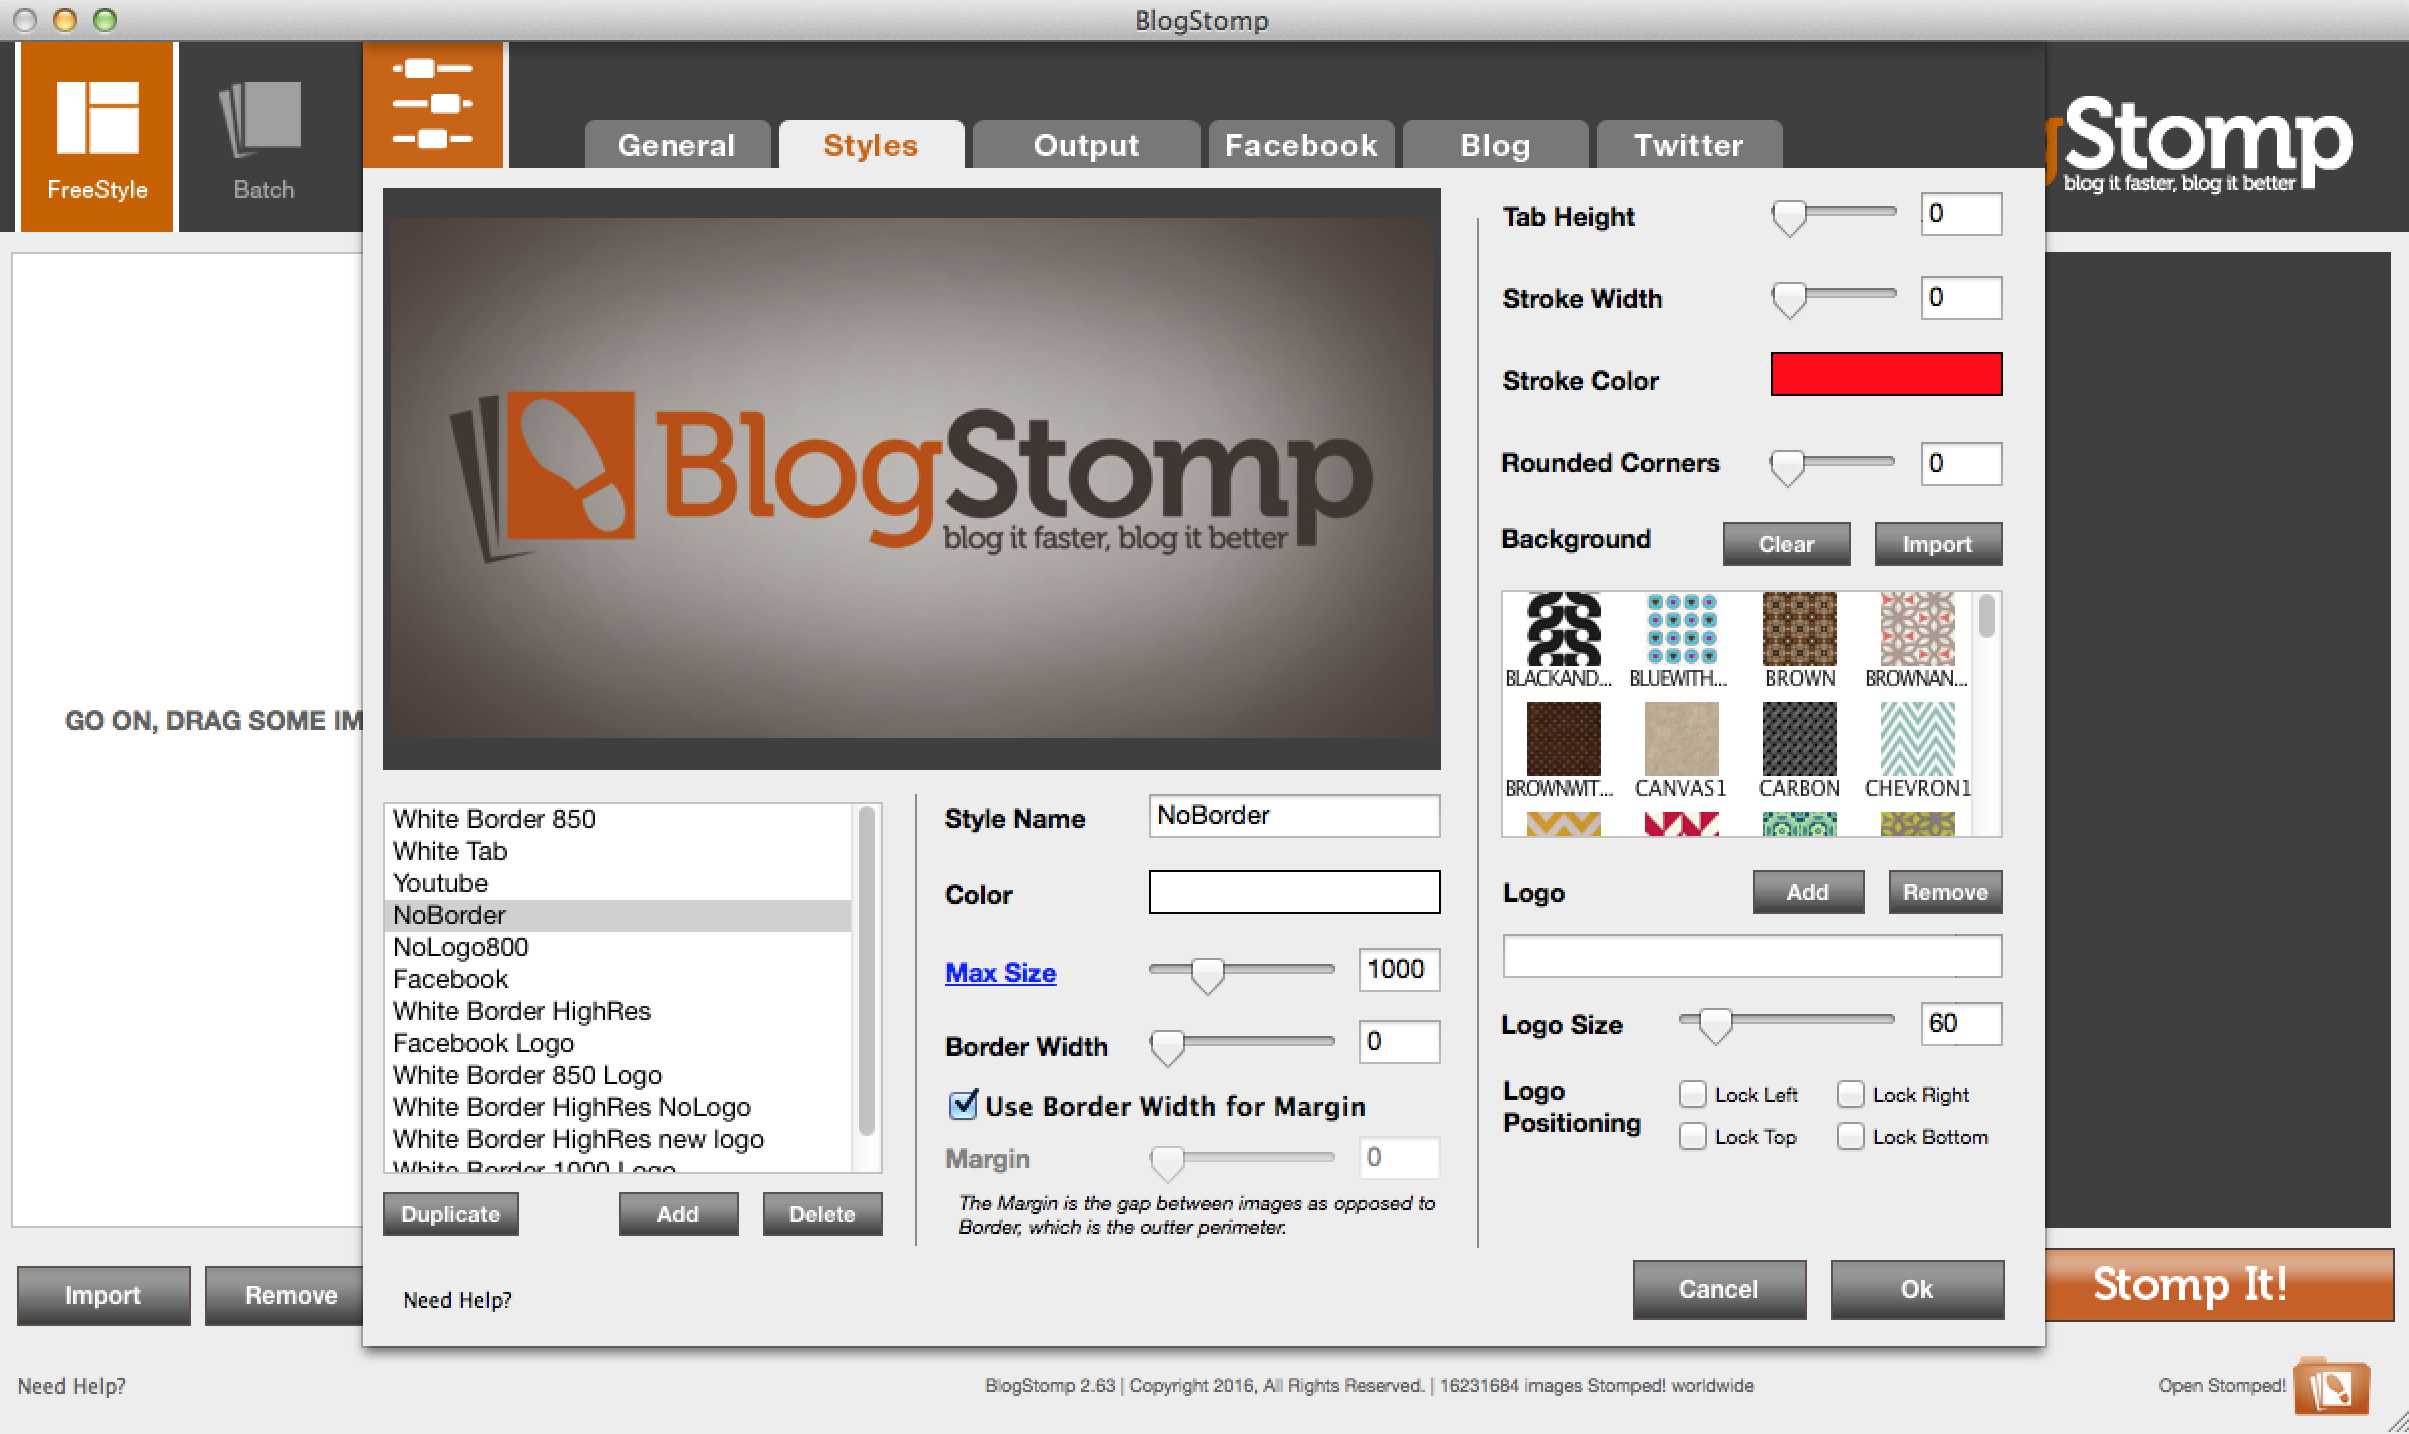
3. CHANGING THE STYLE & Size OF YOUR Collage
Once you are happy with the layout of your collage, now you can play with borders, backgrounds and adding your watermark. These fall under 'Styles'. To change the style, either click the 'Styles' drop down menu and select 'Edit or create your style' or click the Settings button at the top of the program and then select Styles. I have saved a number of styles (similar to presets in Lightroom or Actions in Photoshop) which I have made.
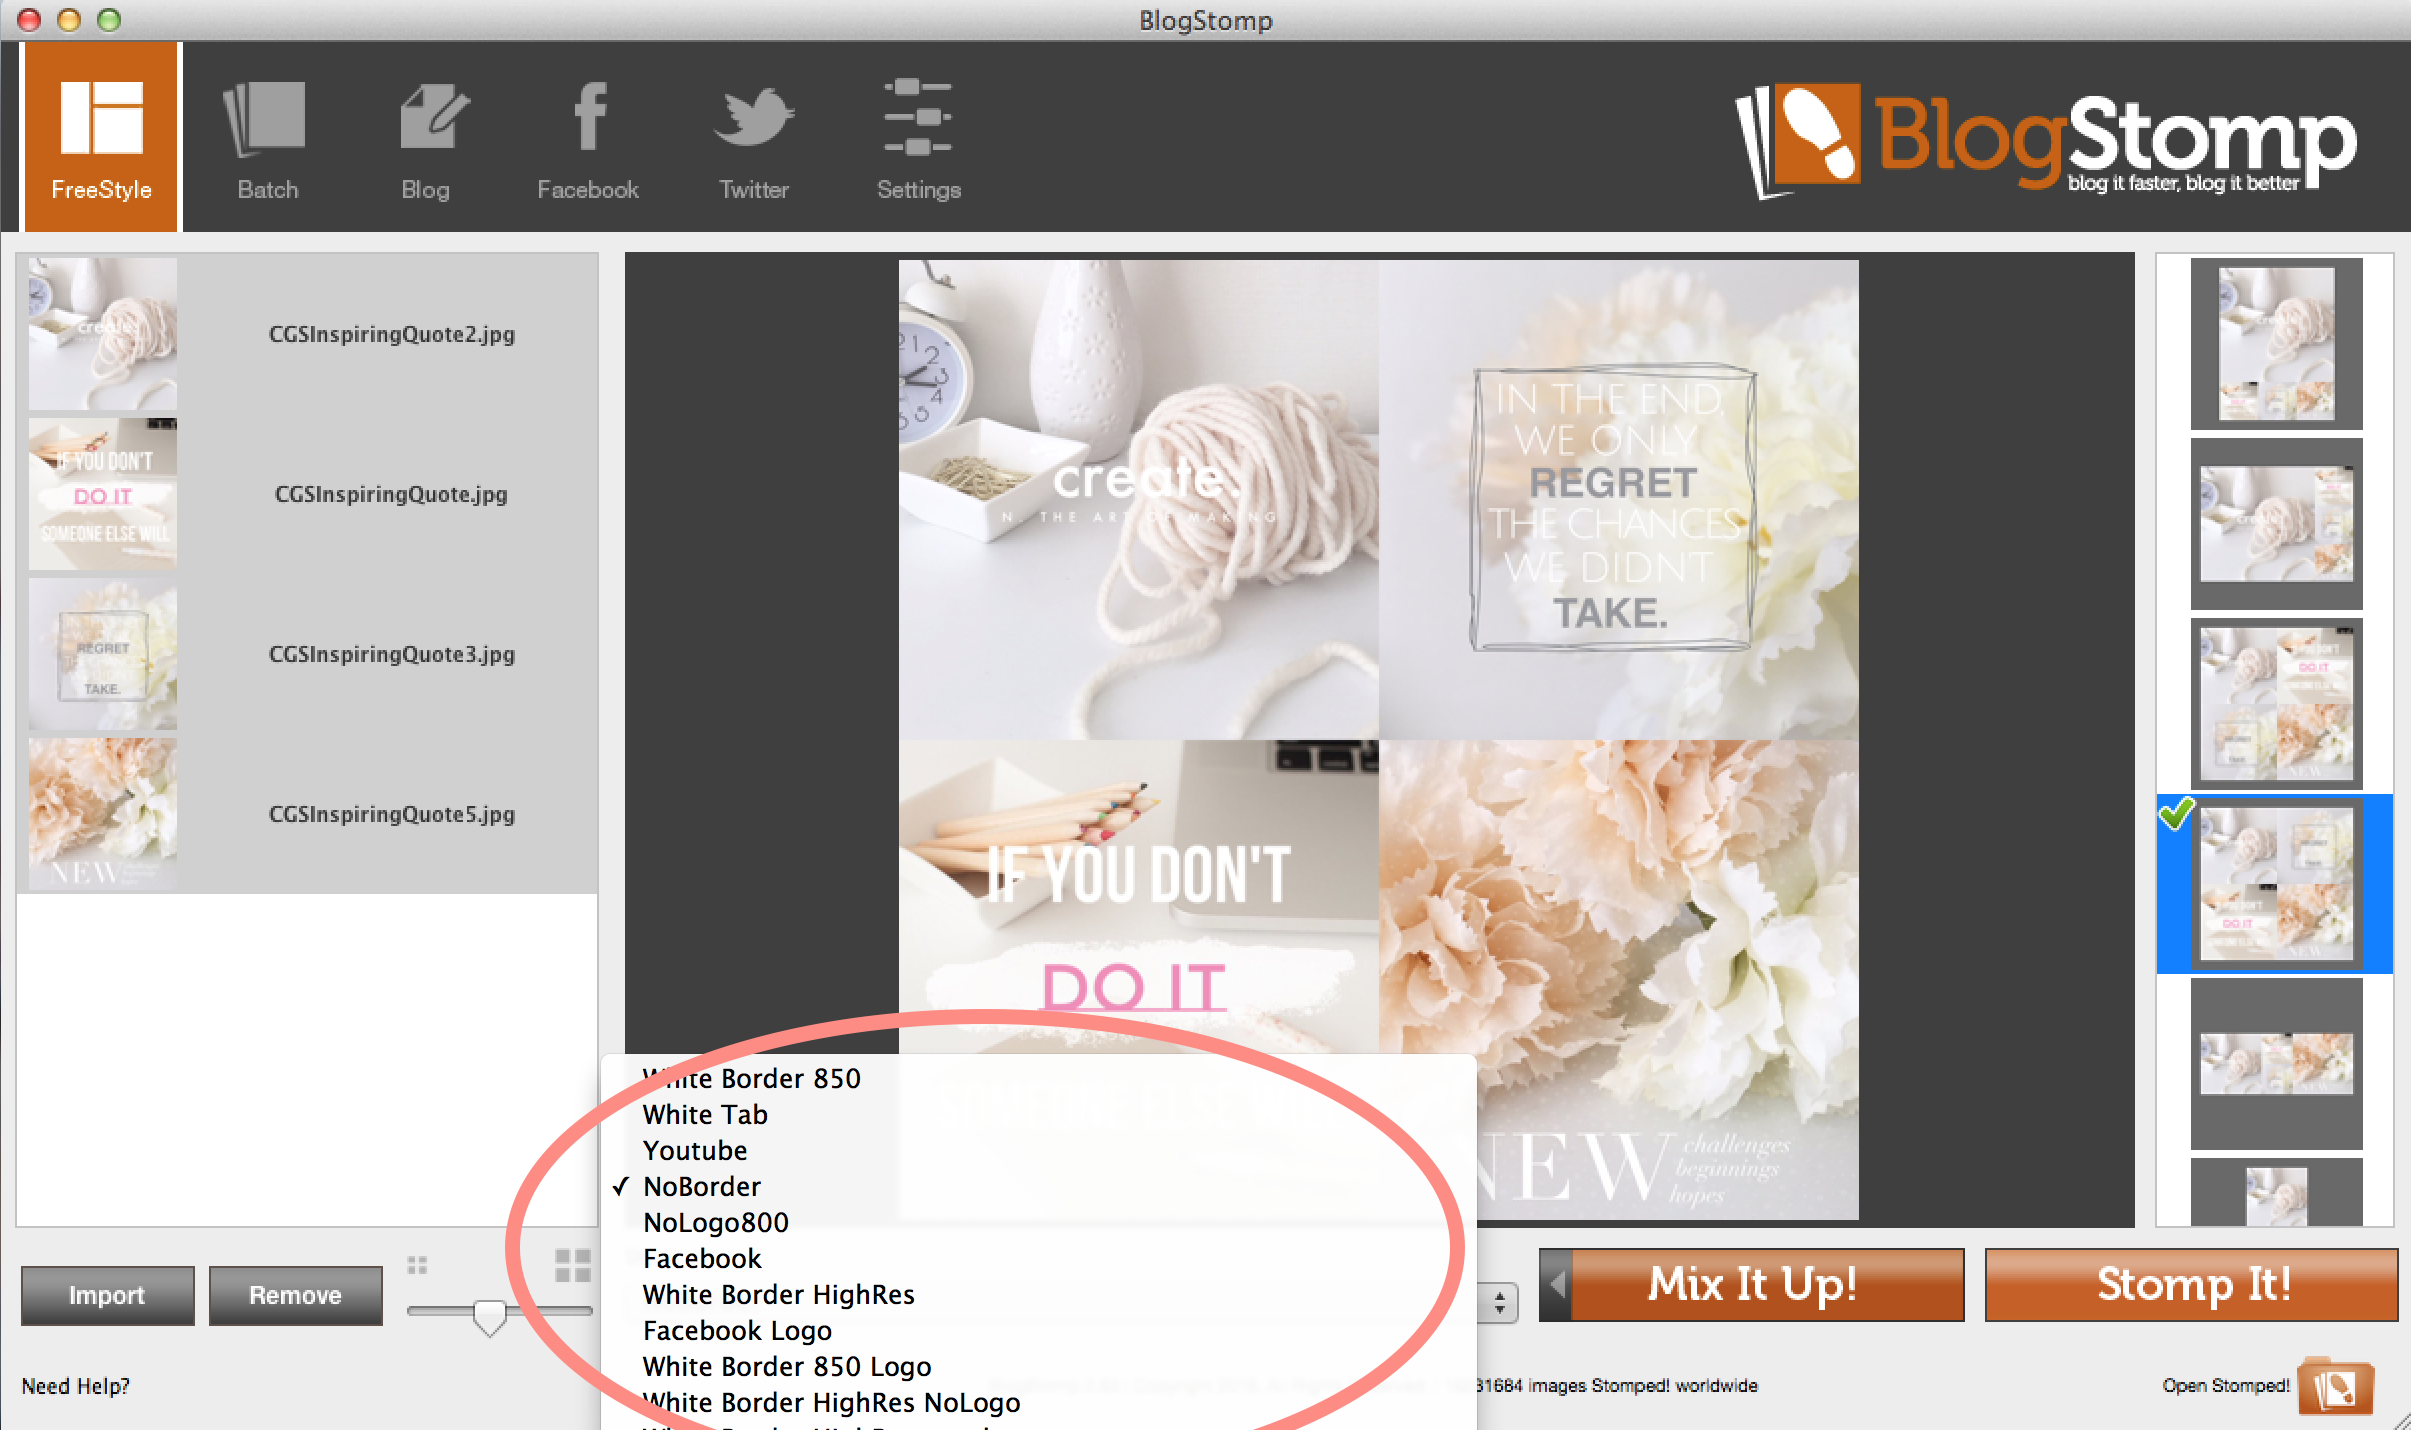
You can easily make new style presets or edit existing ones. In the 'Styles' tab you can change every thing from border colour & width, to adding a background. This is also where you decide what size you want to save your image in. Once you create a style that you like, you can save it as a preset (like the ones I have listed below eg WhiteBorder800 which is what I use for my standard blog images...this puts a white border around my image, adds my watermark and resizes my image to 800px wide). Here you can also upload your logo to the style and choose where you want it to go. Once you are happy with the Style, select 'OK'.
4. Choose where you want to Save your image.
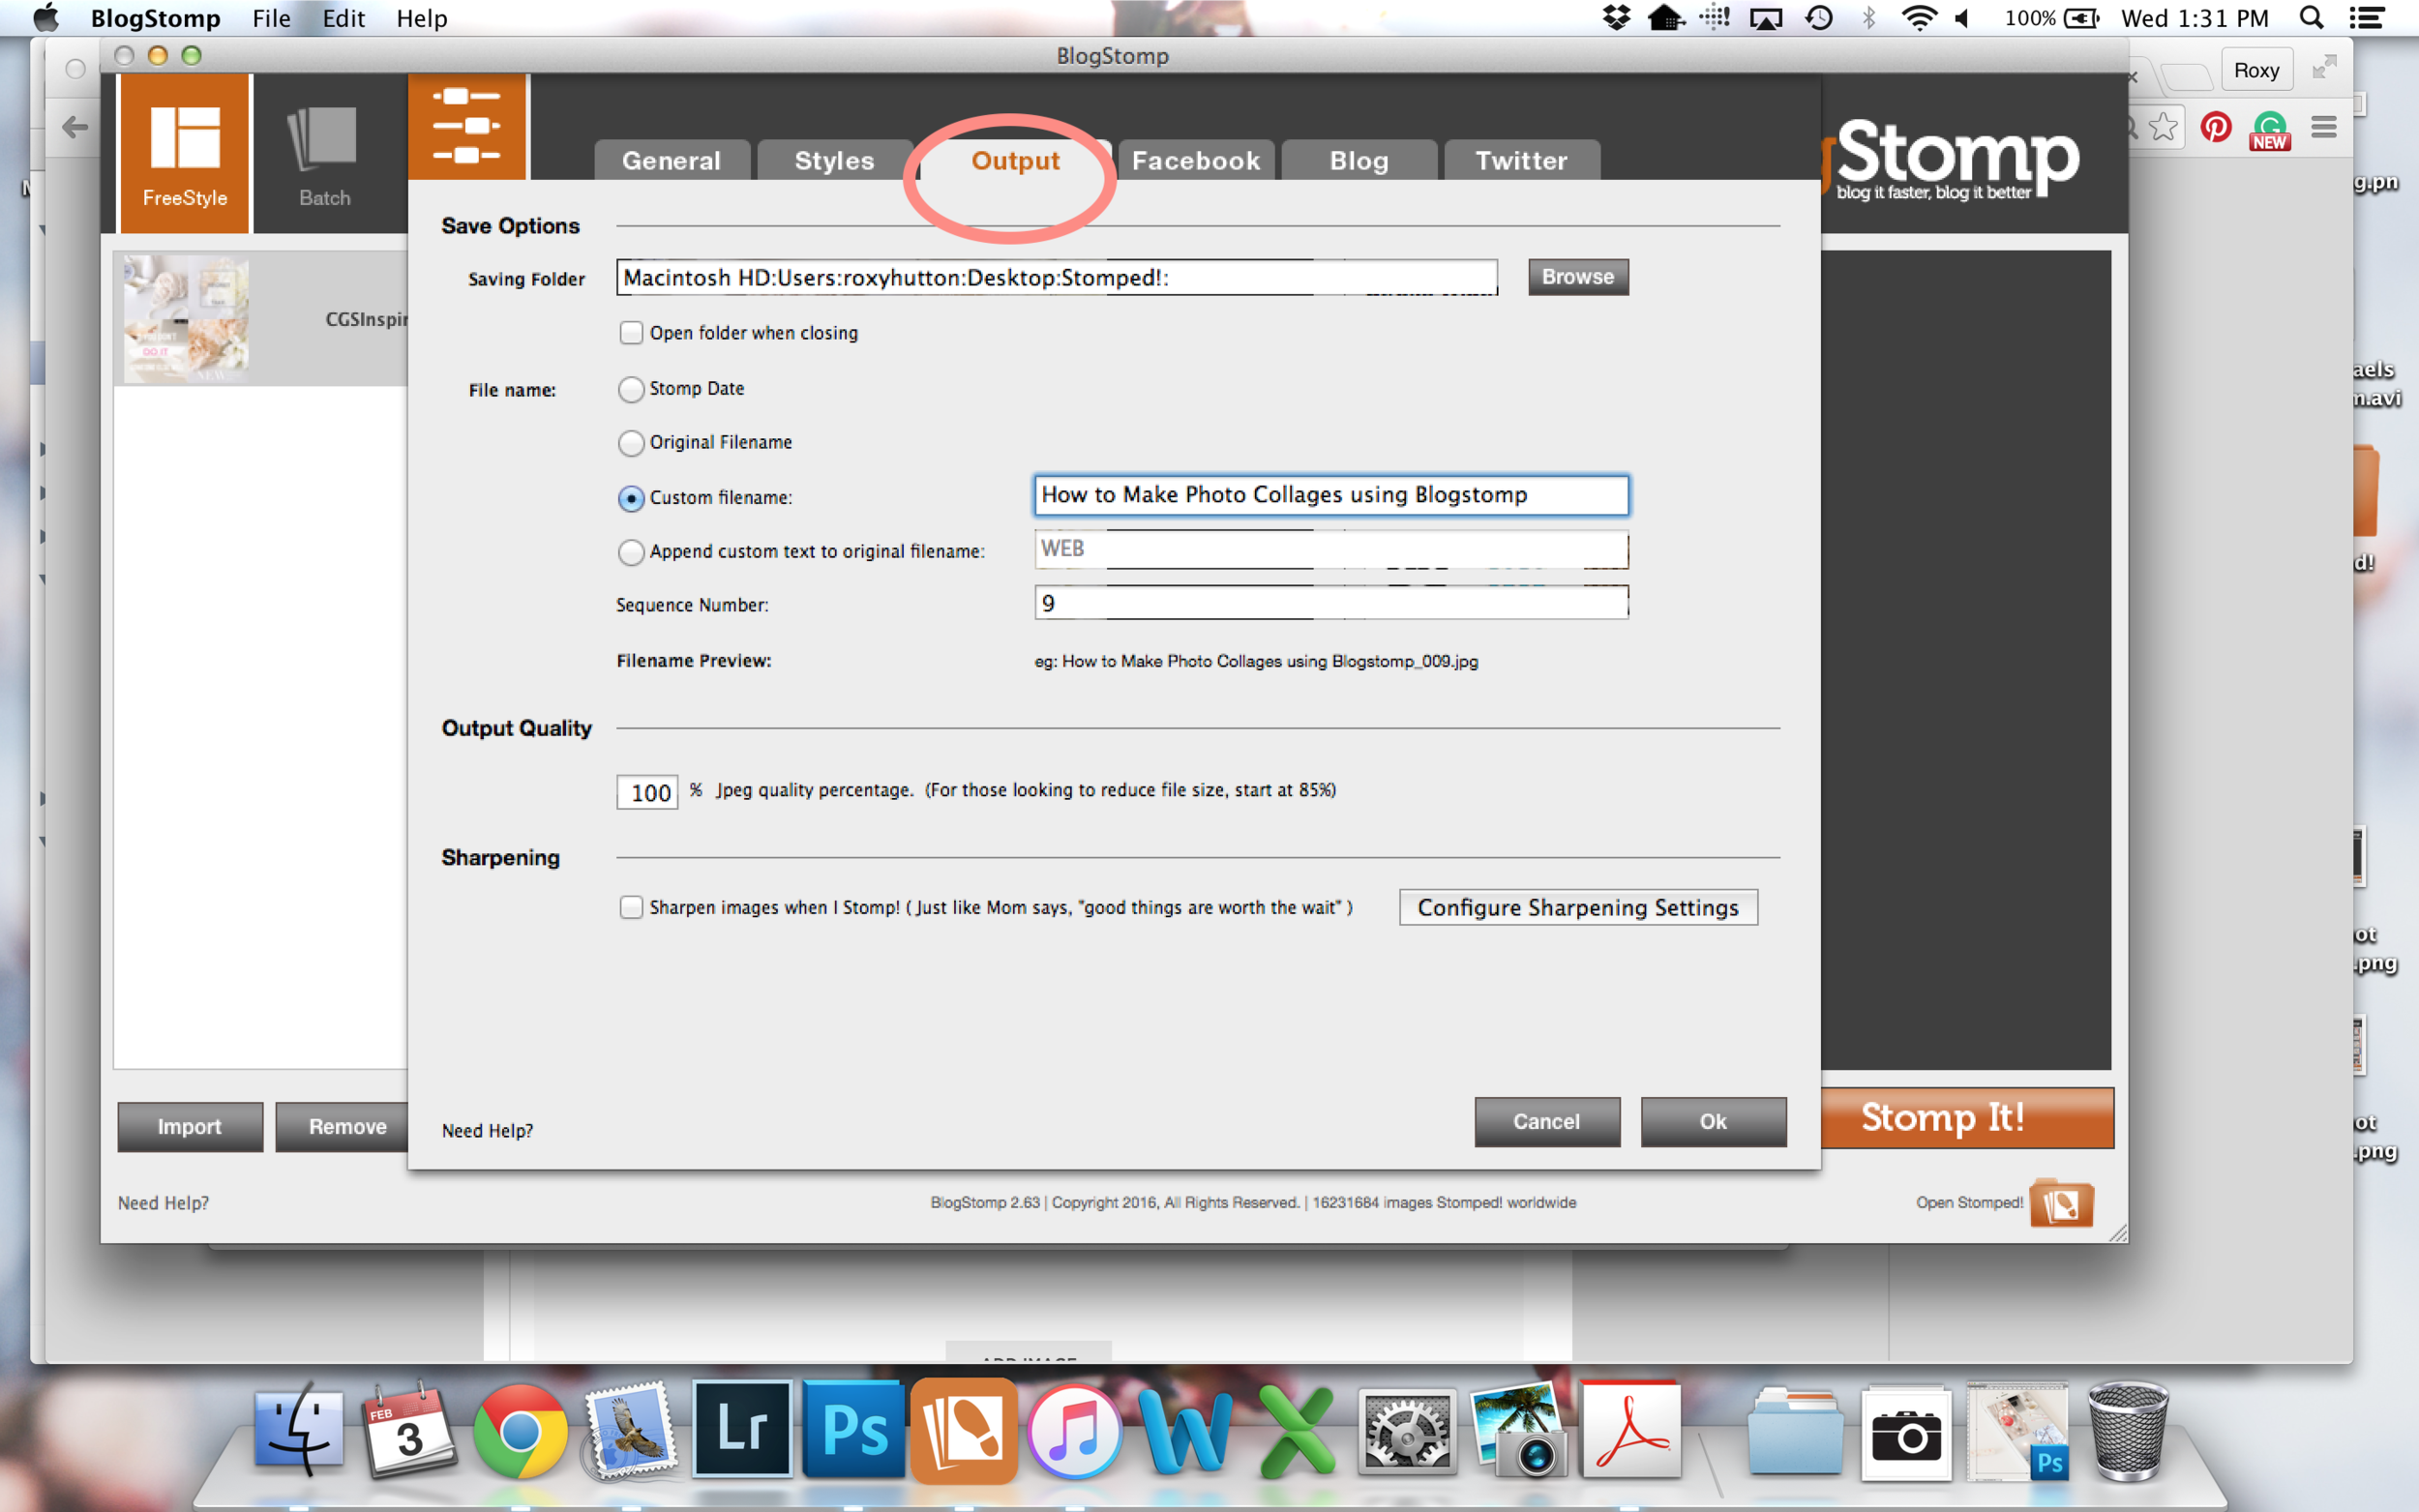
Once you are happy with the size and border/background style & layout of you collage, you can still move your logo around in the preview screen. To save your image, make sure to click on the 'Settings' tab and then the 'Output' tab the first time you save to choose where you want to save your collage. Once you set that up once, it will become the default for all of your next BlogStomp creations unless you change it each time. Blostomp automatically saves your images into a Blogstomp folder, you simply choose where you want that folder to go. Right now I have my Blogstomp folder on my desktop.
This is also where you can re-name your collage or images. I do this to increase my SEO...re-naming your images helps them show up better in google searches. There are a few other settings you can play with in the Output tab (like output quality & sharpening). Once you are happy with where you are saving your collage, click OK.
5. Save (Stomp) your Collage
Click the orange 'Stomp It!' button to create your collage. Your collage will now be saved in your chosen destination.
Easy peasy! I hope you found this tutorial useful. I'd love to see your Blogstomp creations, so feel free to tag me in them on Facebook (@CityGirlSearching) or on Instagram (@RoxyHutton).
If you have any questions at all, feel free to leave me a comment below.
Happy Stomping!