How to make Rainbow Spaghetti - A sensory activity for toddlers {that is safe for babies too!}

How to make Rainbow Spaghetti Sensory Activity for Toddlers Food safe-01.png

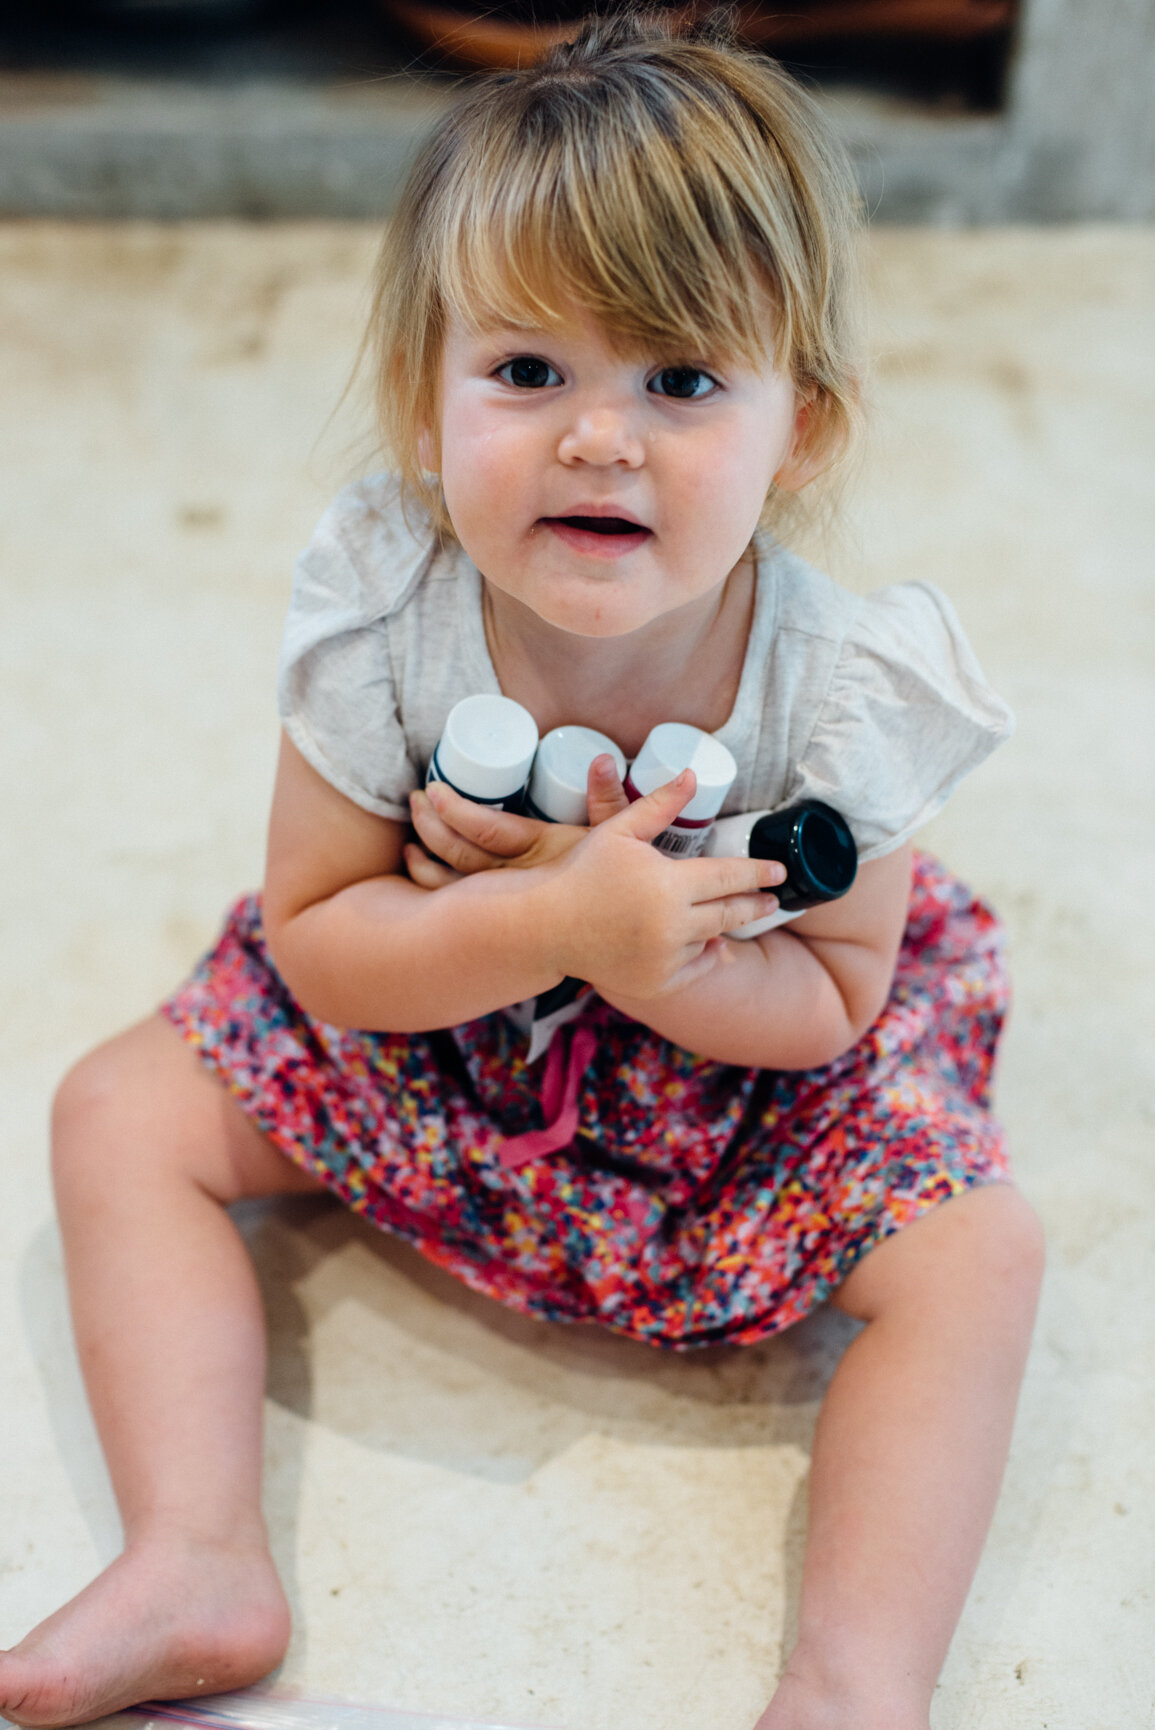
This was a really fun activity for Everly, and I’ve got lots of tips to share with to make sure this lasts longer than one play session (as was the case with us because I actually just winged the whole thing didn’t look at how to store and preserve the pasta). So, first things first, this is a food based project (i.e. you’re cooking pasta) and so don’t expect it to last for more than a couple of days. I assumed it would last just like our box of Rainbow Rice (which is still going strong 6 months later…but this is because the rice wasn’t cooked, silly me). So, as long as you know that going in, then you’re all set!

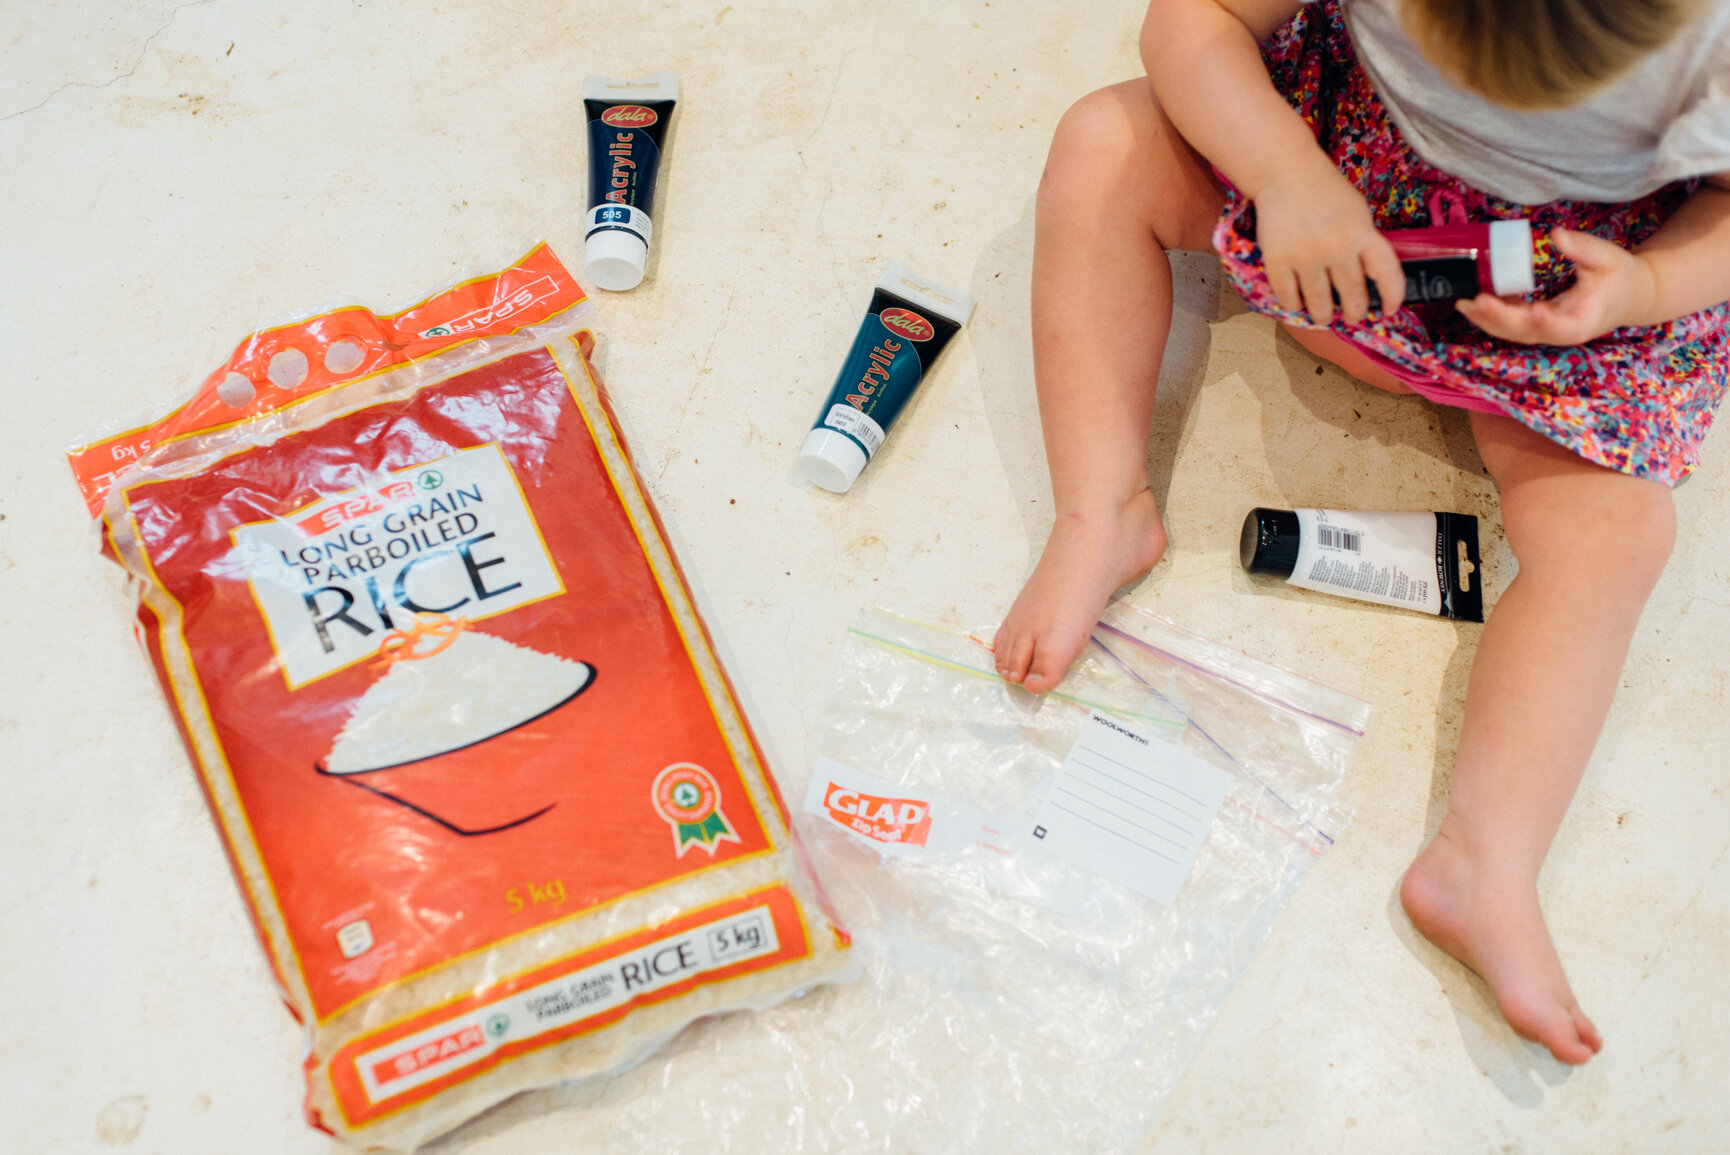
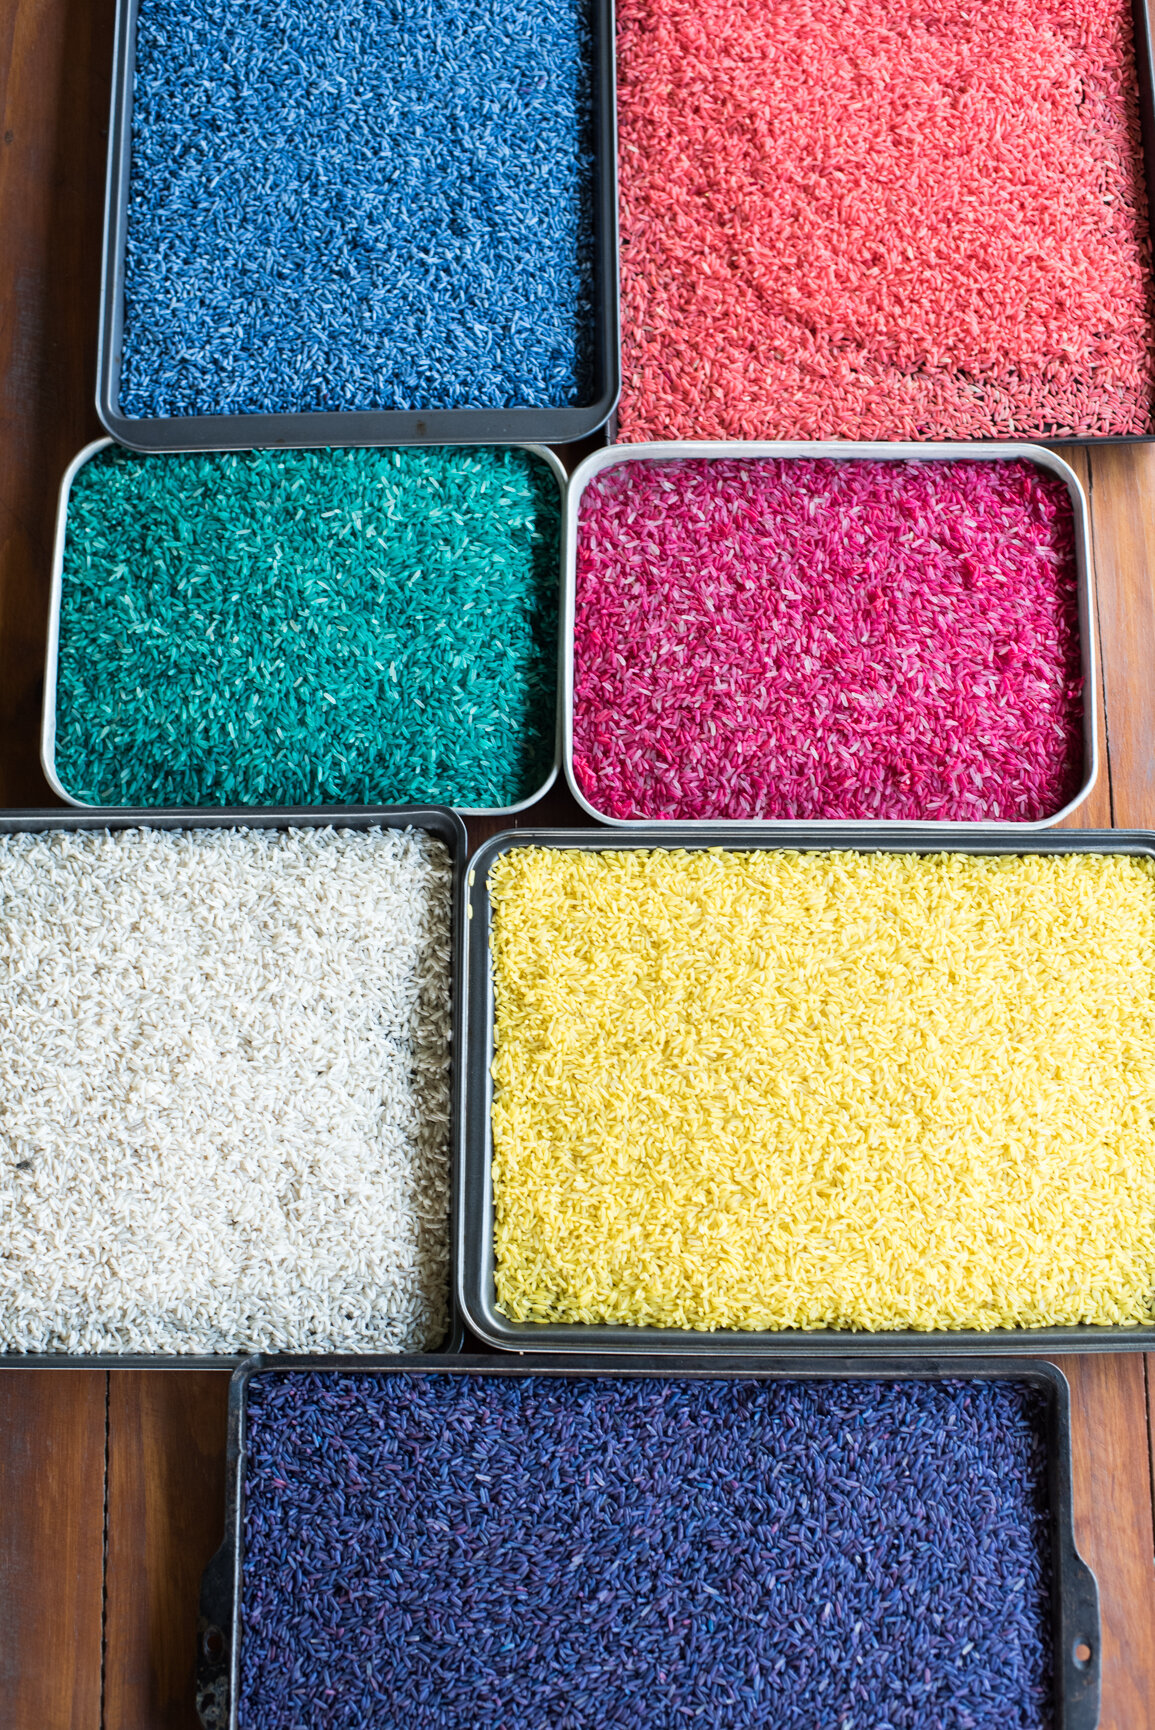
I used a whole packet of pasta (a bit of a rare commodity these days with us being on Lockdown here in South Africa) but perhaps you have a little stash and can spare one. We don’t really eat pasta (not because we don’t like it....I LOVE PASTA) but because we follow a loosely low carb way of eating so I made sure to buy a pack of spaghetti before Lockdown so I could do this activity with Everly. You could actually use any pasta, but spaghetti made really fun coloured worms.

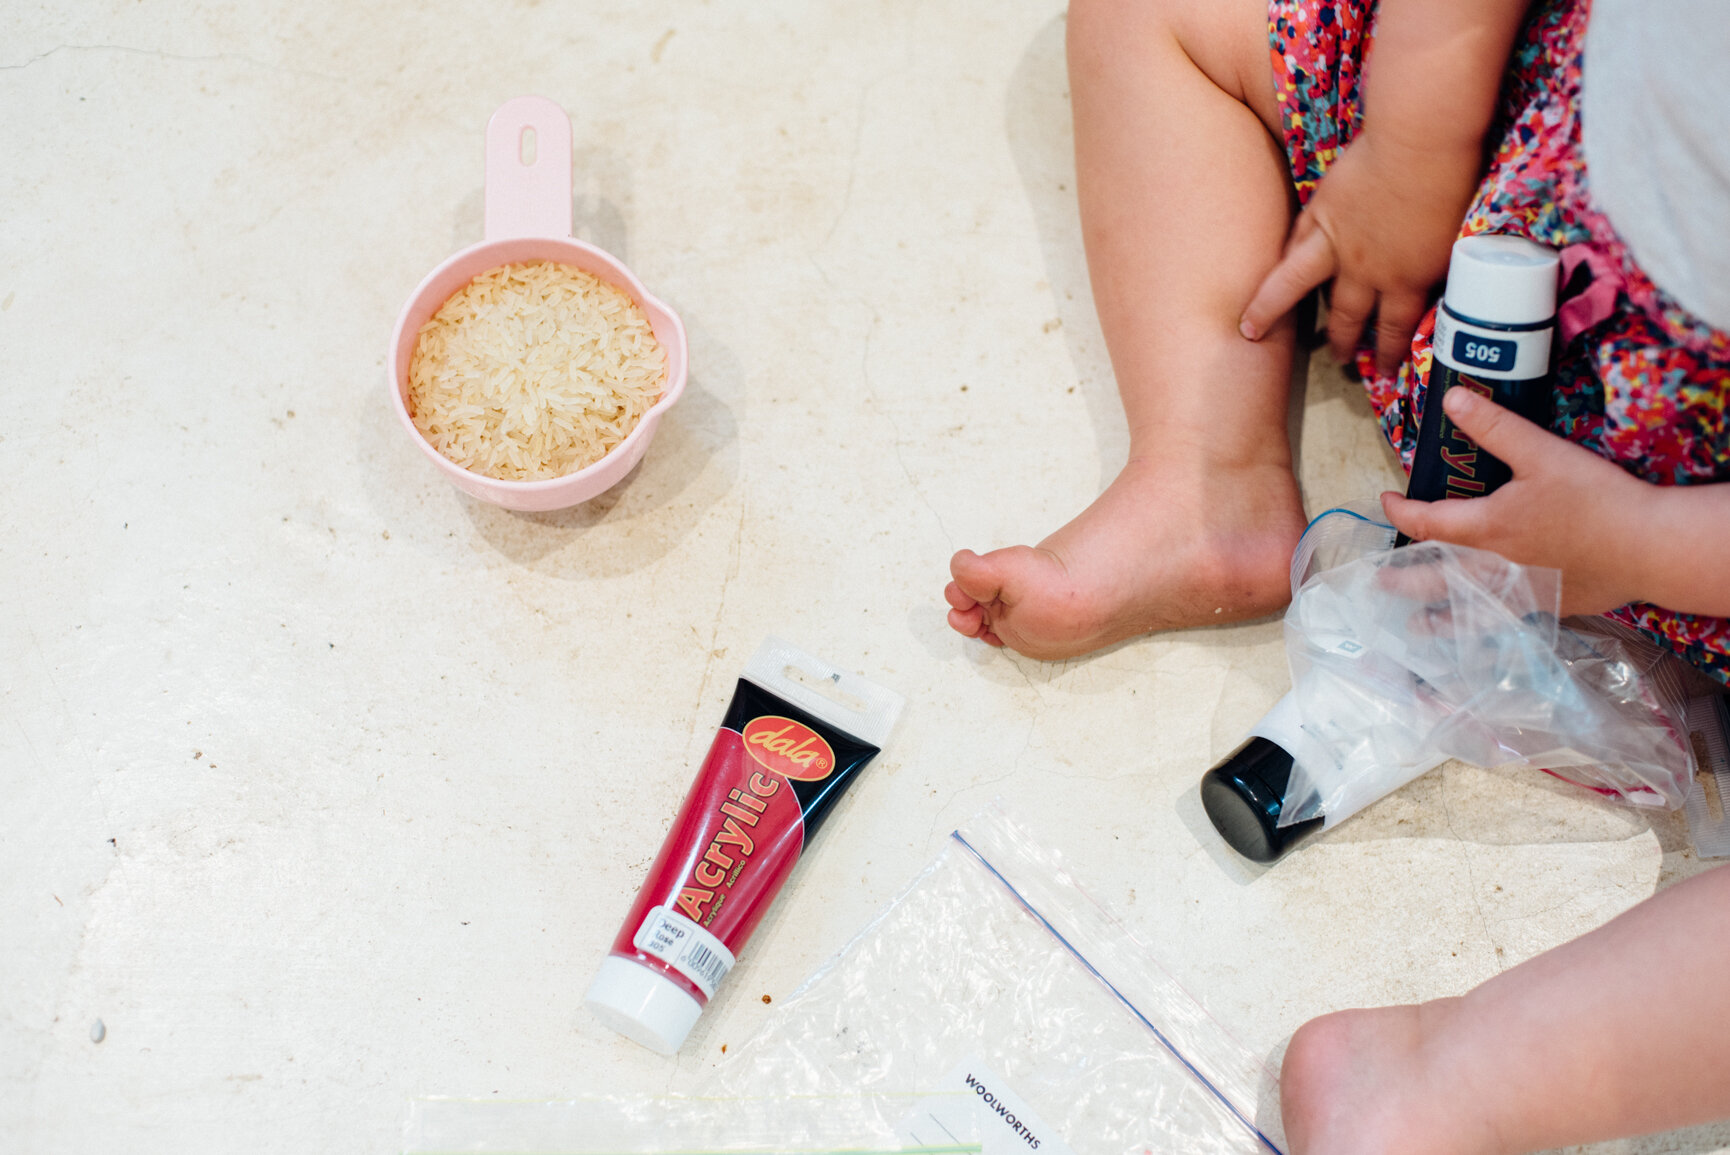
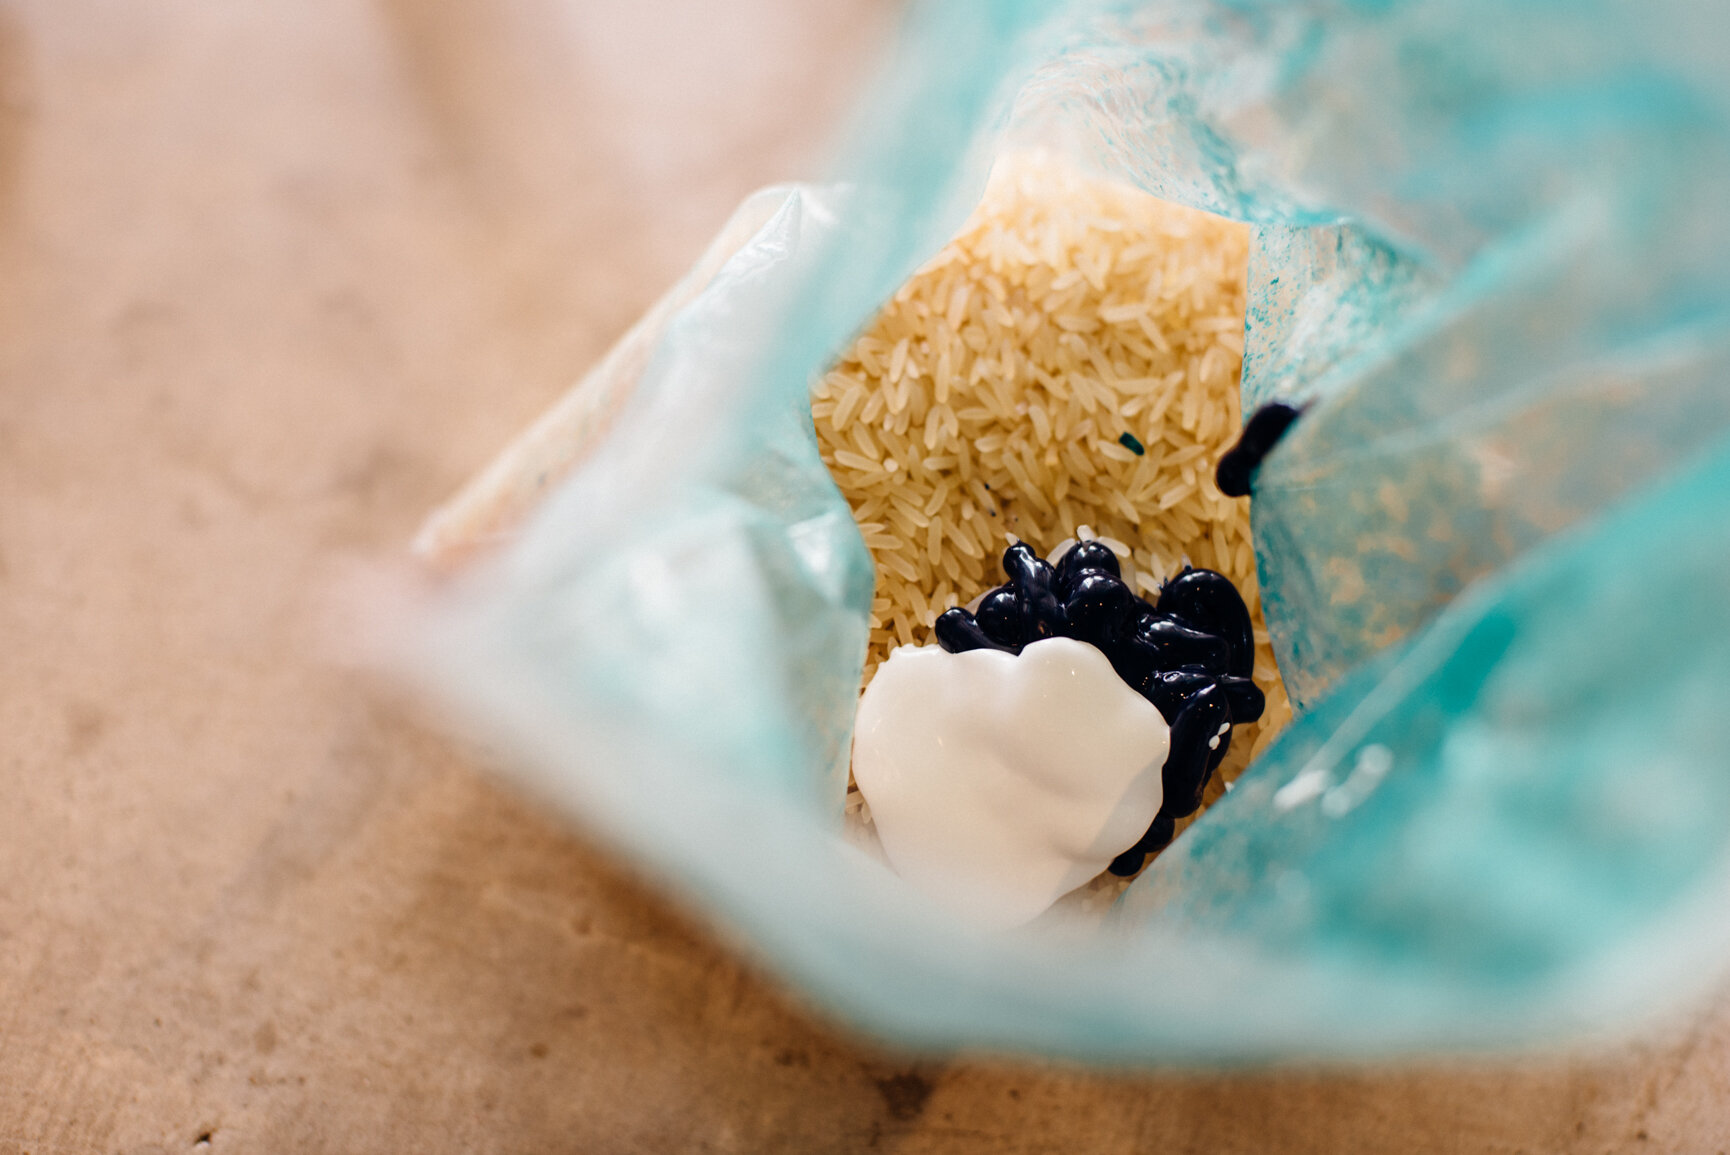
Then you need oil of some kind…and then food colouring.

IMG_0386.jpg

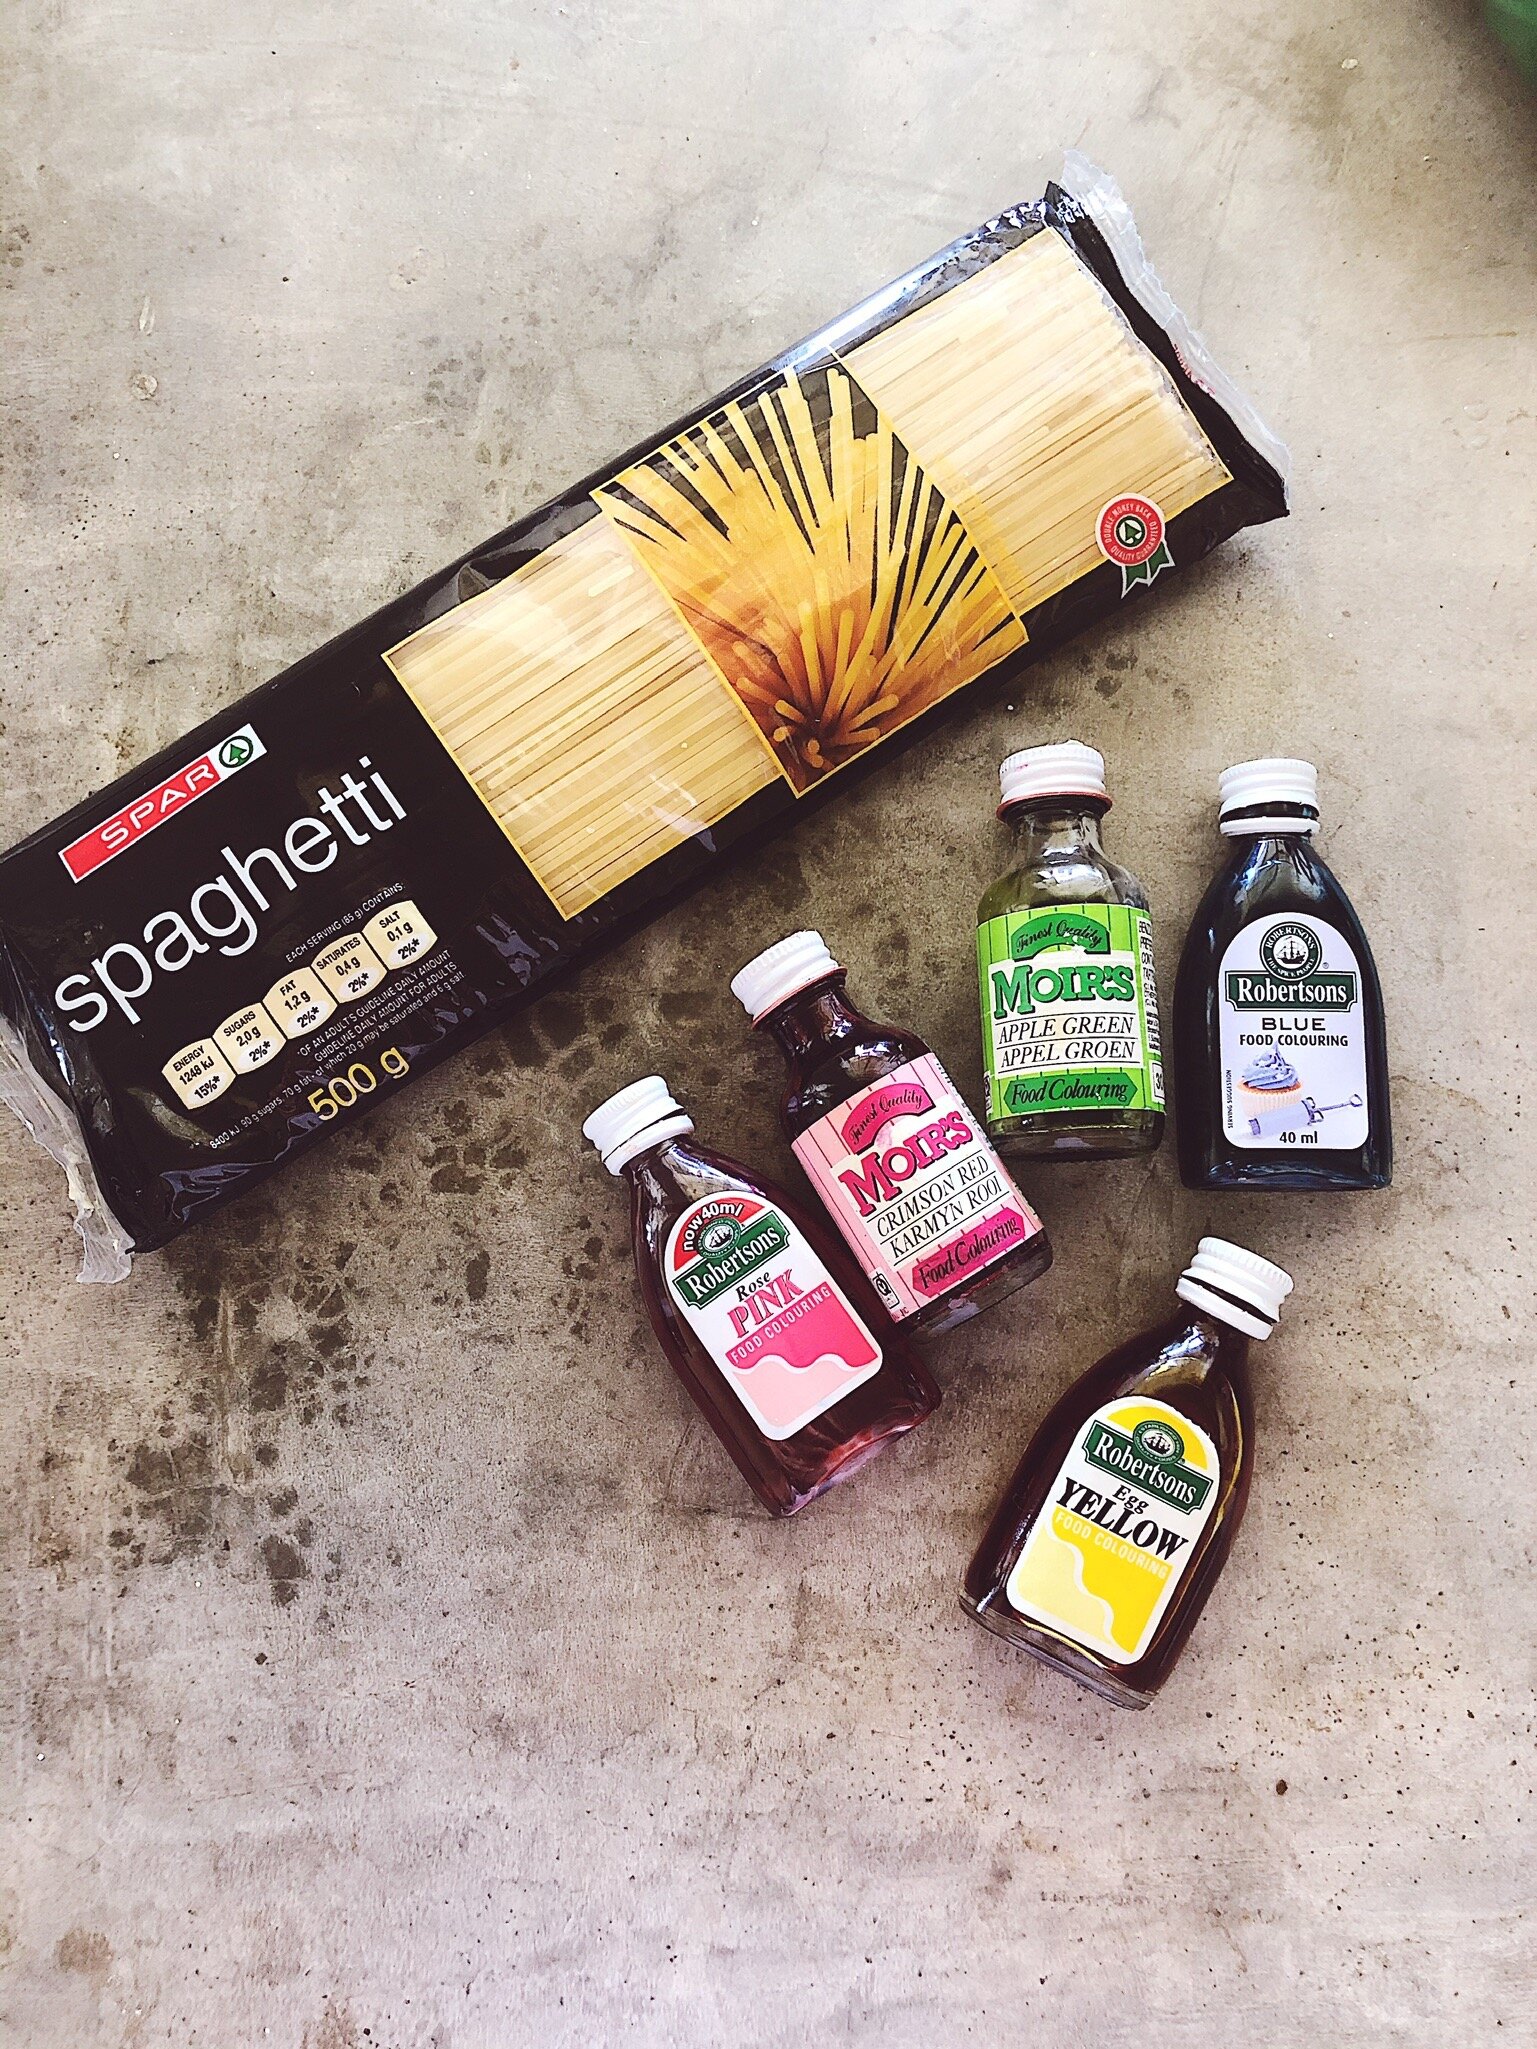
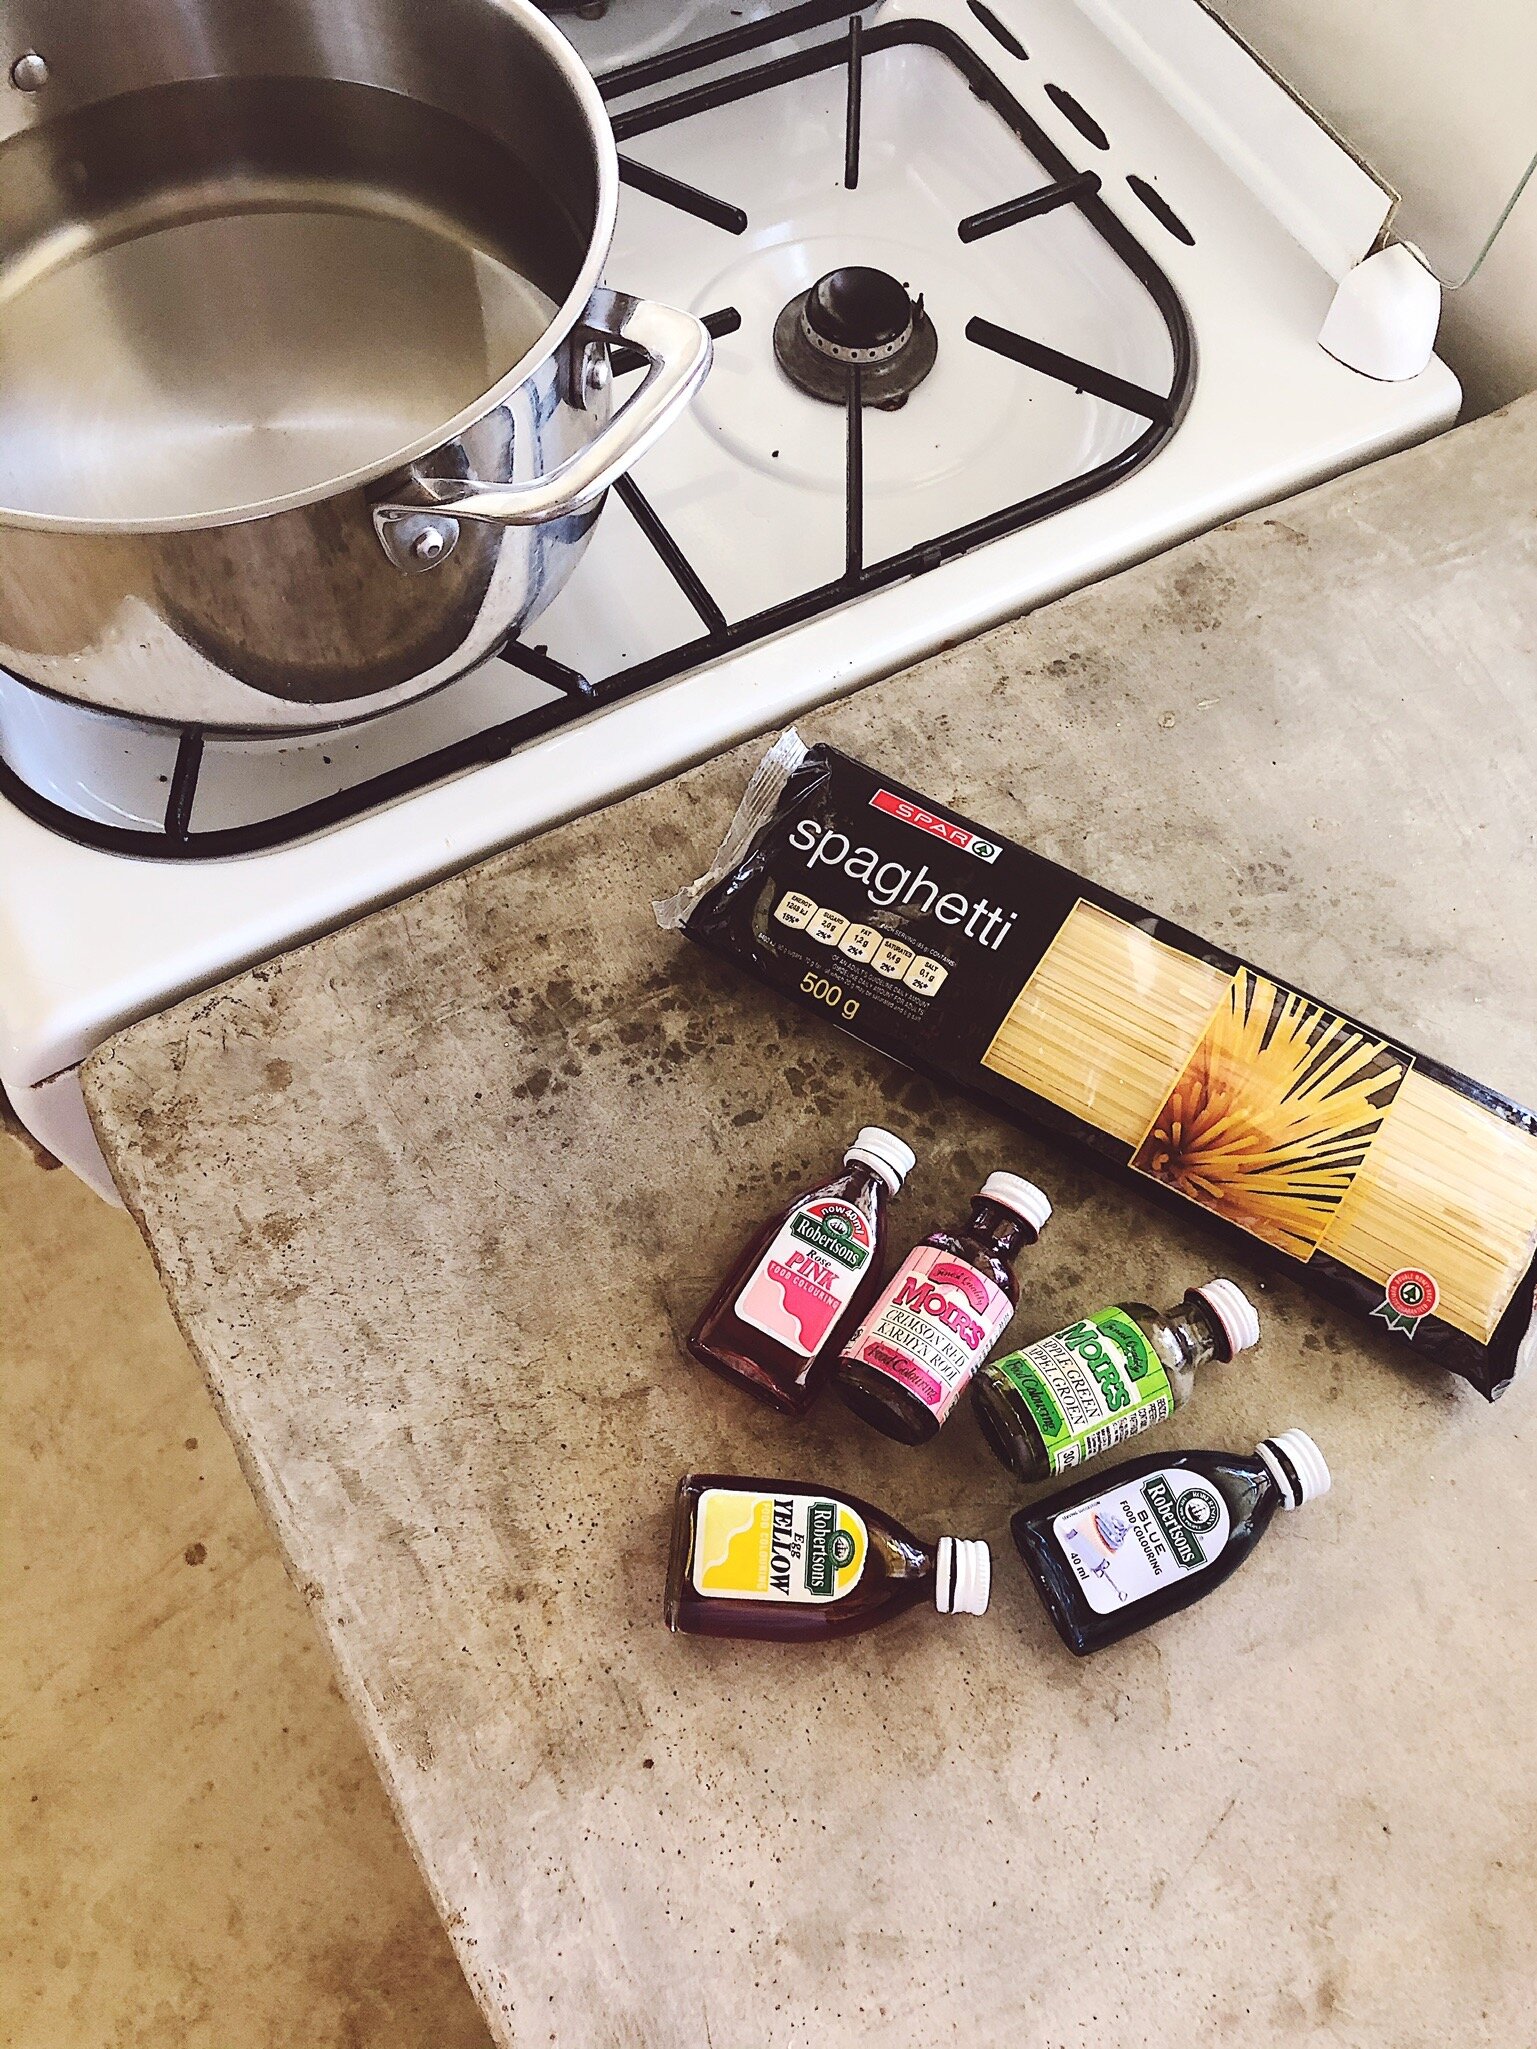
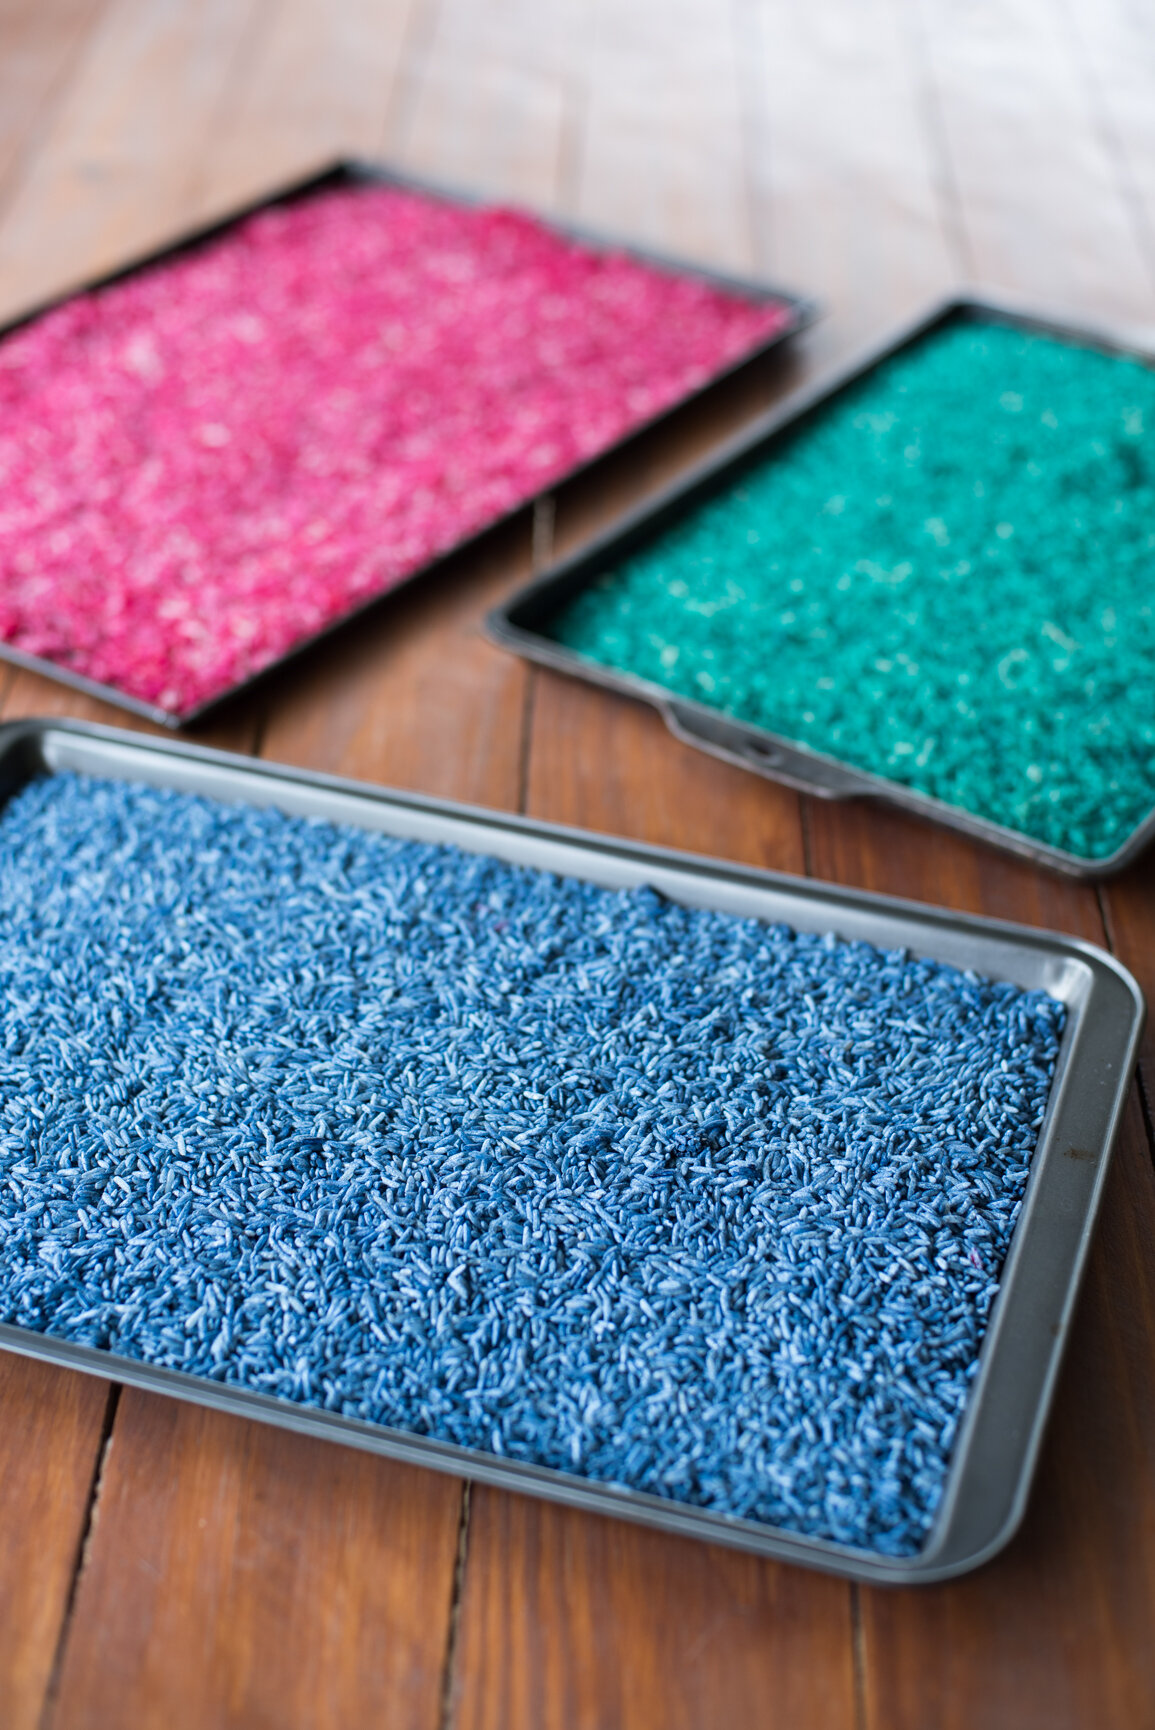
There are two ways of going about this. You can do what I did (which was awfully time consuming) and boil separate batches of water for each colour you want to make. I thought this would make the colours more vibrant, but I’ve been told the other method does indeed work just as well.

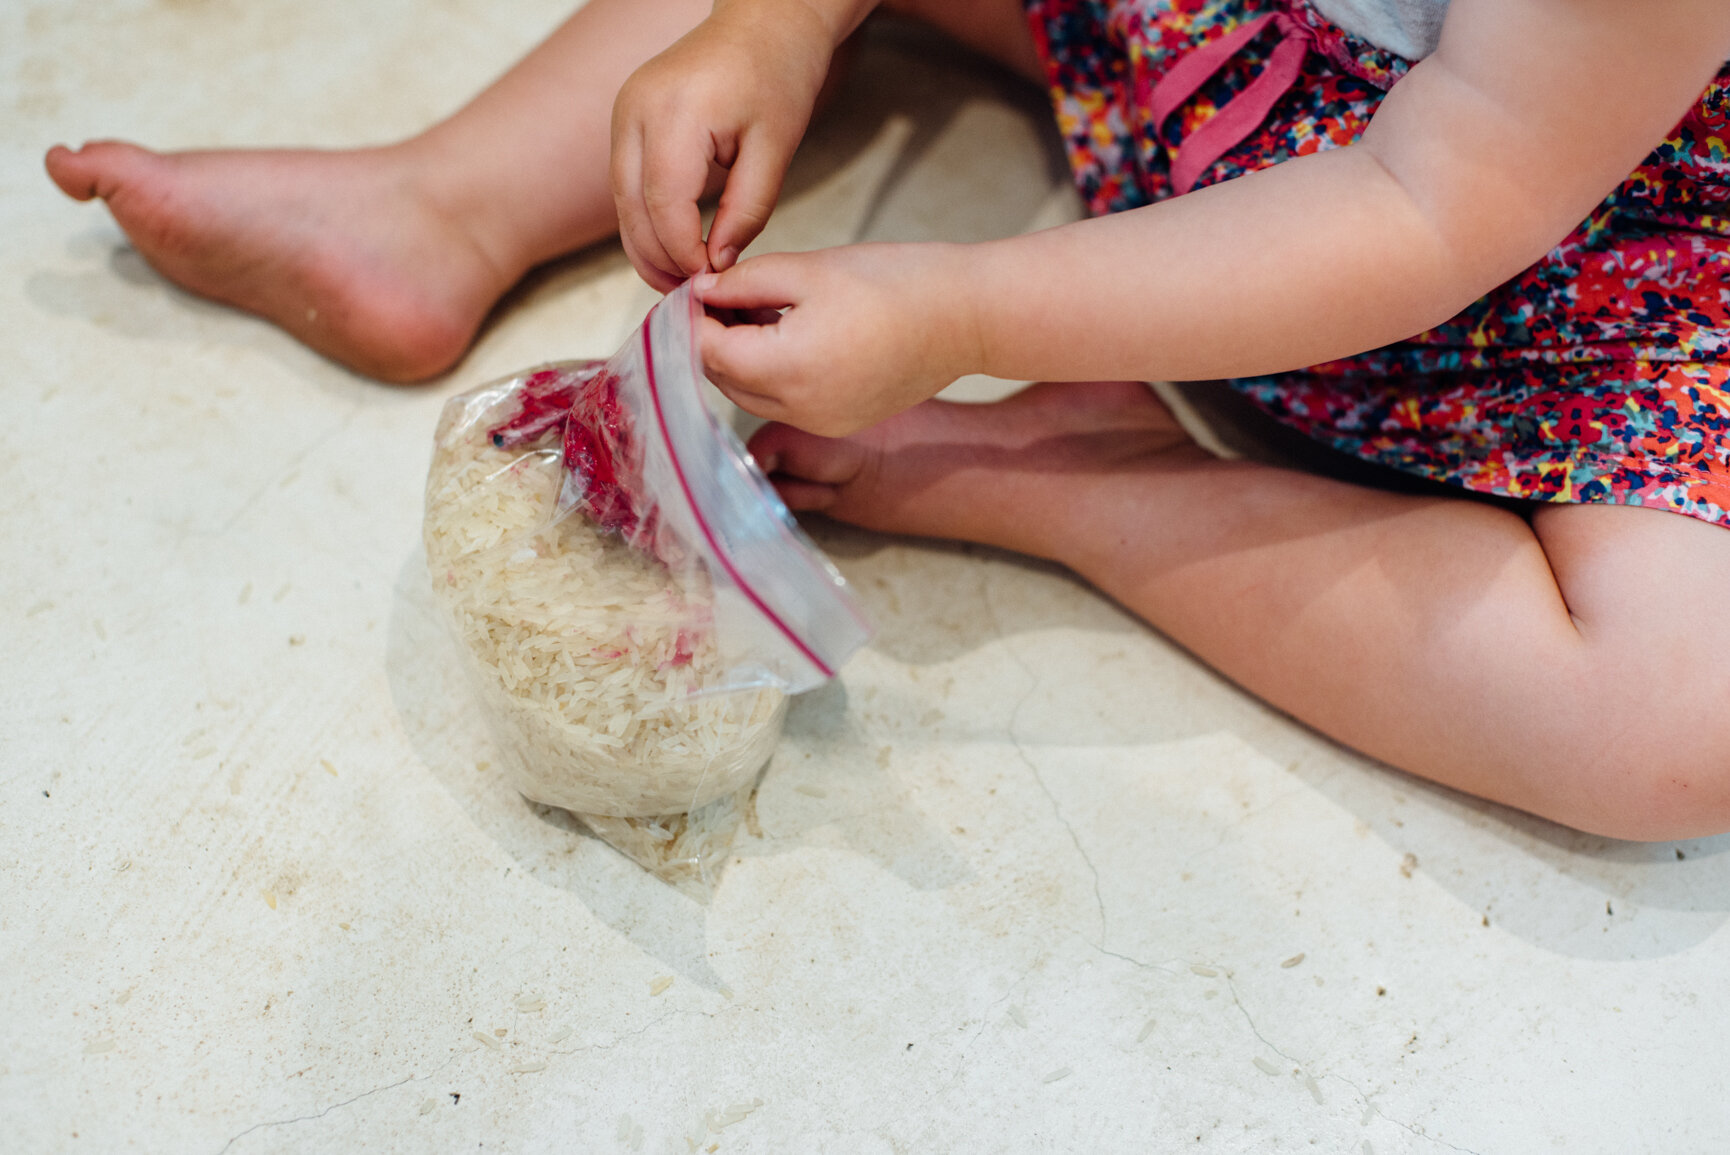
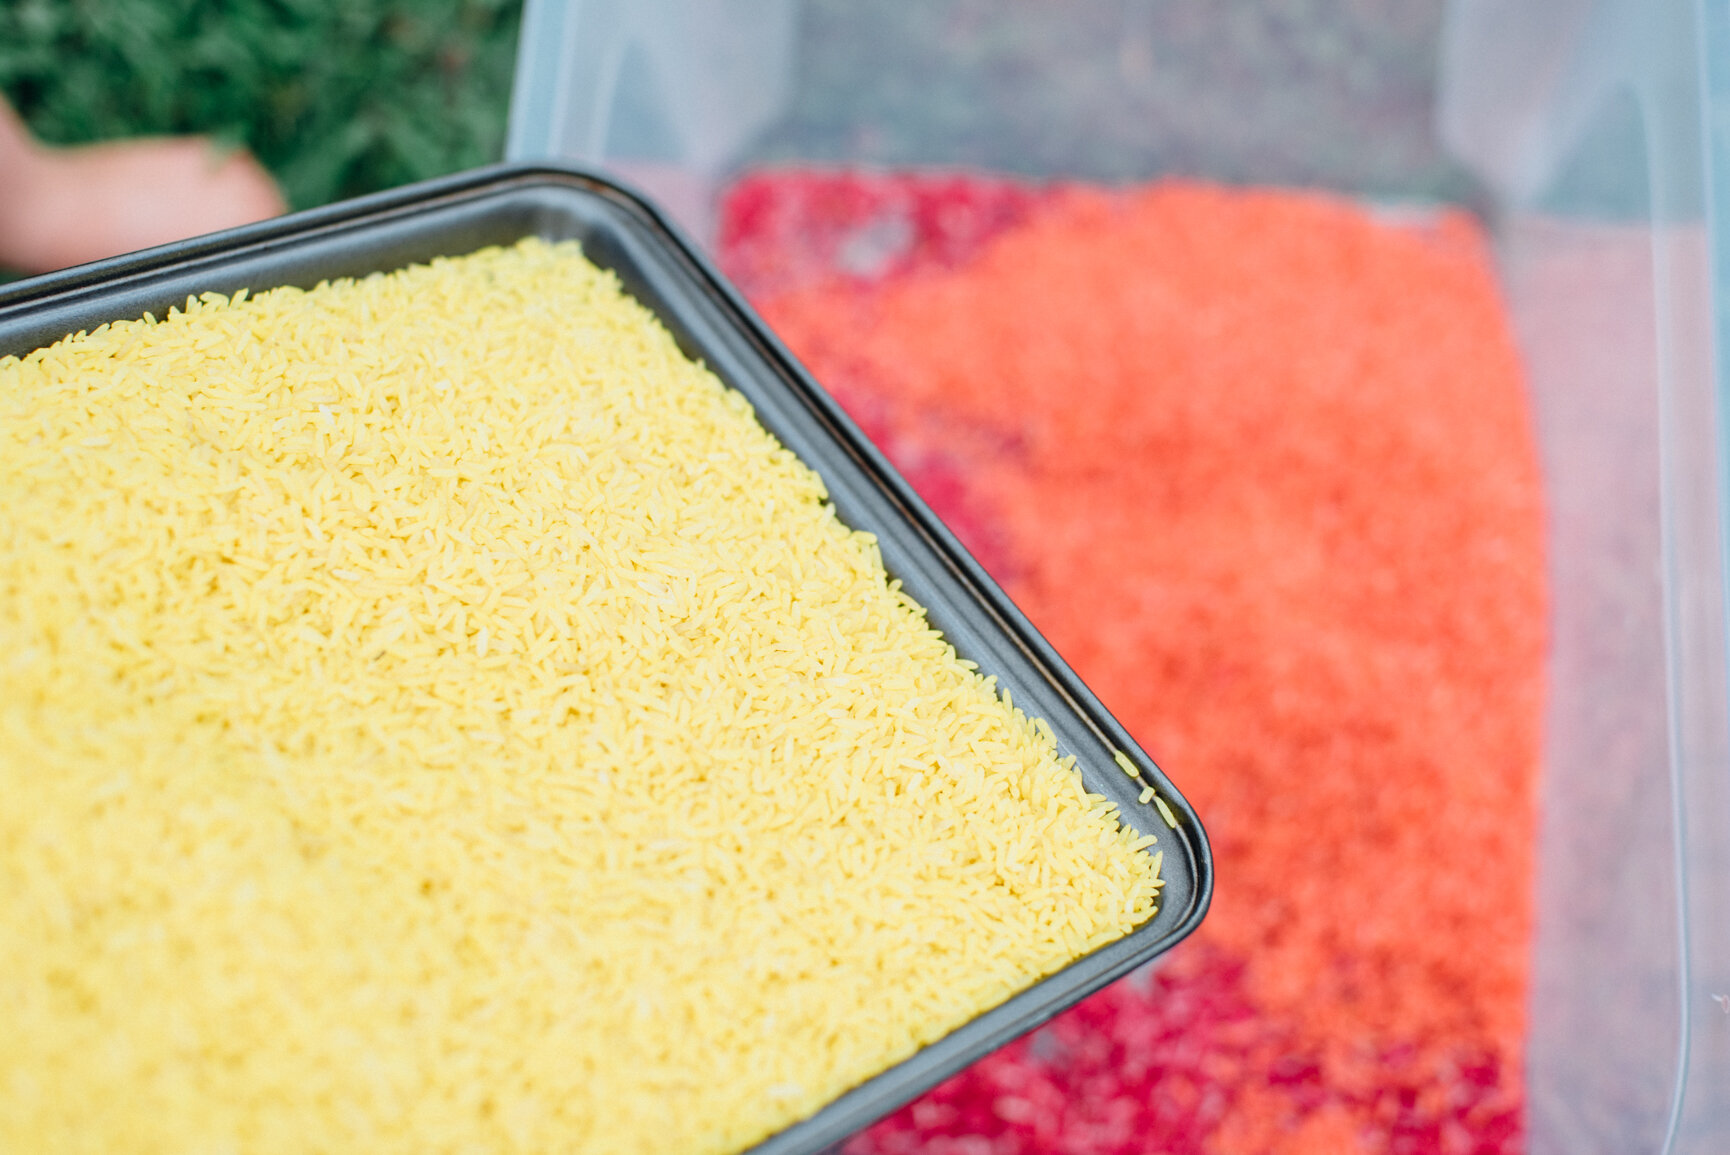
Bring water to boil with a good dollop of oil (use more than you think you’ll need to keep the pasta nice and slimey) and then add your pasta and food colouring. Or cook your pasta first and then use separate plastics bags to make separate colours. Allow to cool and then place in a container of sorts. I used a big plastic box.

Some tips:

  • Rinse the pasta in vinegar after cooking to help preserve it for a few days (although I’m not sure if you should rinse it before putting the food colouring in…as I haven’t tried this step yet).

  • Dry it out a bit in the sun after playing, to help preserve it for a few more days.

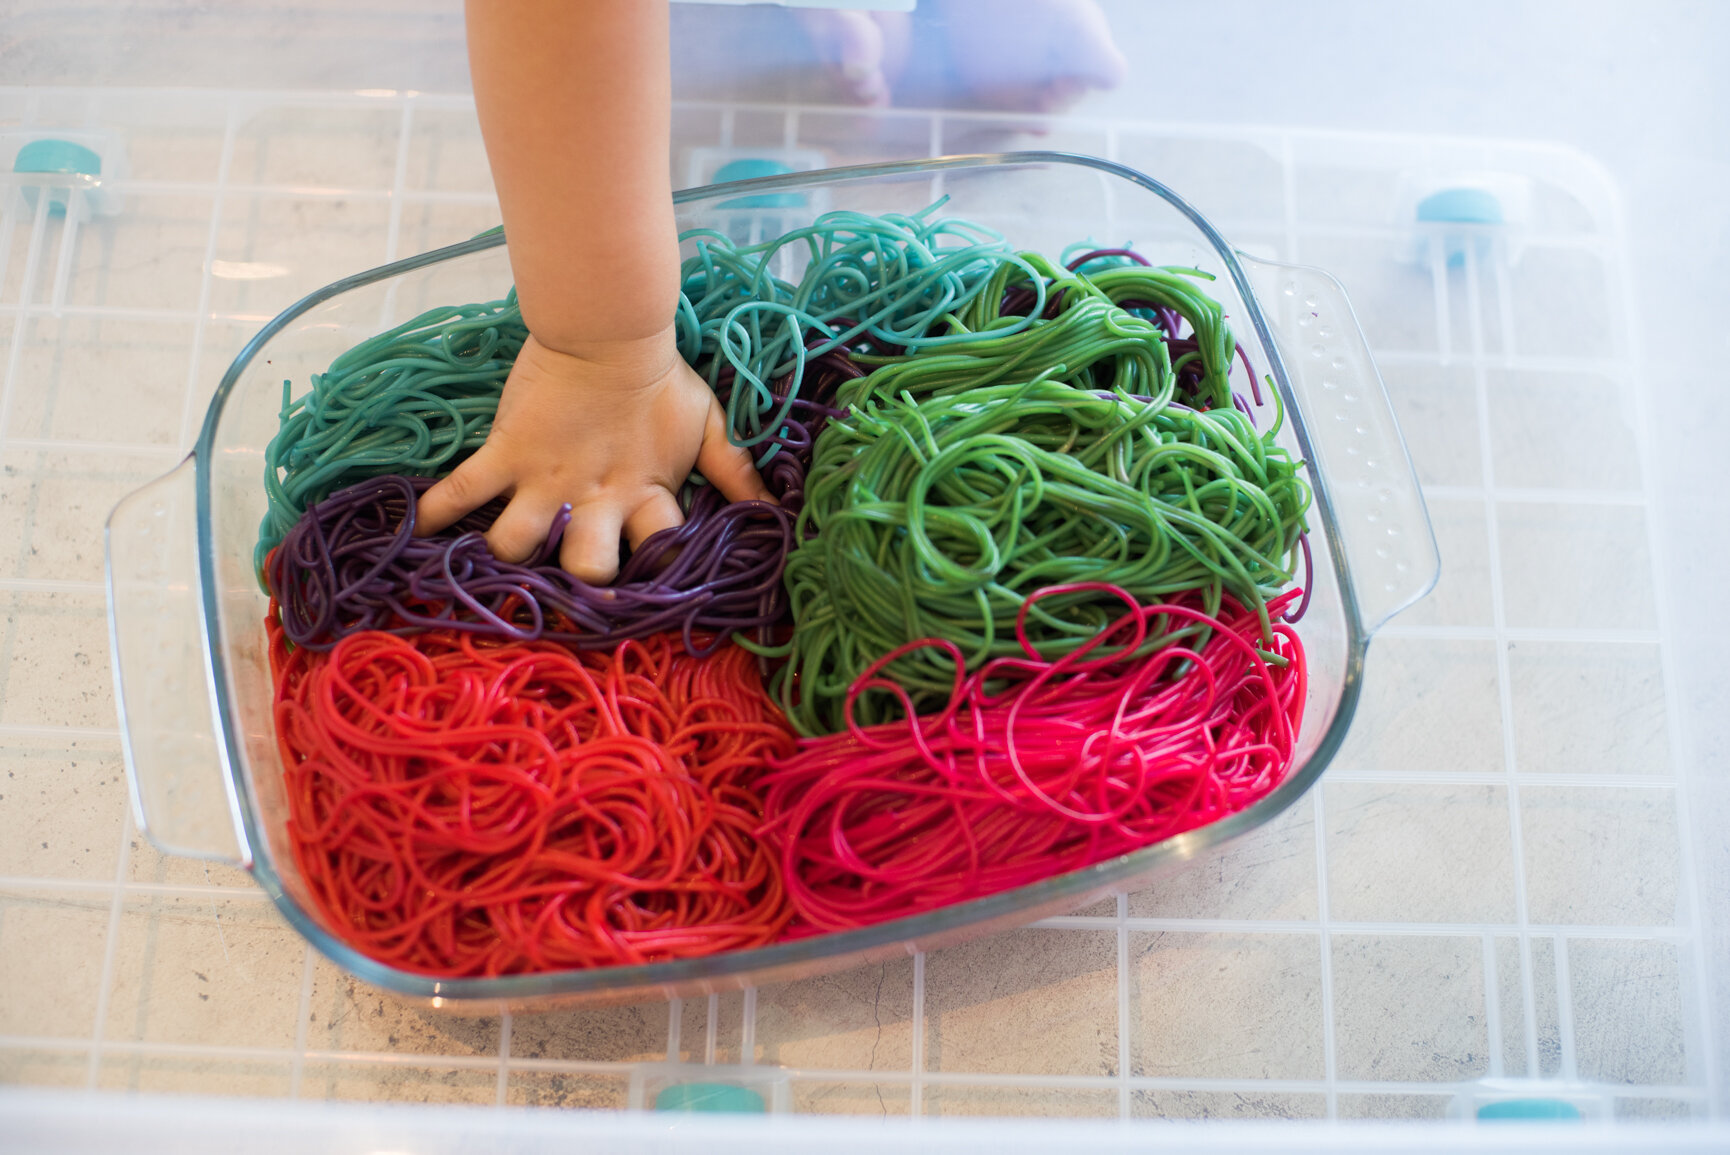
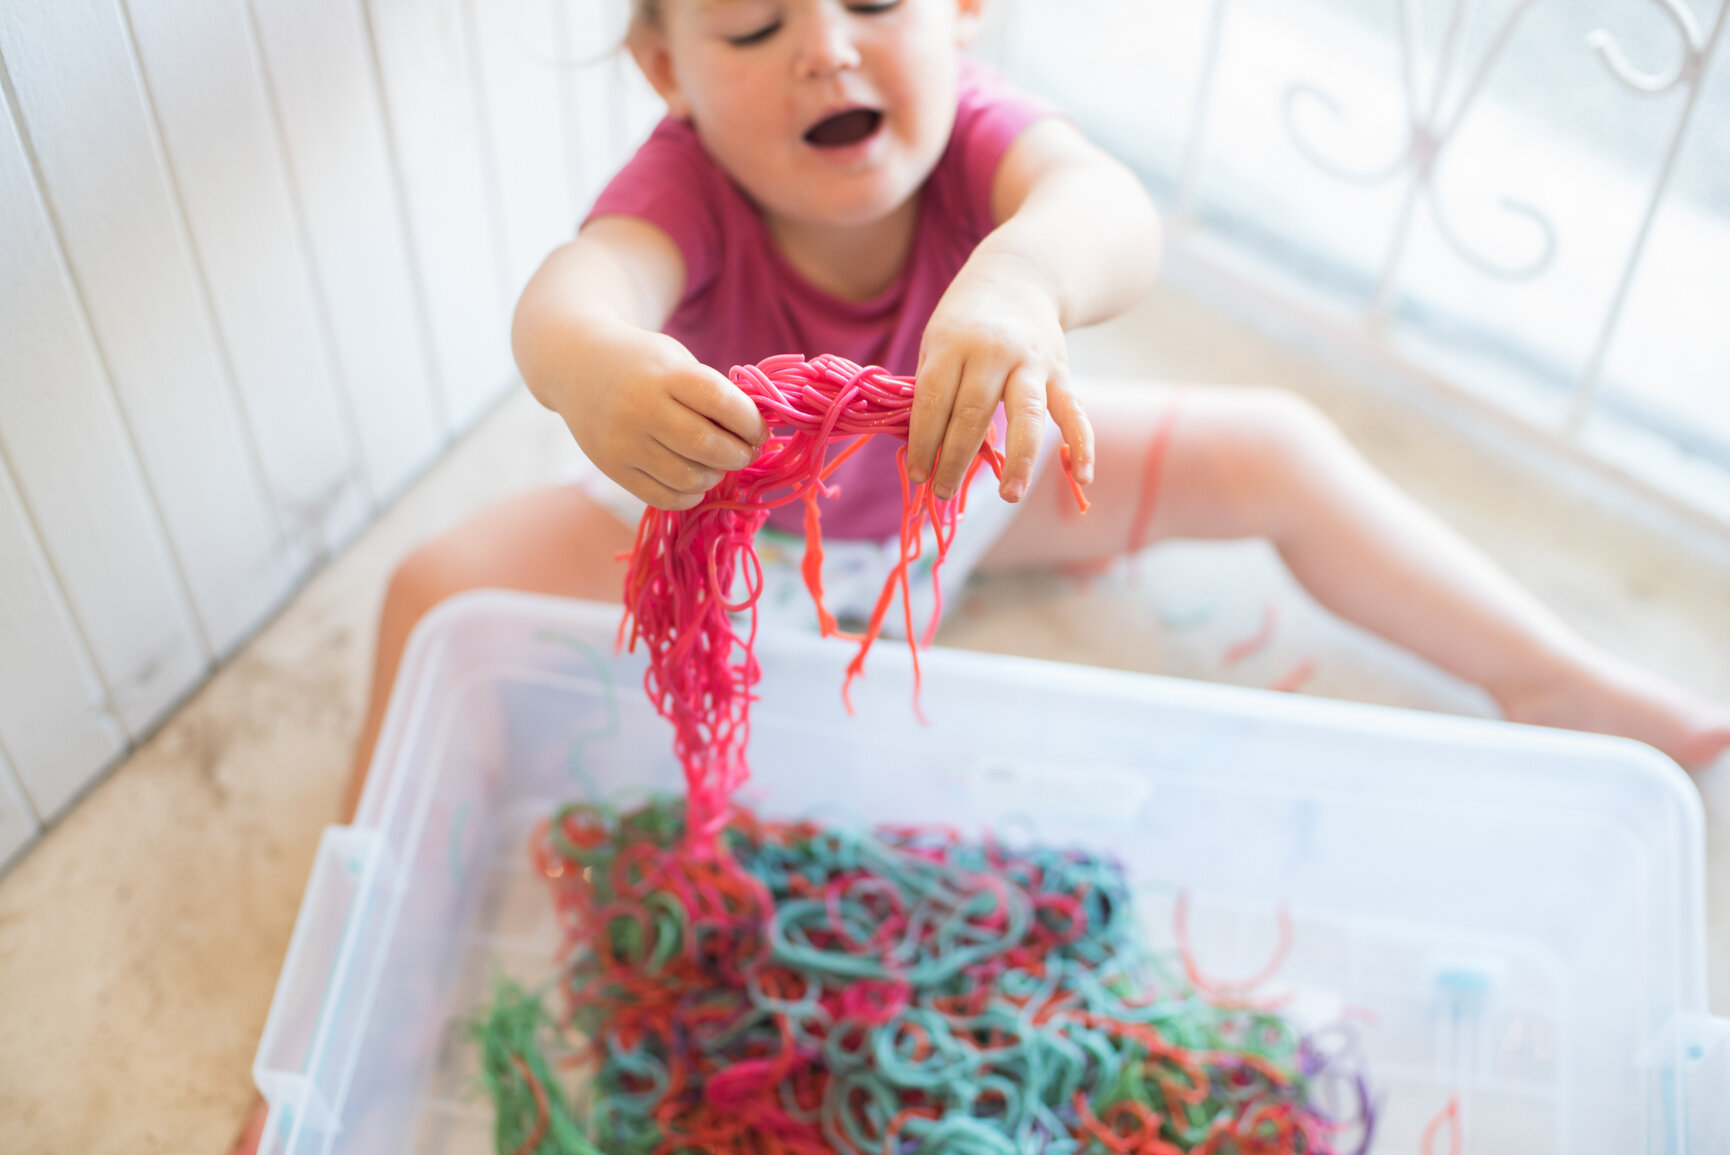
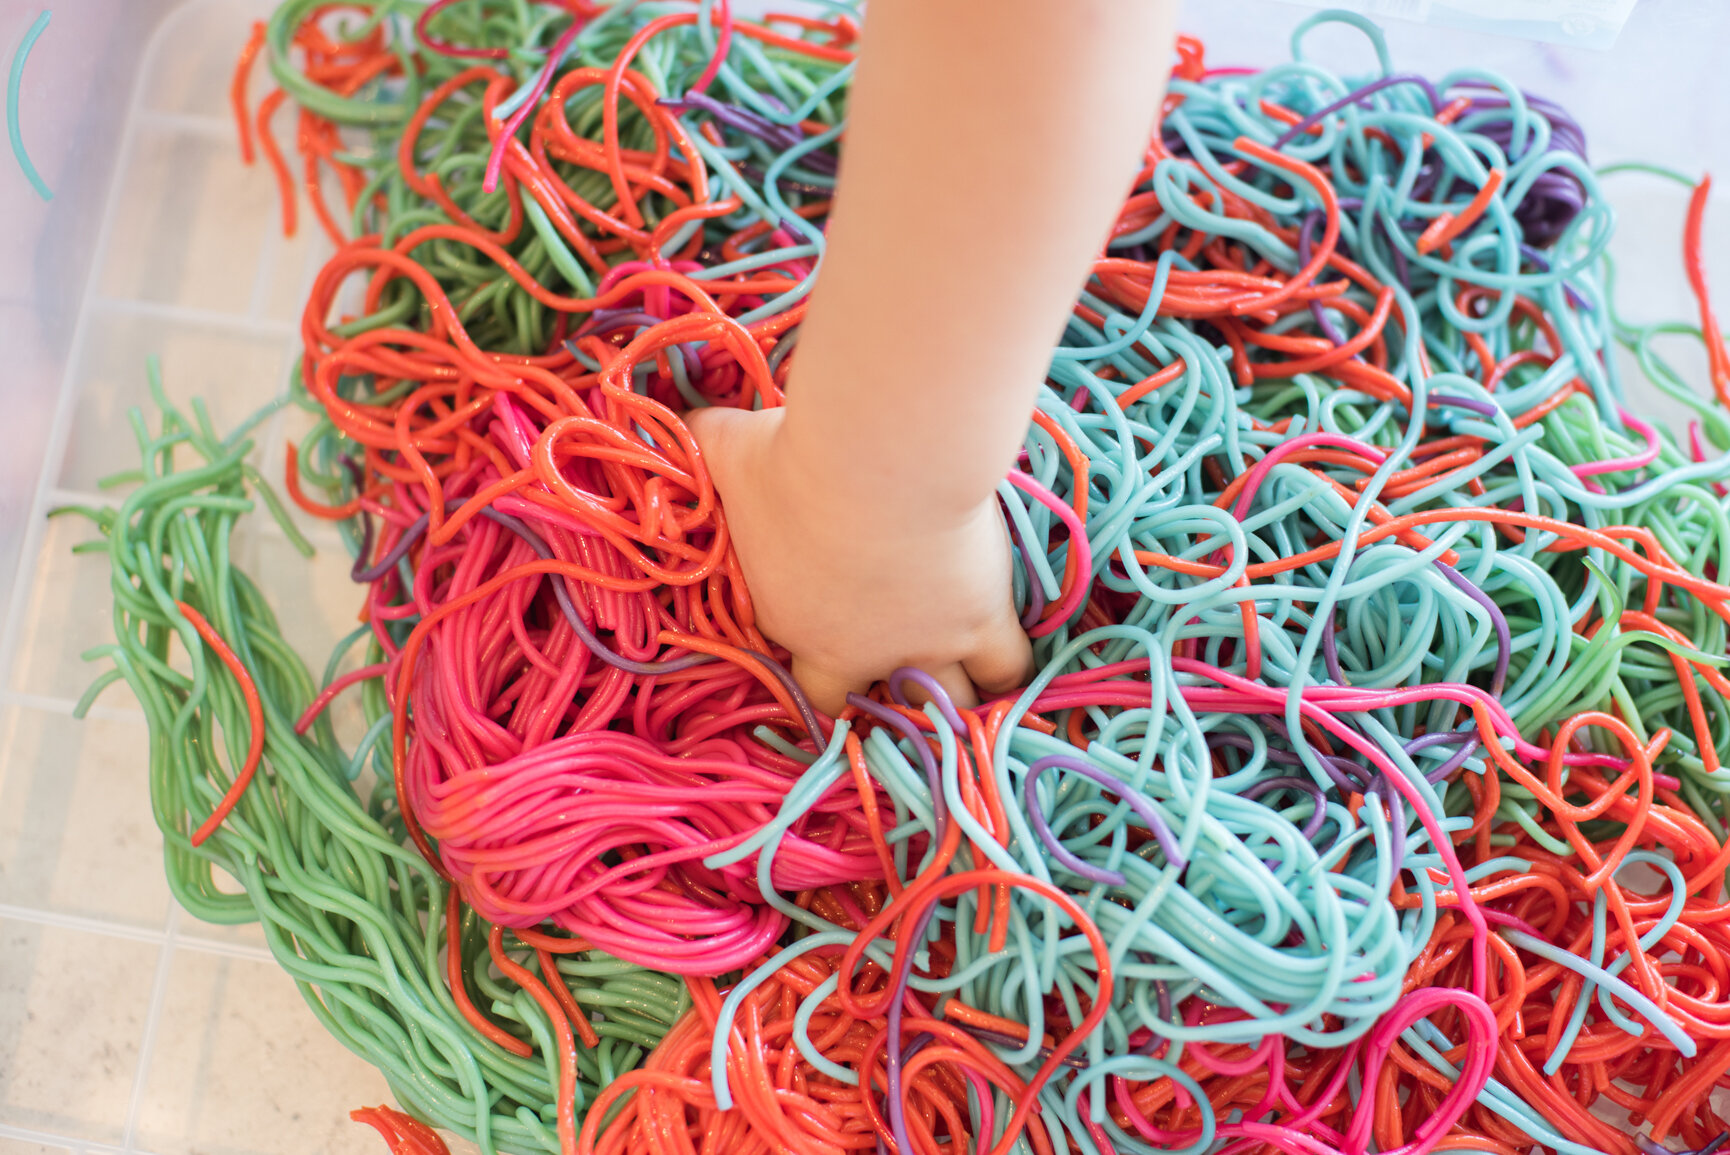
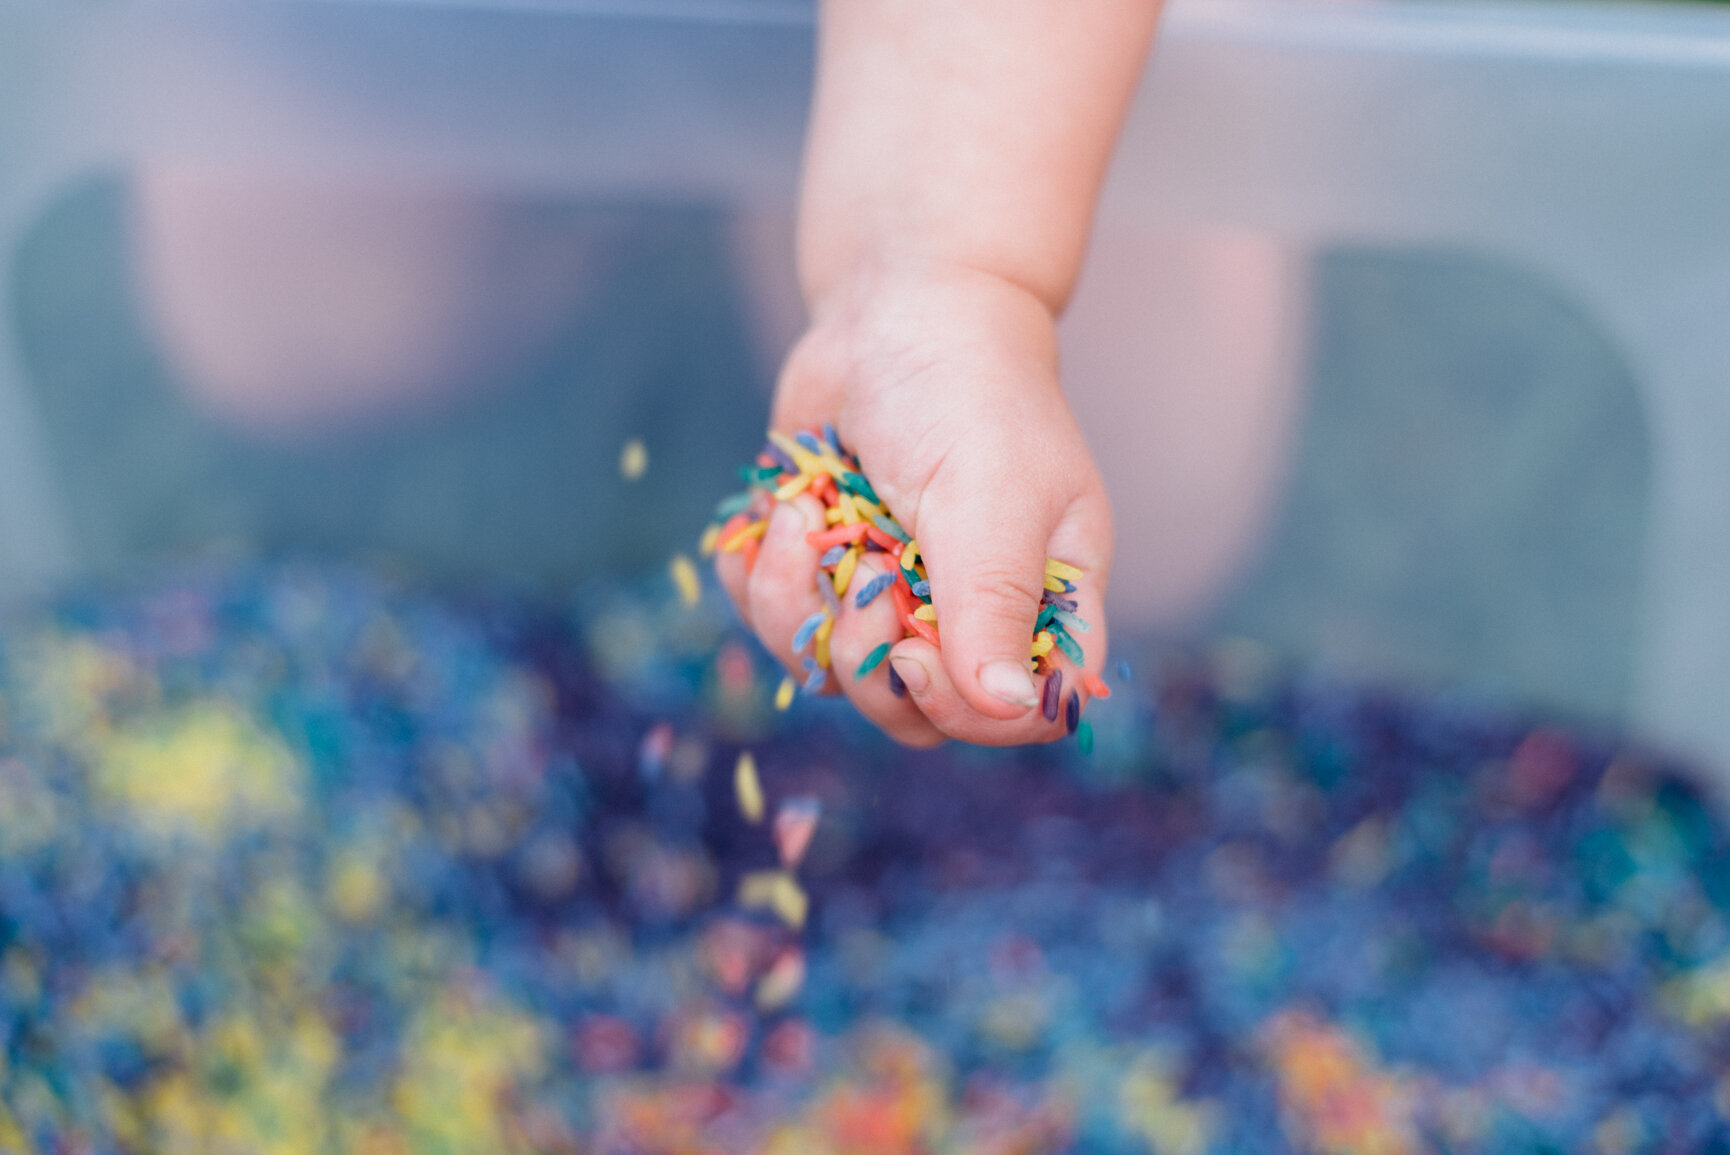
Just bare in mind how squishy the pasta can get. I left Everly for a few minutes and came back to pasta pieces squashed into the mat by our front door…this wasn’t fun to clean up at all. So best to set up a nice big area to play on that you can clean up afterwards. Or better yet, set it up outside where the dogs can help ‘clean’ up the mess once you’re all done.

How to make Rainbow Spaghetti Sensory Activity for Kids (14 of 19).jpg

Happy playing friends!


Here are more fun activities to do with your little ones:

How to make your own Rainbow Rice - An easy & fun sensory Activity for Toddlers

How to make Rianbow Rice South Africa Sensory Activity for Toddlers-01.png

If you’ve even just spent 1 minute on Pinterest and searched for toddler activities, sensory bins are just about the first things that pop up. Basically, a sensory bin is a container of sorts that you put different things into that stimulate your little ones senses. One that has always intrigued me, and one that I have been wanting to do myself for AGES is a Rainbow Rice sensory bin. I finally got around to doing this, and it’s one of Everly’s favourite things to play with. And the best part, she doesn’t need me to help with anything and so it encourages independent play (click here for a blog post on 5 more activities that encourage independent play).

I had to do a quick google as to why exactly sensory play is so important, and I’m sharing some info I found on the CreativePlayUk site:

1. Sensory play builds nerve connections within the developing brain’s neural pathways, which trigger a child’s inclination for and ability in competing more complex learning tasks

2. Sensory play supports language development, cognitive growth, motor skills, problem solving skills, and social interaction

3. Sensory play aids in developing and enhancing memory functioning

4. Sensory play is great for calming an anxious or frustrated child

5. Sensory play helps children learn vitally important sensory attributes (hot, cold, sticky, dry, etc)

This sensory bin will trigger your toddlers sense of touch (the rice), smell (if you choose to use essential oils), sight (the bright colours) & sound (the rice makes the most wonderful sound when poured) making this a wonderful activity for just about any toddler.

Rainbow Rice Sensory Bin How To CityGirlSearching Blog (27 of 27).jpg

Now, a word of caution if you’re going to attempt making this WITH your toddler. There IS going to be mess (probably A LOT!), and there will probably also be tears. Take a deep breath, relax a little, and rather enjoy the process. And, in saying that, no judgement if you stop half way, put your toddler to bed for their nap, and use the quiet time to finish making the rice in peace and quiet!

Most of the instructions I found online talked about using Vinegar and food colouring, but I had these acrylic paints lying around and decided to give them a bash and they worked out soooo well. I also only used 1 plastic ziplock bag for all the colours, and I just washed it in-between uses so try and now mix the colours too much.

What you need:

  • Rice (I bought the cheapest, biggest bag of rice I could find…buy as much rice as you’d like to fill your container)

  • Airtight Plastic container (i.e. something with a lid). Looking back I wish I had bought a container that;s sides weren’t as high, because Everly can’t actually sit on the floor and reach inside it, she has to stand or sit on her knees…not a huge train-smash but it does mean she makes more mess…but this is probably just me and my OCD tendencies when it comes to cleaning up). In saying all of this, she actually likes to sit INSIDE the container too…so I’m glad I bought one as big as I did. But it does mean you need a lot of rice to make it worth the effort.

  • Ziplock bag(s)

  • Acrylic Paints (or food colouring, but I think gel food colouring would work the best if you go the food colouring route)

  • Essential Oil (optional…but does give the rice a nice smell, especially as my paint smell was rather strong…make sure you choose something you actually like the smell of. I just used what I had in my cupboard and I am now 100% sick of smelling this blend… I would have preferred a lemon grass or lavender).

  • A willing helper (OPTIONAL!!! haha)

There is no exact measurements for this…I started with a measuring cup, but it was too big for my little bag and ended up just making a mess. So in the end I just poured the rice directly from it’s bag into the ziplock bag. I needed an extra pair of hands for this though, and luckily had our Nanny nearby for this step.

Pour about 2-3 cups of rice into your ziplock bag, squirt in some paint (add white to your colours to change the shade a bit), add a few drops of essential oil if you’re using any and seal the bag.

Then squish the bag and the paint together until it’s all mixed in well.

Instead of using an oven to dry out the rice, I just put the different colours onto baking trays and left them outside for a couple of hours. I think the acrylic paint was the key to making sure the rice dried out really well without having to use an oven.

Then, get your toddler involved (if they haven’t already been a part of the process) to empty the trays into your container. I would suggest moving to the grass were cleanup won’t be as much of a worry. Although, I now put a big blanket under the box so that I can put all the rice back once she’s finished playing, otherwise there would be an awful lot of coloured rice all over my garden. And I’m pretty sure the paint would wash off the rice leaving pools of red and yellow all over the show. Not sure my grass would like that very much ;)

And then leave them to play and mix!

I change things up every now and again by adding plastic measuring cups and spoons (toddlers LOVE pouring activities), and then swop these out for plastic animals and other toys that she has fun burying and looking for. There really are so many different things you can do with the rice, and even I have spent my fair share of time pouring rice into and out of a cup…it’s soooo relaxing!

So there you go. And easy and fun way to keep your little one entertained. Please do let me know if you make this yourself, and post some photos (tag me in them over on Instagram!) I’d love to see your little one’s enjoying their own rainbow rice.

Toddler Activities - Quick & Easy activities that encourage independent play

Toddler Activities to encourage independant play-01.png

I’m sure we’ve all spent our fair share of time on Pinterest, scouring through millions of different blog posts with ideas for keeping toddlers entertained…and if you’re anything like me you’ll also be looking for activities that you don’t actually have to be 100% involved in because #thatbusymomlife.

Today I’m sharing some of my favourite activities that encourage independent play, which I truly believe is the best sort of play your little one can do (and that’s not just because it might give mom 5 minutes to actually drink a hot cup of coffee for once). What often happens with us parents, is we end up ‘playing for’ our children, showing them how toys should be played with, and how things work, thereby taking away all the creative fun and self teaching that automatically happens when you leave a child to figure out a toy/activity for themselves. I find this to especially be the case with a puzzle…I found it SO hard not to get involved when I first gave Everly a puzzle, and I found it even harder to step back and not tell her she was placing the pieces in the wrong places. It’s such a good skill for us to learn as parents, I’d say almost as important as the skill of independent play that we want our kids to learn and enjoy.

Independent play doesn’t always come naturally to every child, and is a learned behaviour that some kids take to almost instantly, and others need more help along the way. So, to help you, here are some of our favourite activities that lend themselves really well to independent play:

  1. Play Dough!

We have tried all sorts of brands (including homemade variations) of playdough, and the one i recommend highly is the Giotto be-bè play dough (you can find it on Takealot) as it’s got the nicest consistency, and doesn’t have any weird smell. It’s definitely pricier than most of the other brands, but I think the quality is 100% worth it. I bought Everly a little PlayDoh tool set a while ago, and she just loves all the little bits and pieces, and uses them with all the play dough she owns. She also uses the knife as a spoon when making tea ;)

2. Chalk

This has got to be one of the best activities I’ve set up for Everly. As you can see from these photos, she’s grown up a lot since I took them, but she still plays with her chalk all the time. She has just as much fun with a wet cloth, wiping & cleaning the boards, as she does actually drawing. I bought these magnetic chalk boards from the Crazy Store, and then use a little plastic bucket to store her chalk and eraser in.

The best part about chalk…it can easily be wiped off of surfaces, so if you have a toddler who is a bit too spirited when it comes to the walls in the house, chalk is a dream to clean up. In fact, I actually only had chalk in the house for Everly to draw with right up until she was about 18 months old.

3. Water Play

There are MILLIONS of different variations of water play, but Everly is pretty content with a bucket of water, a brush, and a cloth. Then I sometimes add some hand soap for bubbles, and often chuck in random bits and pieces that float/sink that she has fun ‘painting’ and cleaning. This activity is great for the warmer weather. Just make sure to lather on sunscreen and pop a hat on during the hottest times of the day.

I also bought a pack of plastic animals from the Crazy Store, which she has fun playing in the dirt with them and then cleaning them in the water and bubbles.

Everly & Aarom Augusy 2019 (1 of 32).jpg

When in doubt, go outside.

Kids don’t actually need any toys or planned activities to have fun. It might take a bit longer if your toddler is used to mommy or daddy always being around to play with, but the more opportunities you give them to be bored, the quicker they will learn to make up their own games and fun.

I have always left Everly to her own devices (always making sure she is in a safe space to explore and that I am close enough to hear her if she get’s into any trouble) and more so now that she has a little brother that needs me a lot more right now. I find that when I’m not hovering around (or in sight of her) I can literally see her brain clogs whirring as she potters around the garden planning her next adventure. The moment she sees me is when suddenly ‘Mommmm’ and it’s like she can’t play without me. But, when I’m not around (I often watch her from a window so make sure she’s happy and safe) it’s just her and her imagination, and it’s the most amazing thing to watch.

CGS_0955.jpg

In our home, there are always a few ‘toys’ in reach wherever she is. And I say ‘toys’ because most of the things aren’t your usual toys but rather household items she likes playing with.

For when she’s outside, she can always help herself to her wooden trolley, her gardening tools and a bucket with plastic animals, lids & cups as well as a box of Duplo. We are still working on the whole ‘pack away when you’re finished’ rule, but having less junk lying around means she has to work a little harder to make up her own games and activities.

I keep the Duplo in a big plastic container, and then dump out the contents onto a mat (our favourite play mat is this gorgeous big Love Baby one I won in a giveaway on Instagram last year. It’s HUGE and fits both kids and their toys, but being so big it is a bit of a pain to store. So I sort of fold it & shove it onto the bottom shelf of an old metal gardening set of shelves we use to also keep our boots on.

Duplo Activity for Toddlers (1 of 1).jpg

Inside the house, she has a shelf in her room with her books, and then another shelf with wooden toys always on display. She can take these out to play whenever she wants to, but she doesn’t generally take them out of her room (yay for having less things to pack away around the house). When thinking about her toddler room (this came about when we moved her from her cot into a toddler bed…click here to read the full post) I really liked the Montessori approach of having things open for the toddler to be able to explore and help themselves to. This can be very scary for the parent, because one does assume this means your toddler will be up in the middle of the night playing with all their toys, just because they can, but we have yet to have that problem. When she wakes up early, she is now able to entertain herself by reading books or playing, and isn’t that the goal? Well, not the waking up early part, but the part about them being able to entertain themselves.

I’ll write a whole post on her full room set up after we converted her cot into a bed, but here are a few photos so you can see her toy set up. Now that she is in an actual bed (we converted her cot into a toddler bed at 16 months…just before Aaron was born) and then she moved into an actual bed (the one you can see here in the photo above) at about 20 months. Once she had gotten used to the toddler bed, the transition to the big bed was really quick and easy. Some people go straight to a big bed from a cot, but as I had bought a cot that converted into a toddler bed, I wanted to at least get a little use of it before her brother needed it as a cot.

In the lounge, I have just set up a little space for her with one or two wooden toys, her table and chairs, and her playdough. I’ll share some photos of this Montessori inspired space soon.

So there you have it, a few ideas of activities that encourage independent play. I hope you enjoyed this post and found it useful, let me know in the comments below if there are any activities your little ones enjoy doing by themselves.