Canon Pixma G3411 Refillable Ink Tank Printer for Homeschool, Photos & Home office Use - A Review

Canon Pixma Ink Tan Printer Review refillable ink printer for homeschool office photos south africa-01.png

I have been on the lookout for a new printer for ages, something that is easy & (ideally) cheap to refill, and that does really good quality printing. I need it to be able to print worksheets and other fun activity pages for my little ones, and I also need it to be able to print really good quality photographs as we live in the middle of nowhere and getting photos printed is such a pain.

If you Google eco-tank printer, chances are the Epson Eco-Tanks will pop up. And while I was very tempted by them (and they have loads of great reviews!) unless you are going for the high end printer, it seems the photo quality isn’t that great. This was a big one for me as I want to be able to print photographs for scrapbooks, baby books and for frames around the house. And this is where the Canon Pixma comes in.

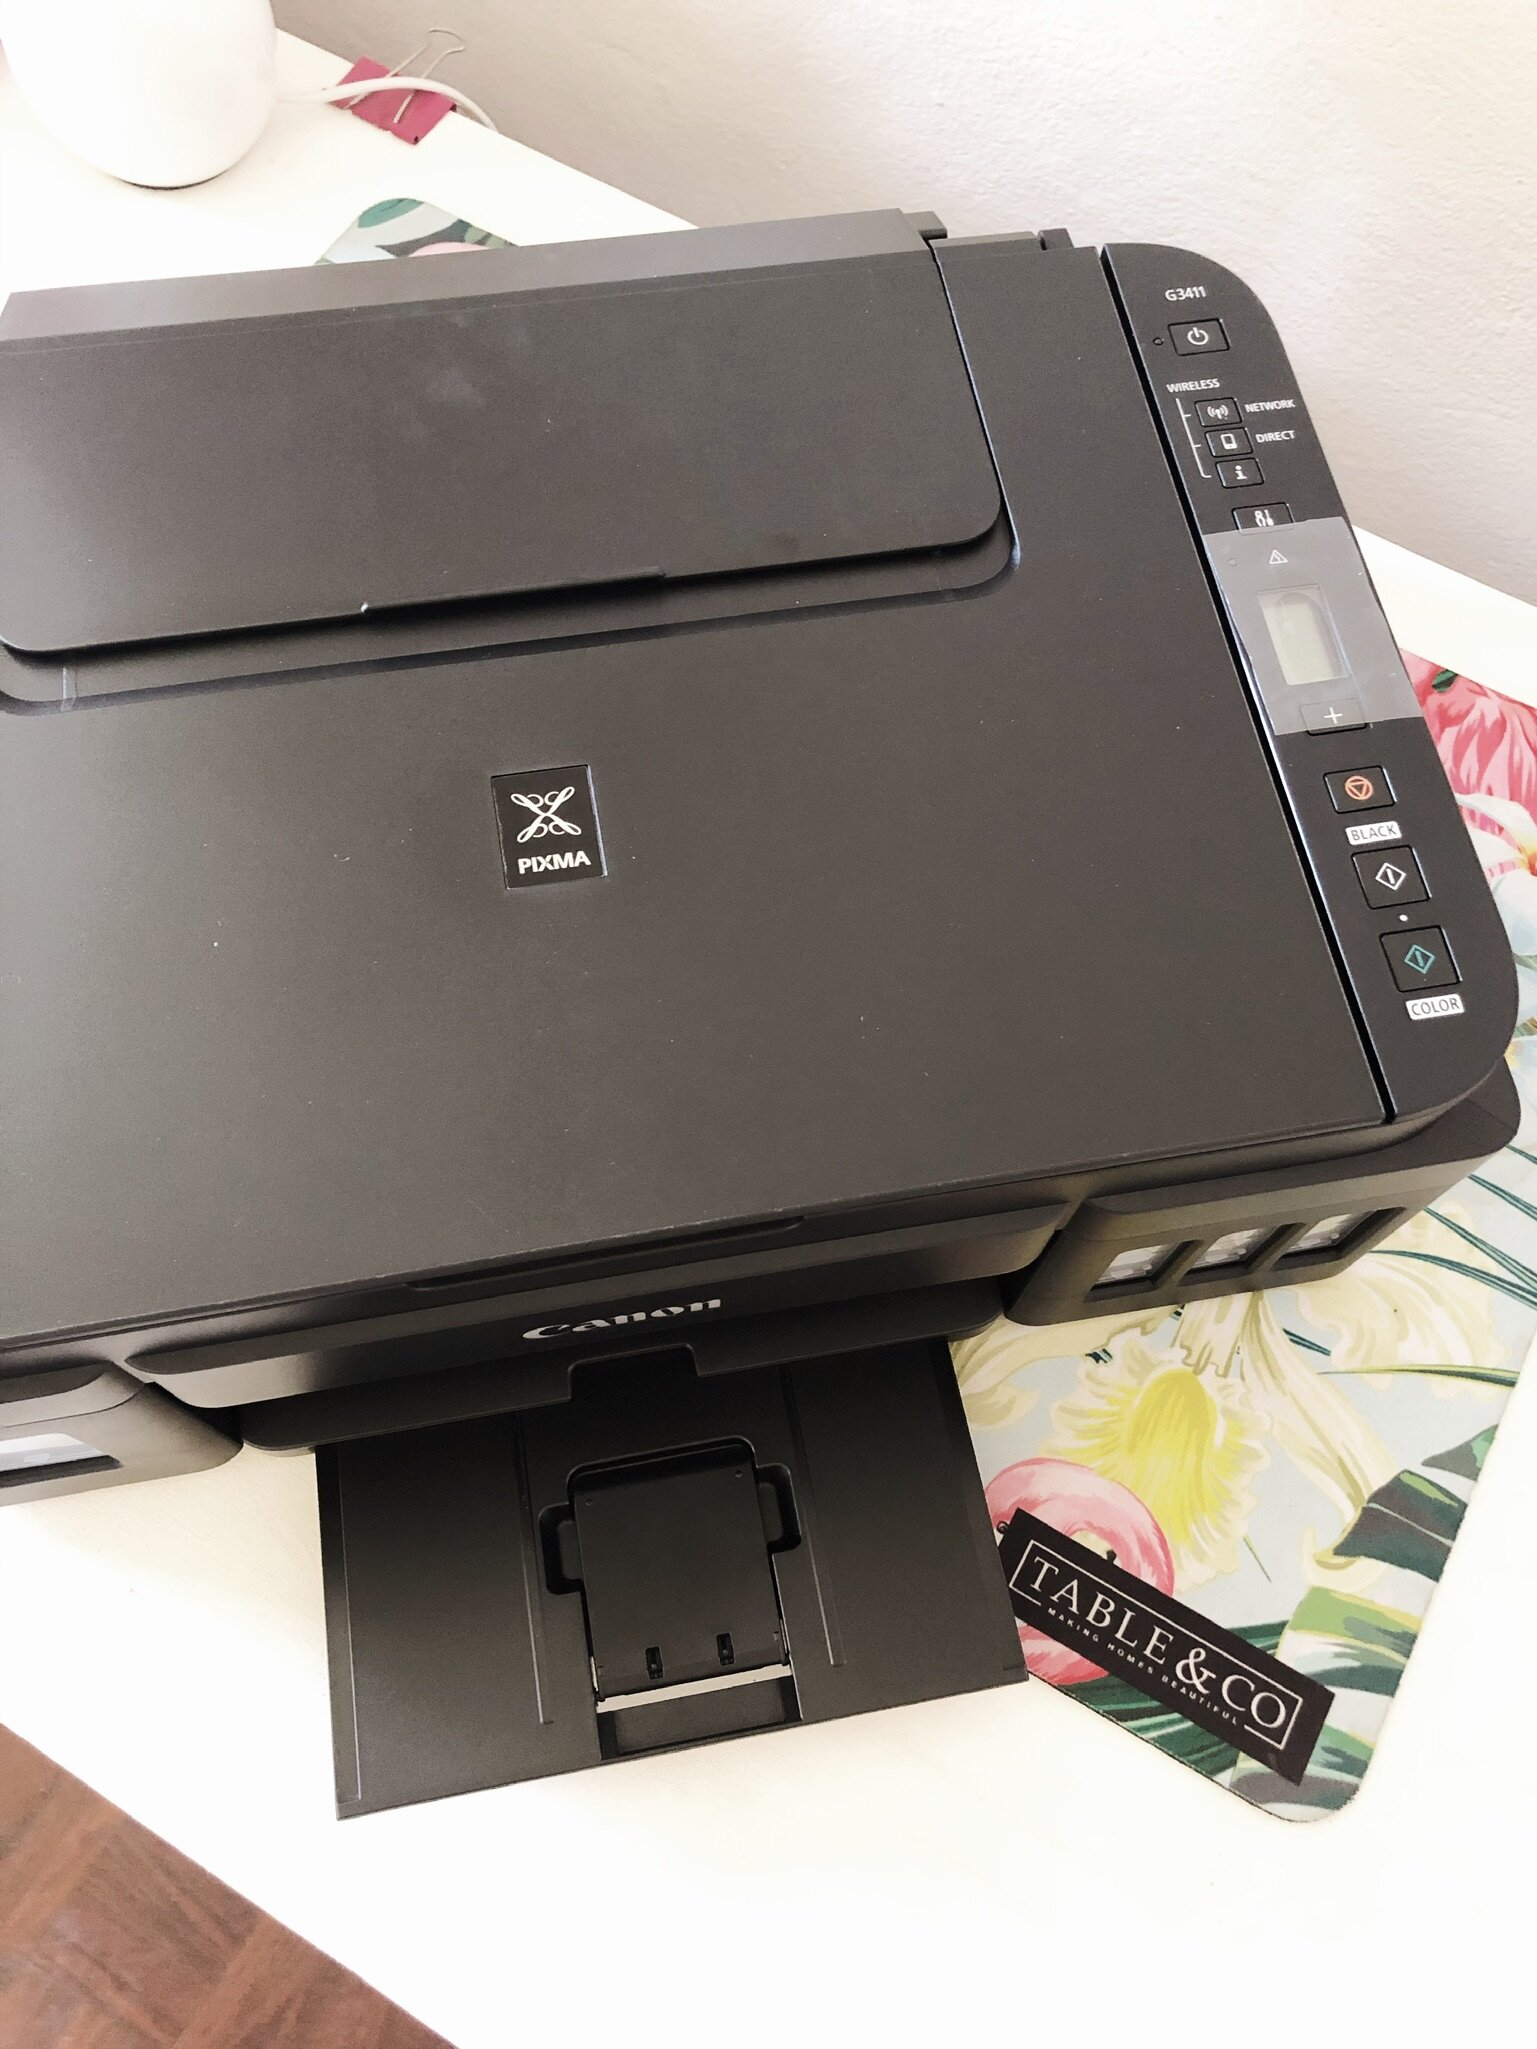
The one I eventually chose is the G3411…it does all your basic printery things (scan, copy & print), has wifi connectivity (I print straight from my iPhone and from my Mac…this has been a little tricky especially from my Mac because downloading drivers for a printer isn’t as straightforward as a PC but it’s doable!) and the best part is that the ink is refillable.
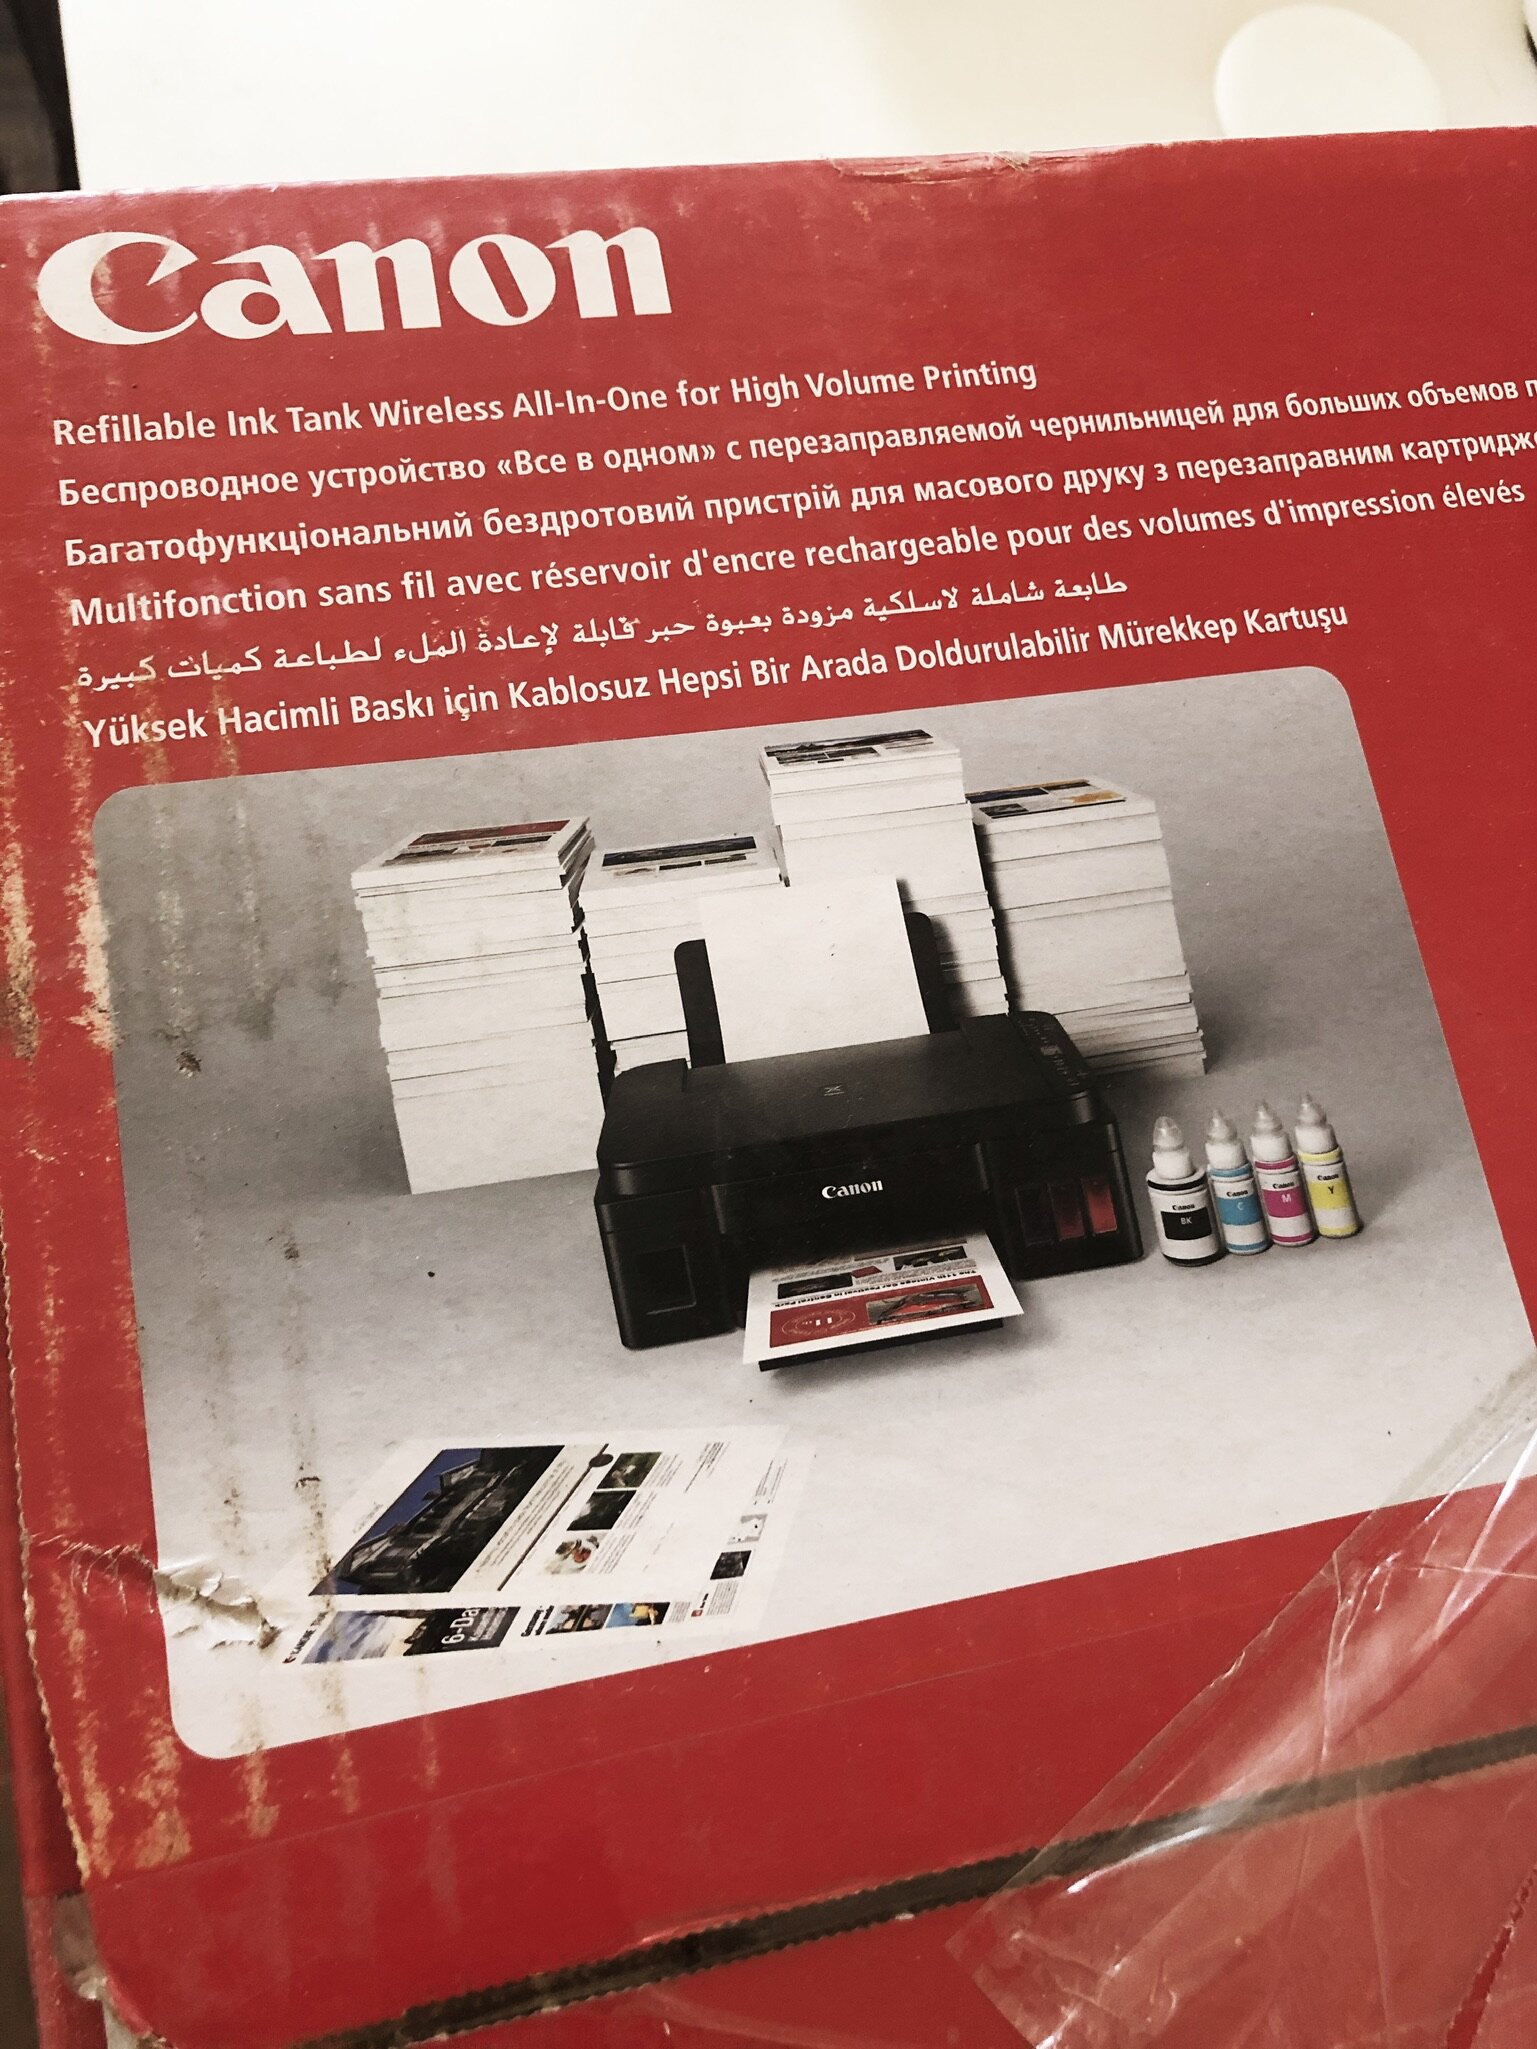
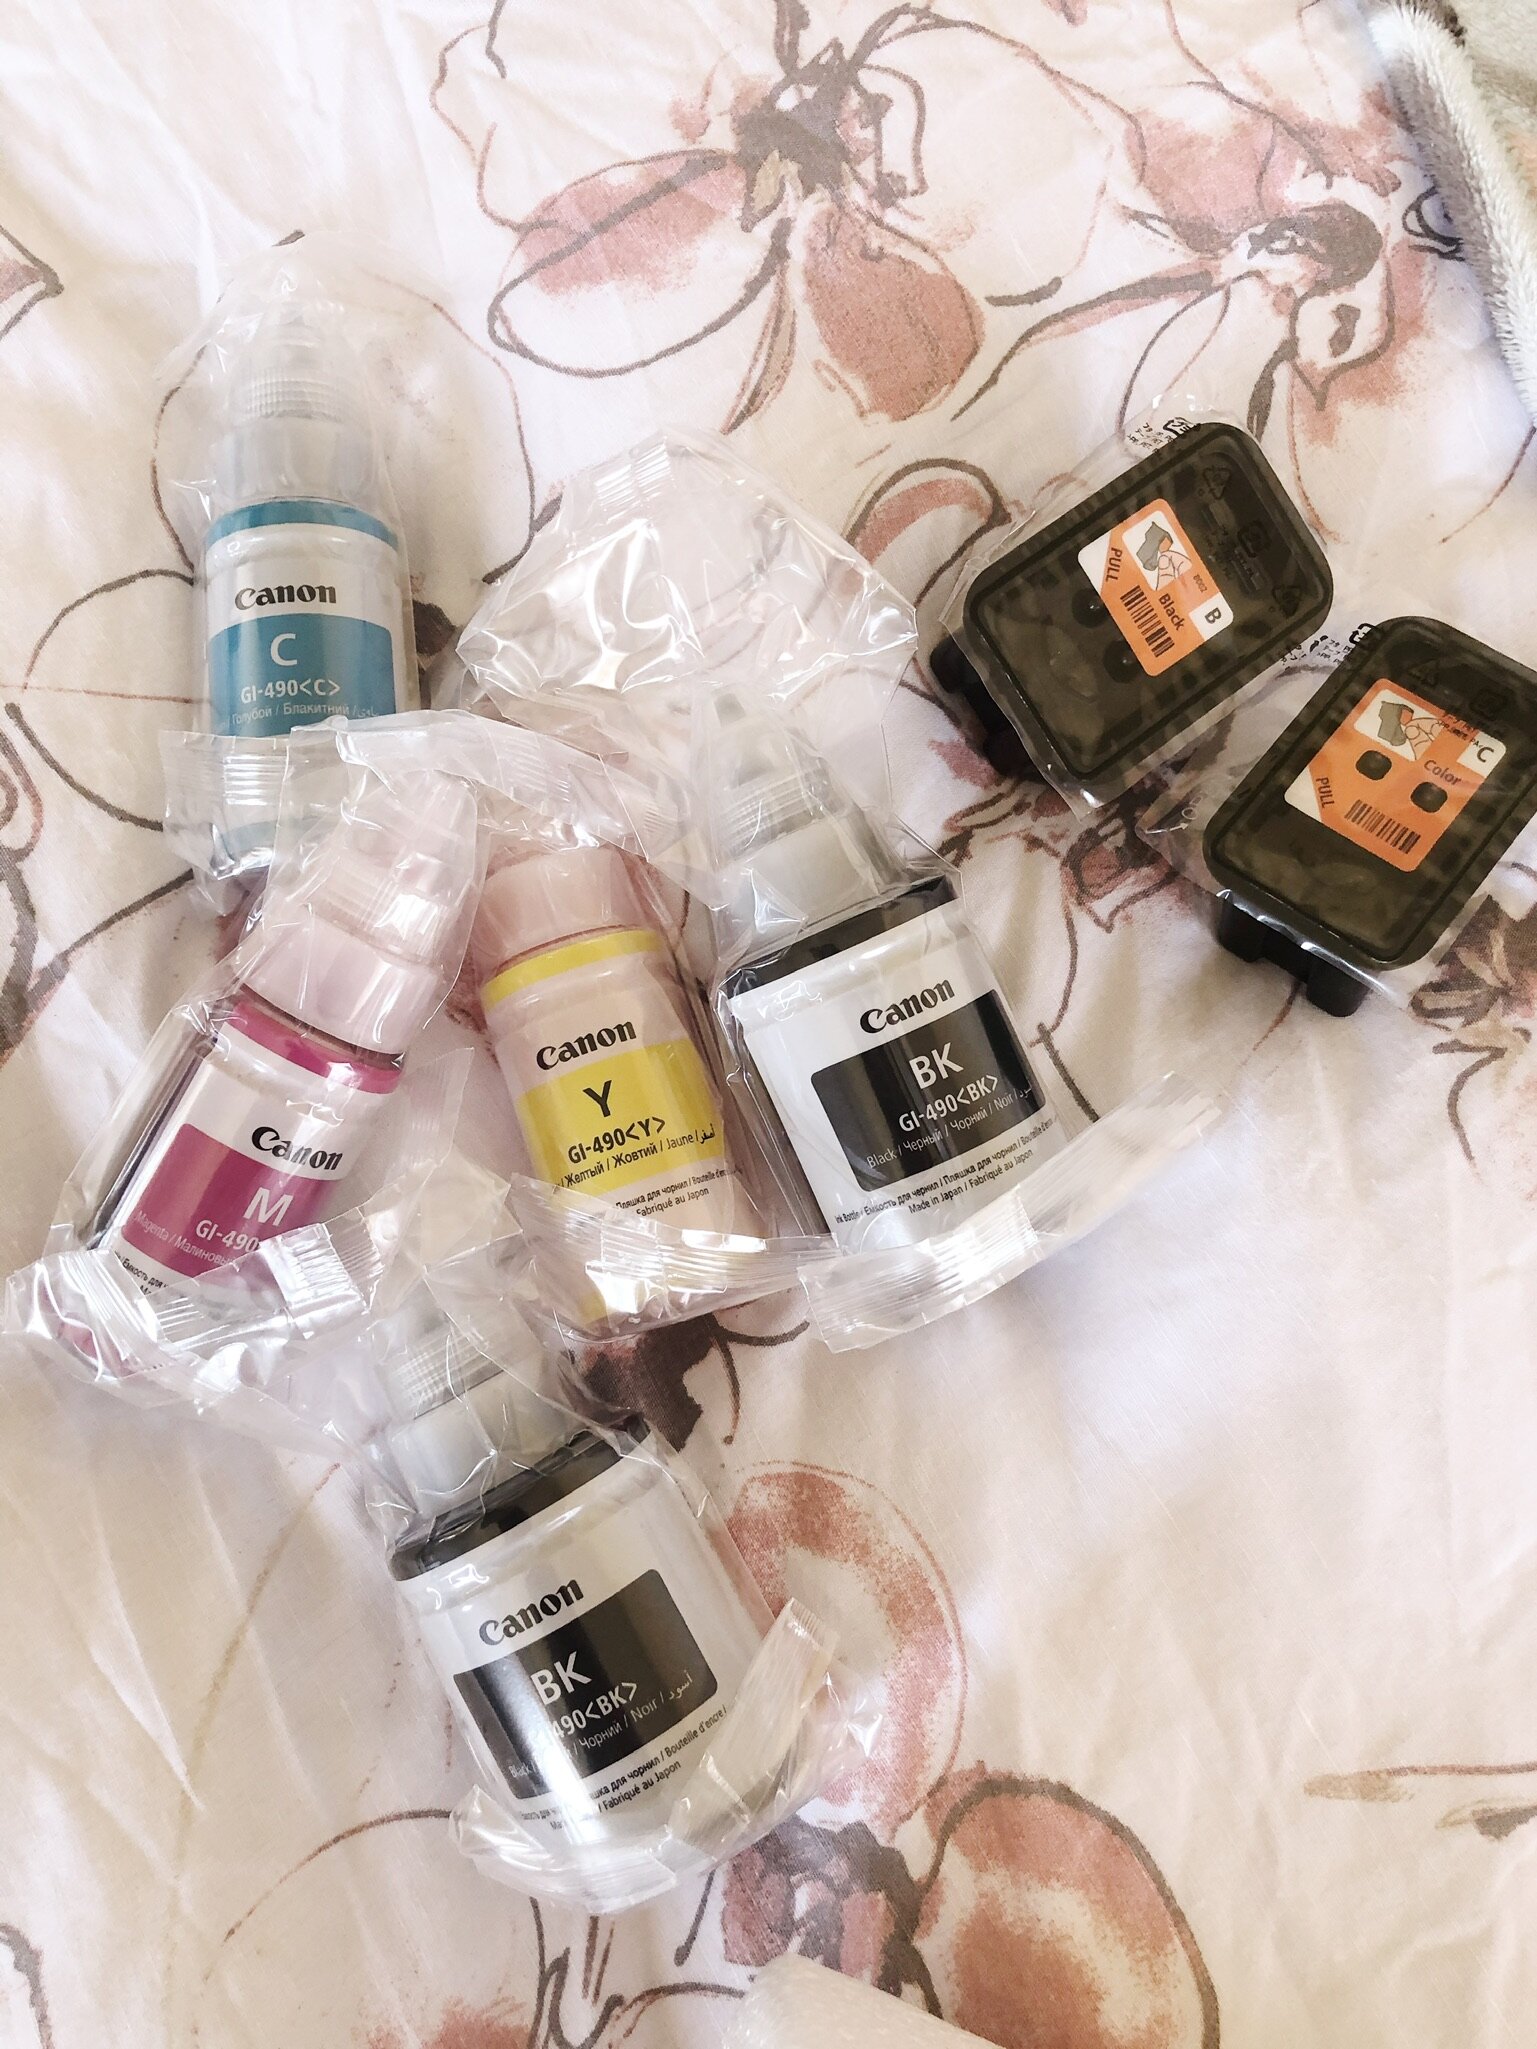
Canon Pixma G3411 Refillable Ink Tank Printer for Homeschool, Photos & Home office Use - A Review

What’s in the box?

The G3411 is a midrange priced printer (I bought mine from Incredible Connection where it was on special for R2999 and it came with free delivery…it arrived out here on the farm within 5 working days!). The box comes with:

  • actual printer & cables

  • 2 black ink bottles

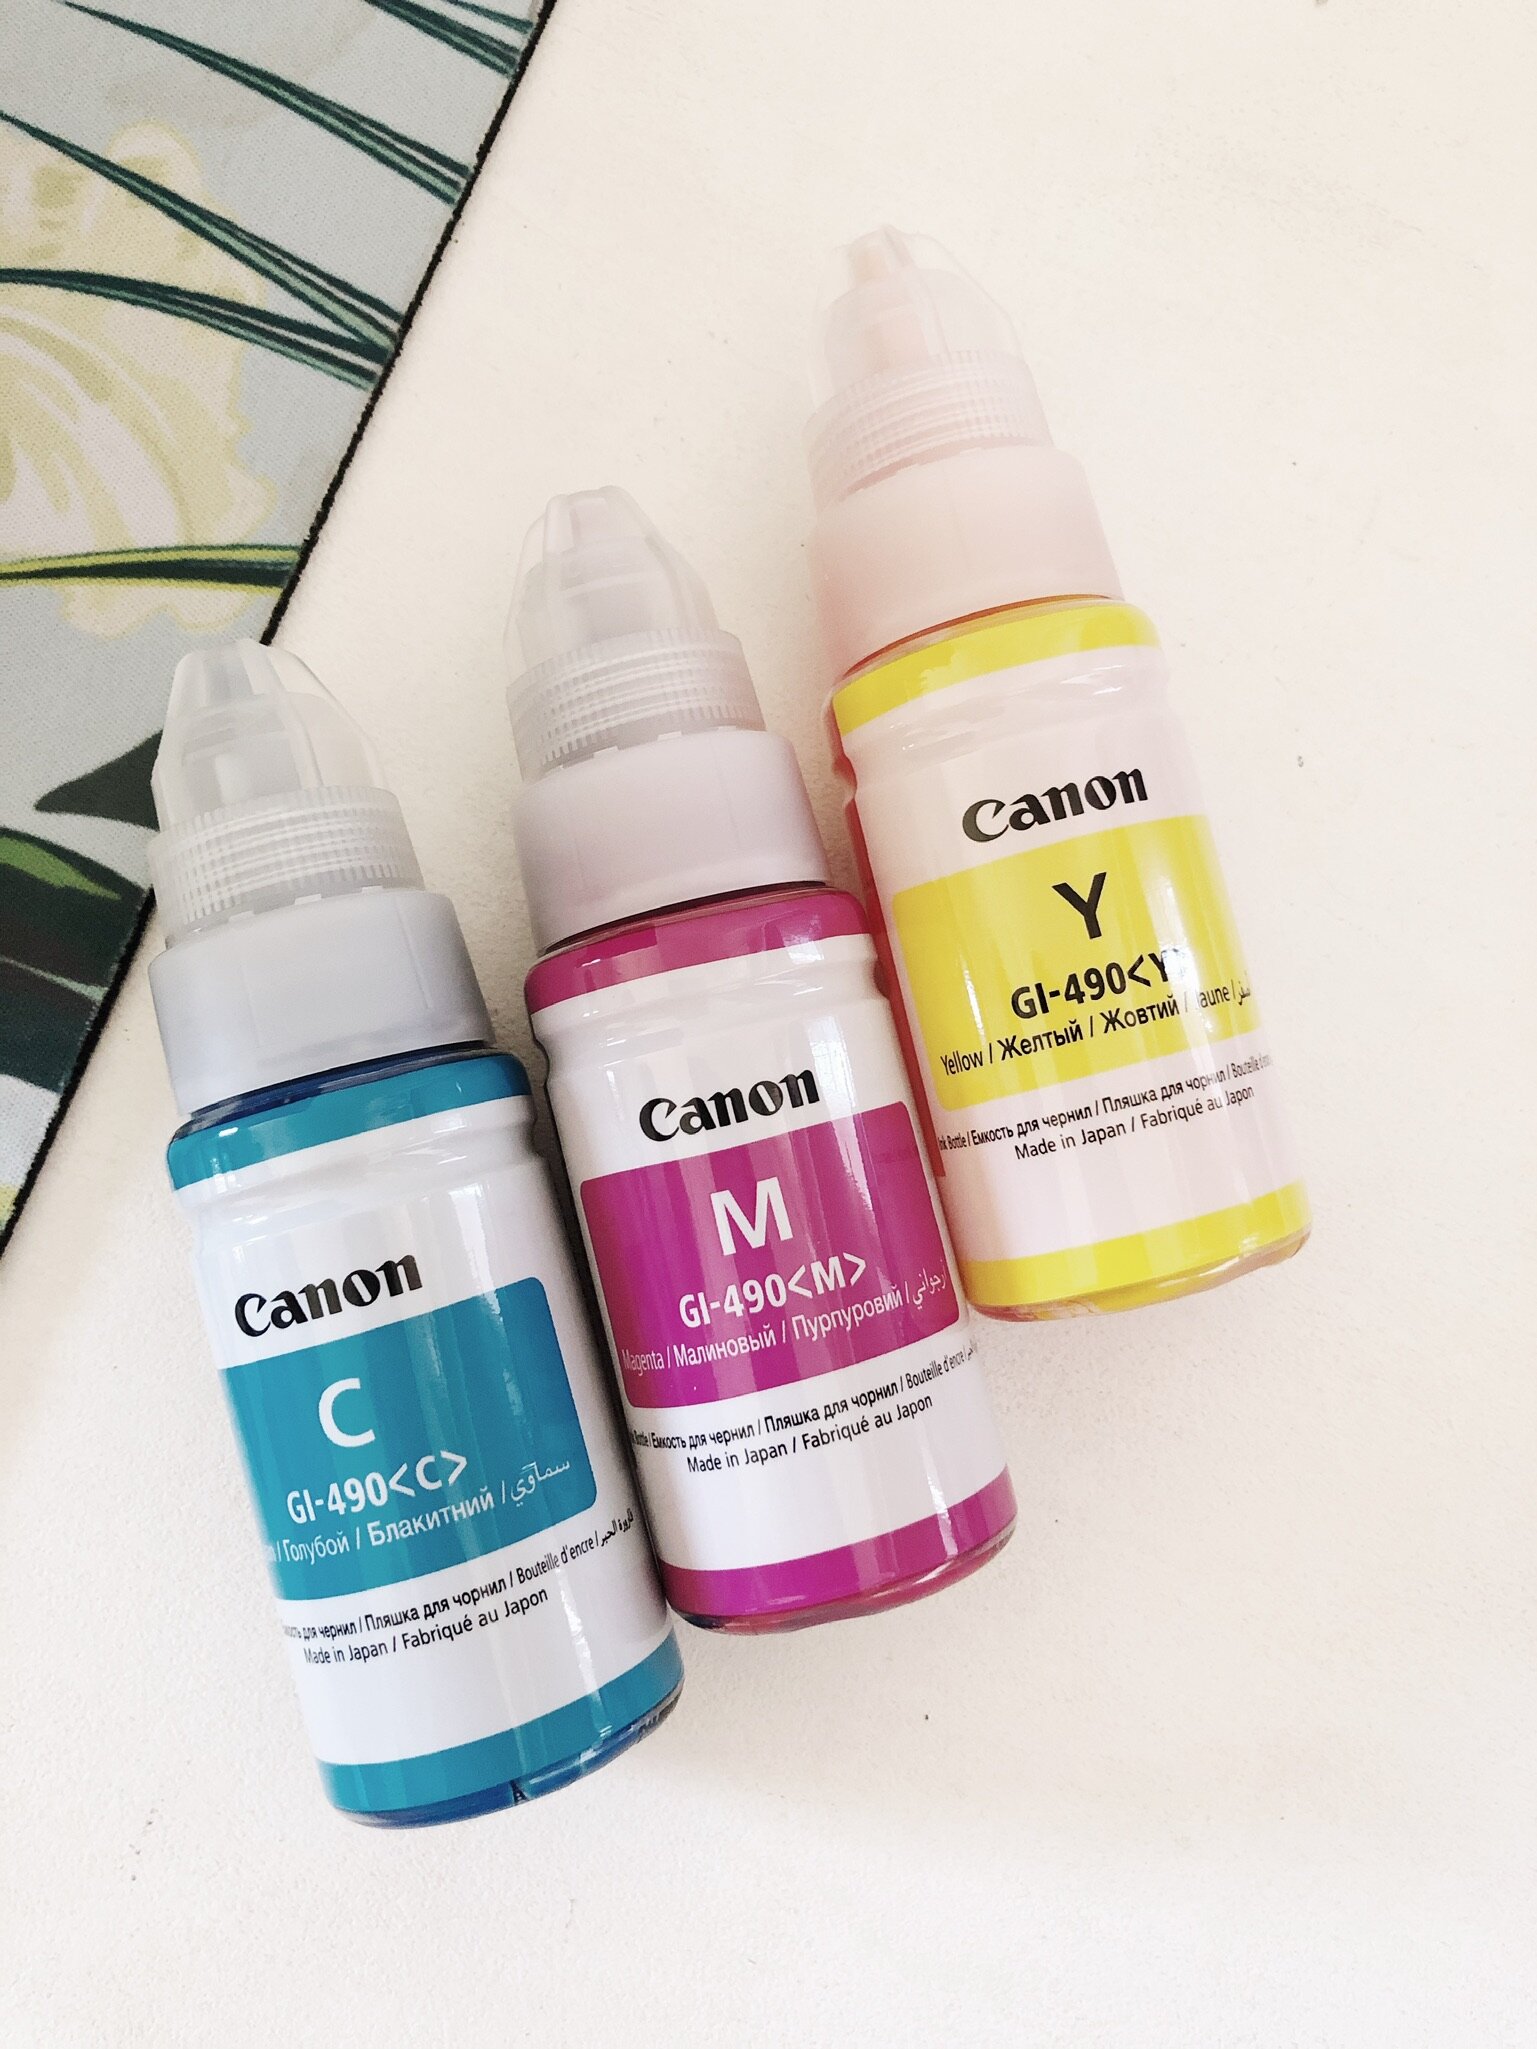
  • 3 colour ink bottles (CMY)

The Set Up

I was slightly nervous when it came to setting up the printer, as I’m usually pretty slap dash and don’t read instructions. My mom was visiting, so that really helped as she read the instructions and I was able to actually follow them step by step. It took about 25 mins for the entire thing to be set up (it has to calibrate the ink and the black calibrates separately to the coloured ink) but it was very straightforward.

The actual printing took me a lot longer, as I needed to download the Canon Print app (I have an iPhone but the app is free and available for both Apple & Android) . Then to print photos vs documents is a little different from your phone. I used the Print app for for both photos & documents. And then to print from my Mac was a little trickier, as I have to connect to the printer via wifi (this means I can’t actually be on the Internet wifi…which was a bit of a pain as I have to disconnect from the Wifi and connect to the printer, and then connect back to the Internet when I’m done). I think I read somewhere that there aren’t any actual cables to connect this printer to a Mac…so just bear that in mind it would be much simpler if I was able to connect my laptop to the printer via a cable. But, as I work on a laptop and not a desktop, this isn’t such a big deal.

I have been blown away at the quality of the photograph printing most of all! The Print app is easy to use and you can print different sizes and collage using the photos on your phone. I tested the quality of my iPhone shot photos vs my camera images (I use Google Drive to on my Mac to upload my camera images to the cloud and then I download them from the Drive app on my phone) and I am very impressed.

Refillable Ink Bottle Prices

The ink is usually where you really get caught when it comes to home printers, but the refill bottles for this printer are pretty reasonable at R180 for colour & R270 for black (this is the online price at Incredible Connection right now). But, apparently I shouldn’t need to buy ink for at least a year (and then some!). So I’m hoping this proves to be the case even with printing kiddie related bits and pieces as well as photographs.

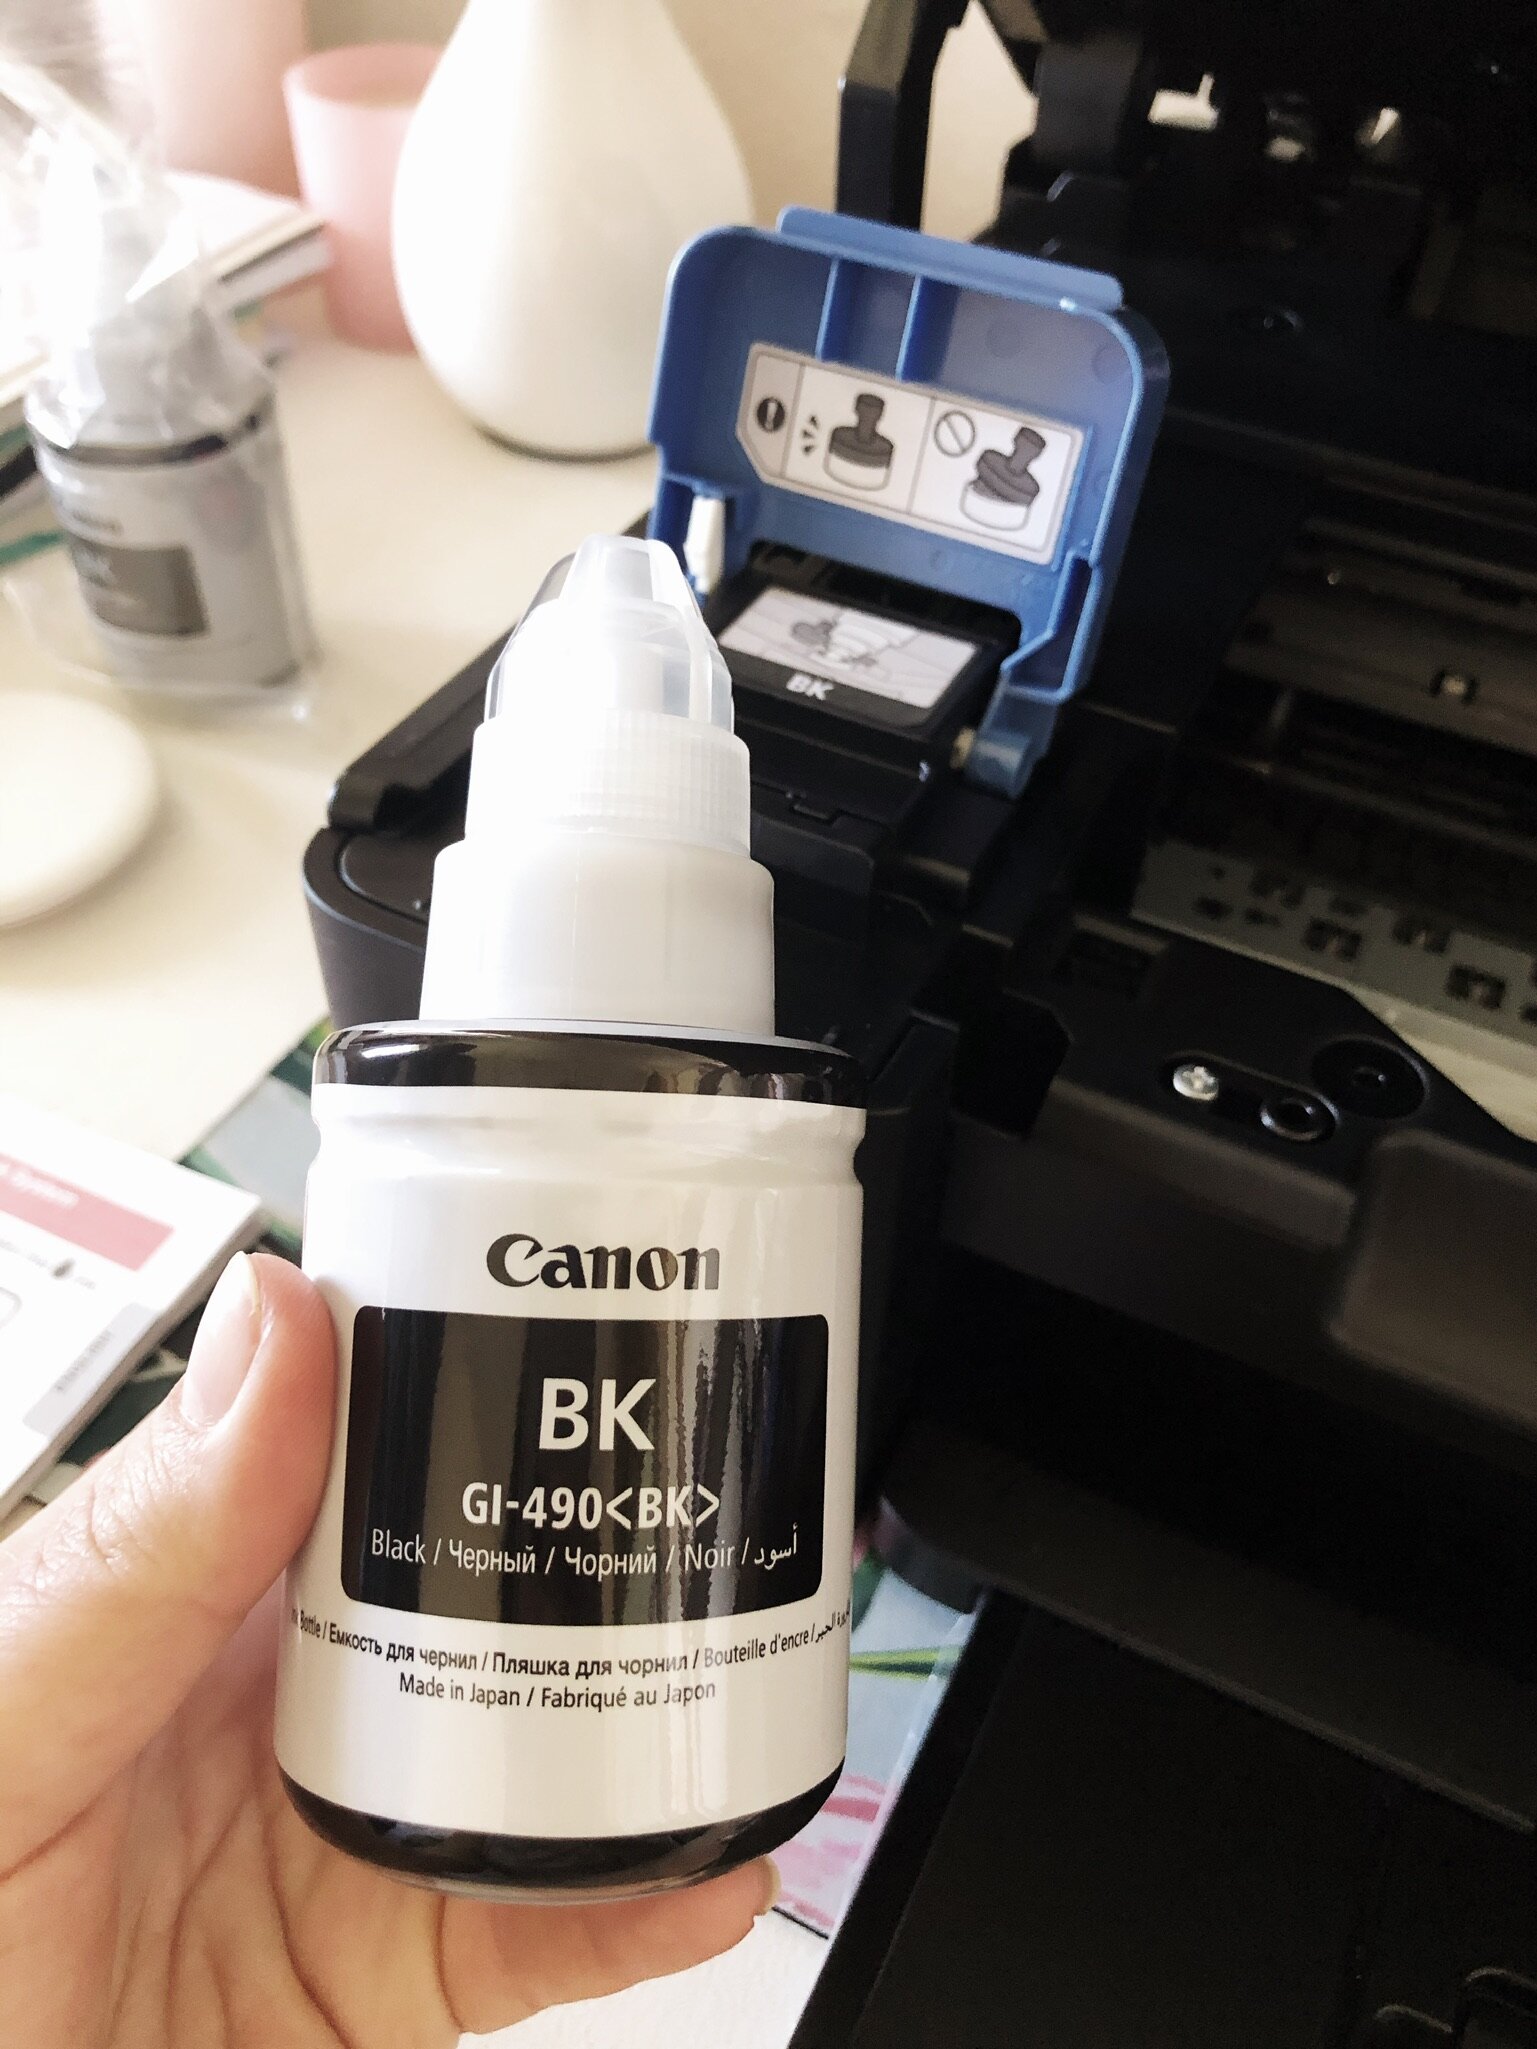
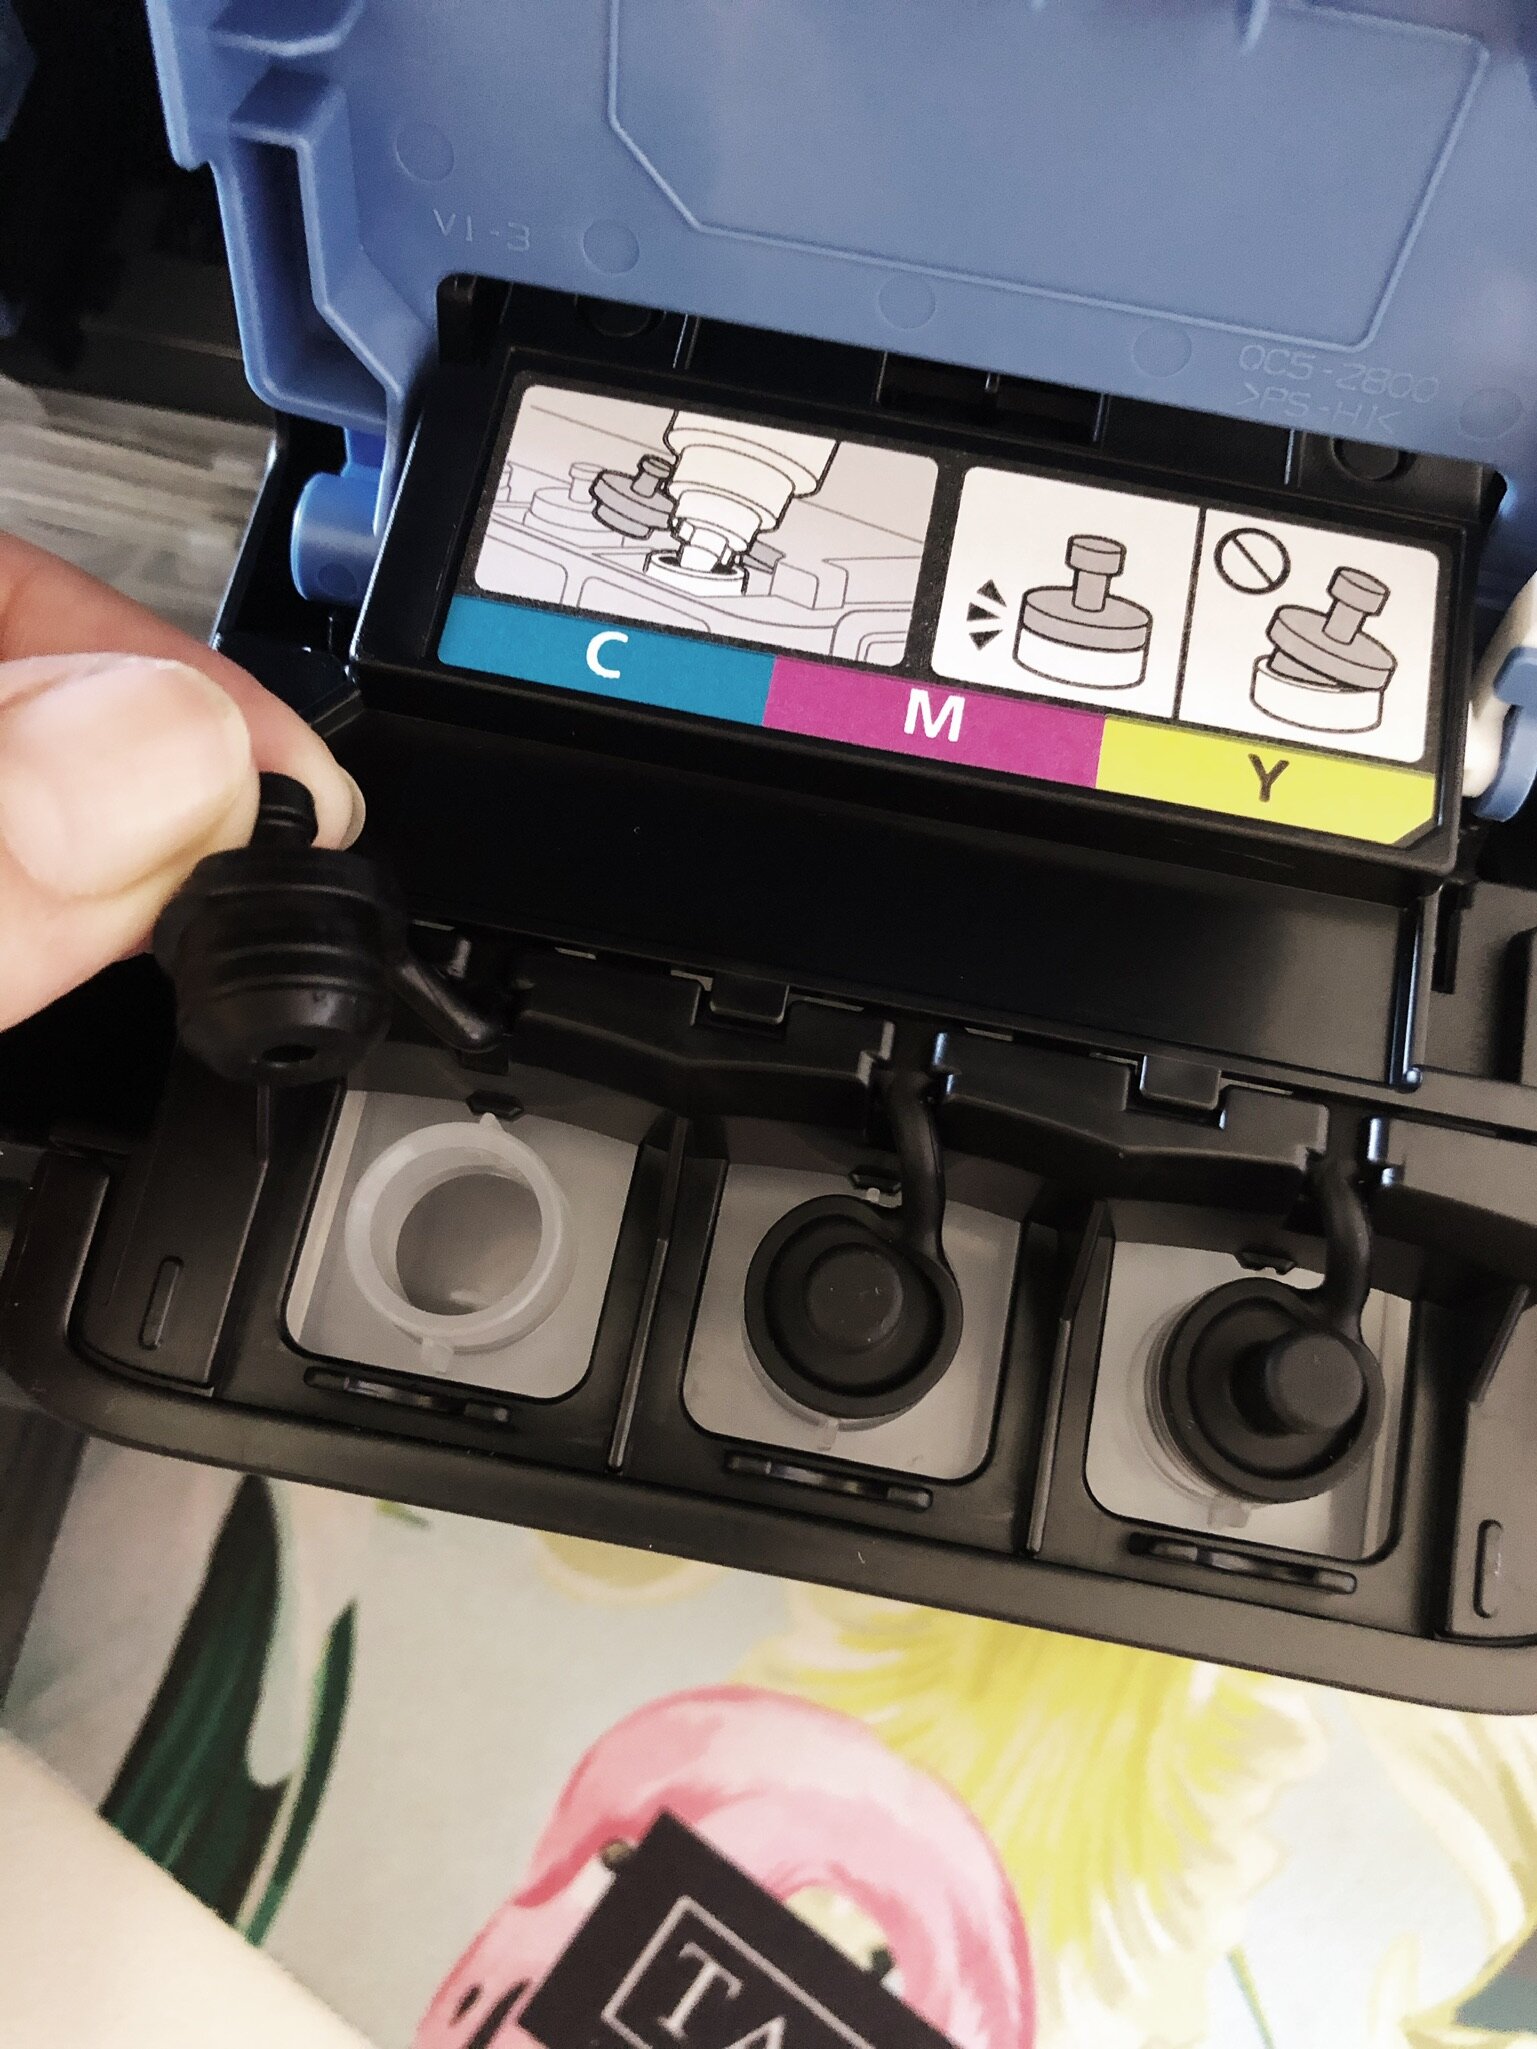
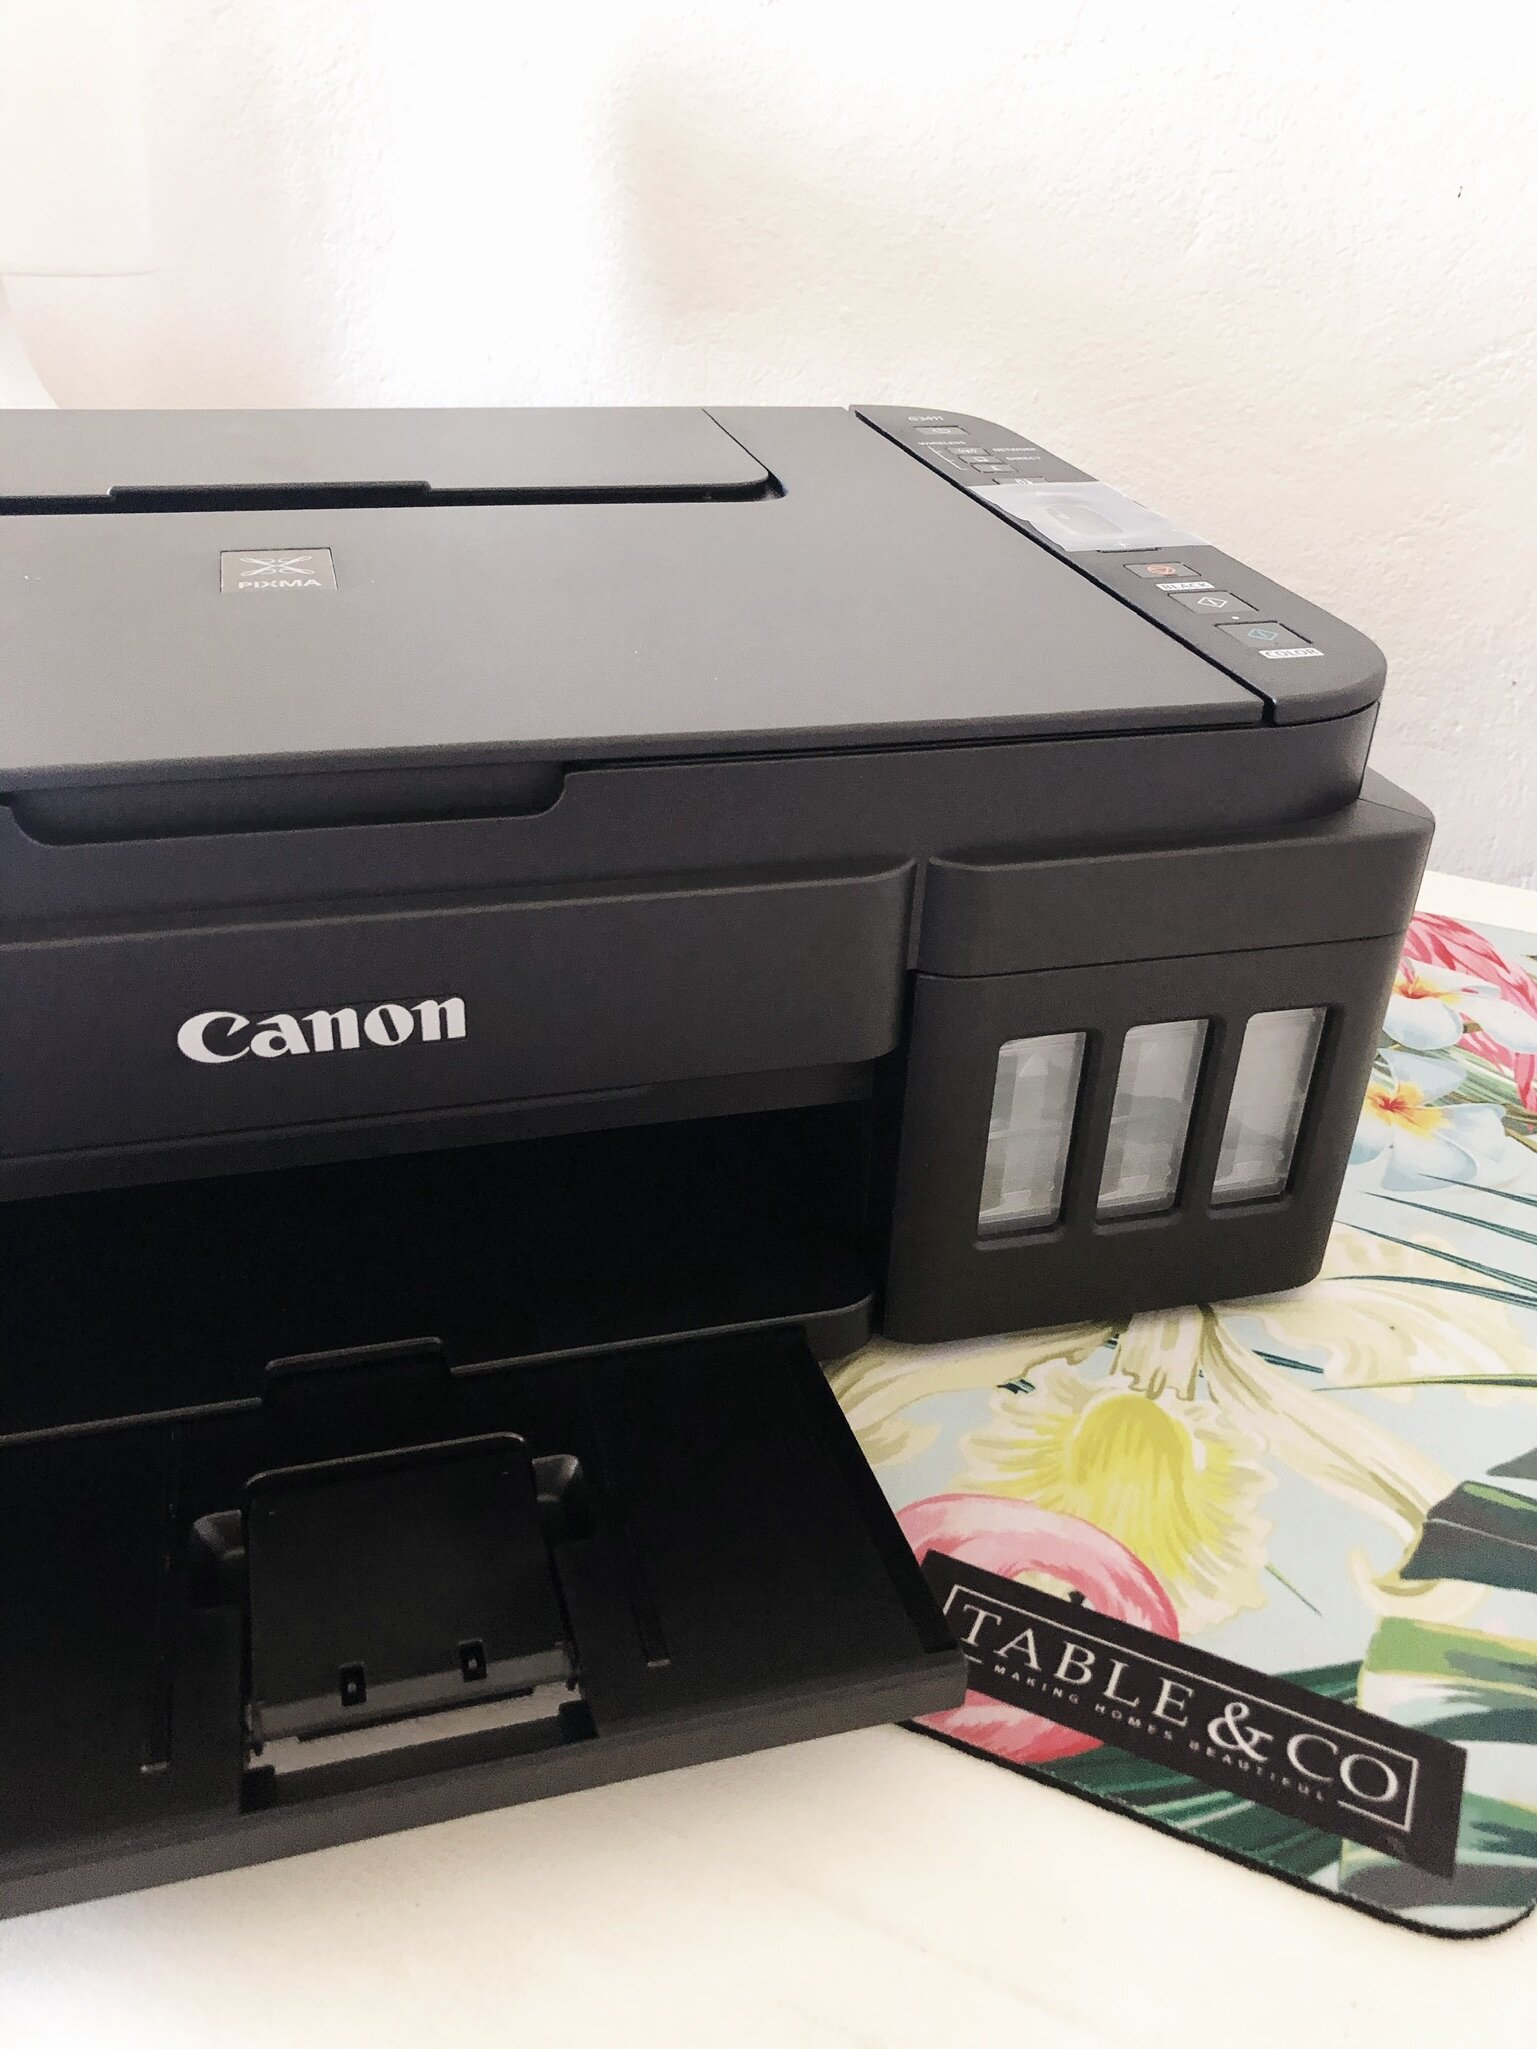
Filling up the ink tanks was very easy (you simply pour the ink into the little jars) and then once full the printer calibrates the colours. There is an easy to see ink level on the front so you can see how much ink you’ve used and when you need to buy more.

The nitty gritty product features of the Canon Pixma G3411 3-in-1 printer

  • Print, scan, & copy 

  • Ideal for those who do not require speed but low cost per copy 

  • Ideal for regular printing  

  • Page Yields: 12 000 pages mono / 7000 pages colour

  • Productive low-cost printing 

  • Wireless Connectivity 

  • Rear paper feeding 

  • Borderless printing 

  • 12 Month Warranty 

So far I’ve printed a number of photographs and a lovely workbook from Under The Acacia (a nature based homeschool curriculum for little ones…even though I haven’t actually started it with Everly yet) and I am really impressed with the printer so far.

Canon Pixma G3411 Refillable Ink Tank Printer for Homeschool, Photos & Home office Use - A Review

Next on my list is a laminator (any recommendations for a good one? I’ve been told it’s the laminating sheets that are the expensive thing?) This seems to be like most tech where the actual machine is relatively inexpensive, but the extras are what end up being so expensive.

I’m very happy with this printer, and will keep you updated as to how it goes and how long the ink lasts.

Lockdown Toy Love: A review of a fabulous selection of Leapfrog educational toys - Storytime Bella, Lettersaurus, Build & Discover Toolbox & Tumbling Blocks Fire Engine

Lockdown Toy Review from Leapfrog by Roxy Hutton Citygirlsearching Blog-01.png

Just before our official lockdown hit here in South Africa, Everly & Aaron received a fantastic package from Leapfrog. Looking back, the delivery couldn’t have been timed any better because, for the first 5 weeks or so, we were unable to purchase any toys as these were not deemed ‘Essential Items’. So, long story short, my kids got pretty lucky.

These toys were sent to us in the form of a trade exchange but my thoughts are views are honest, and my own.

We actually own another fantastic Leapfrog toy, My Pal Violet, which was a prezzie from my Dad for Everly’s first birthday. She LOVES that singing pup, and I’m telling you it was instrumental in her language learning. The same can be said for all 4 of the following toys. My kids love them, and are still playing with them all these weeks later. While we as a family try to stay away from plastic toys (opting for more toys of the wooden/handmade variety) but there is a place for DURABLE plastics toys, and let me tell you, these toys have been put through their paces in terms of durability.

And now on to the review of each toy:

Leapfrog Tumbling Blocks Fire Engine – RSP R1000.00

Leapfrog Toys Prima Toys South Africa Blog Review by Roxy Hutton CityGirlSearching blog (18 of 36).jpg

This bright red Fire Engine is sturdy, and even though it has a moveable ‘arm’, there is no worry that it’s going to come off anytime soon. I say this with good authority as Aaron has chucked it down the concrete stairs, off the bed onto our hard, wooden floors and it’s even been given a few good knocks with a hammer!

There are 5 brightly coloured blocks, which each have a letter of the alphabet on one of their sides, along with a cute picture to match the letter. There’s a slot for a block to fit into on the one side of the engine, and then the blocks all fit into the top of the ladder (the moveable arm) where the roll down into the back of the engine, where they ‘wait’ for the ladder to be pulled down and a very cool little mechanism opens up the bottom of the ladder and ‘picks’ up one block at a time. It’s one of Aaron’s favourite features, that and the music!

When you put the interactive blocks into the Fire engine window, it plays the names and sounds of animals & letters from A - Z. There is a real-life sounding siren, flashing lights and a turning water hose too, and different blocks call out different ‘missions’ to complete. And there is also a music symbol shaped button to press which plays the ABC song (this is Aaron’s favourite and it never ceases to get him bopping and grooving…and hopefully soon actually singing along).

The Tumbling Blocks Fire Engine is suitable for 12 month olds and upwards.


Leapfrog Storytime Bella – RSP R1250.00

Leapfrog Toys Prima Toys South Africa Blog Review by Roxy Hutton CityGirlSearching blog (5 of 36).jpg

Bella has found her place right next to Violet, and I often find Everly walking around the house with a puppy in each arm as she feeds them snacks and gives them water. But, the best part about Bella, are the 5 books that come with her; each one ‘activated’ by the corresponding number on her collar.

Each story features one of the following themes; emotions, shapes, numbers, colours and opposites, and even though Everly can’t read yet, she follows Bella’s instructions to ‘turn the page’ and loves looking at the pictures while Bella reads along.

Bella also sings lullabies and her collar gives off a lovely soft light as she sings gentle songs that are catchy and easy to listen to (I say this more for the parents sake…they don’t drill into your skull, an important fact that should be highlighted). Everly will often come to me and ask me if she can read me her ‘Bella Books’ and then recounts the story to my complete and utter surprise because I haven’t actually read any of them to her. She adds in her own plot twists and turns, but she’s got a firm grasp of the story, which is pretty incredible.

Although Everly can’t read yet, she loves Bella and so I’d say Storytime Bella is suited to 2 year olds and upwards.

Prima toys Leapfrog Storytime Bella Review by Roxy Hutton CityGirlSearching Blog-1.jpg

Leapfrog Toys Prima Toys South Africa Blog Review by Roxy Hutton CityGirlSearching blog (35 of 36).jpg

And now for Aaron’s favourite toy! This poor tool box has really been given a hard time, and yet looks as good as new! It’s been put through it’s paces with all manner of hard objects thrown at it, and has also been yanked apart more times than I can count. It also gets played with as much by Everly, as it does Aaron.

The 4 sides of the box fold down, and then all clip together again with the handle at the top, which has two screws that ‘lock’ the handle in place. There are 5 tools (a hammer, a ruler, a screwdriver, a saw and a wrench) and all of these tools have fun places that allow them to be actually used for their intended purpose (and for all their non-intended purposes too…like hitting his sister over the head).

I must say that this is the toy that drives my the craziest, because of how all the pieces are always scattered all over the house within seconds. But, Aaron loves playing hide and seek with them so I pick my battles, and he does USUALLY find all the pieces and put the tool box back together most times.

The Build & Discover Toolbox is suitable for 12month olds and upwards.


Leapfrog Lettersaurus – RSP R800.00

Leapfrog Toys Prima Toys South Africa Blog Review by Roxy Hutton CityGirlSearching blog (21 of 36).jpg

Everly and Lettersaurus can often be found walking together around the garden (although the little string/lead attached to his neck is rather short for use as an actual lead). It’s rather sweet how she will go and pick him up, play a few ABC tunes and then tell me she’s off to take him for a walk. His head spins from side to side as he goes, and it really is rather sweet to watch.

This little Dinosaur has coloured letters (from A - Z) on his back that when pressed sound out the letter name and sounds. He also says a number of fun phrases and sings three different songs when you press the musical note. His orange tail also spins and this brings in numbers and counting too. There is also a footprint button which plays a jungle tune, to which the letter buttons can be pressed to add sounds to the music, almost like a little mini DJ set up.

Lettersaurus is suitable for 12month olds and upwards.


You can purchase the entire Leapfrog range from the Prima website by clicking the BUY NOW option on each product; or alternatively on Takealot, and in store at places like Toy Kingdom & ToyZone.

Prima Toys Leapfrog Toy Review by Roxy Hutton CGScreative Blog (14 of 17).jpg

Do you own any of these (or any other) Leapfrog toys? Are any of these being added to your little one’s birthday lists this year? Let me know in the comments below!

Squarespace vs Wordpress and why I chose to specialise in Squarespace website design

Squarespace vs Wordpress & why i choose to specialise as a squarespace website designer south africa-01.png

When I first started blogging, I set myself up on Blogger (to all the other bloggers out there reading this, remember those good old days?!) and all was right in the world. Blogger (which is sort of where the term ‘being a Blogger’ came from) was how I started dipping my toe into the world of graphic design (I used PicMonkey at the time to create banners and blog graphics) and it’s also where I first started learning about coding & custom CSS.

Once I started becoming frustrated with the limitations of Blogger, I started a separate blog on Wordpress. I tried both the self hosted and the hosted options, but I just found the whole platform to be VERY clunky. I also ended up with a million and one widgets that continually needed updating and at least once a month there would be some sort of plugin that I was using that would ‘break’ my site. And I’d end up spending hours trying to figure out which one it was, only to realise the person who had designed it hadn’t made an update for it and so it no longer worked for my site. It was soooo frustrating, and I felt as though I was just never able to make my site look like the picture in my head. And for me, I just wanted a pretty place to blog from, and one that I could control the look and feel of without having to spend hours searching for coding tutorials or having to rely on graphics and other design elements.

Brand & Stock Photography by Roxy Hutton of CGScreative (1 of 1)-2.JPG

This is also when I delved into Wix, but this didn’t last long either as I found the interface even more confusing that Wordpress. And finally, when I came across Squarespace I just knew, even from my very first day of their free 2 week trial period, that this was the platform for me.

Everything was (and still is!) just SO beautiful!

And the best part about the platform, and the main reason why I use it to design websites for my clients, is just how easy and intuitive it is for my clients to be able to take over and make changes and updates themselves (yay!). This means it’s a win-win for both designer & client, because as a designer I’m able to ‘sign off’ a project and I know, that while I am available to ask questions and help, my clients will probably be able to solve most of their questions themselves. They are able to swop out images, update text, create more pages and work out how to do this in relatively small amount of time. Wordpress on the otherhand, while being an incredibly powerful content management system, has a MUCH steeper learning curve. If you know what you’re doing and are familiar with the platform, the options for creating beautiful websites are endless! But, when it comes to clients being able to make changes themselves (especially when it comes to blogging and writing posts), in my opinion (and this seems to be the general opinion of everyone I ask about it) it’s just not an easy platform to understand and learn how to make basic edits.

Custom Brand Stock Photography for bloggers small business owners adnd creatives CGScreative (1 of 1).JPG

This also brings me to the next tick for Squarespace…their help forum is amazing! They have an incredible archive of tutorials that are laid out systematically and most importantly, easy to navigate! There is nothing worse than spending hours looking for a tutorial for the most basic of basic questions. And they have a forum where you can pretty much find the answer to anything and everything. And if you can’t, they customer service is pretty fantastic. When I made the move from Blogger to Squarespace, I had over 500 blog posts (can you even!!!) and comments on those posts and moving everything was pretty straight forward. I was (and am still) using DISQUS for my comment management system though, so this posed a few issues and I ended up loosing a whole bunch of comments because of URL re-directs failing etc. BUT it was less of a hassle than I thought it would be.

So now that you’ve heard from my personal experience, here are some of the other important (and more technical) reasons why I believe it to be the best website platform for the types of small businesses I work with:

  • Mobile Responsive Design:

Squarespace templates are beautifully designed and have built in & unique mobile experiences that match the overall style of your website. This means your content will look great on every device, every time. Squarespace is design-driven, user-friendly, and performance-focused (doesn’t that sound fancy!).

  • Simple User Interface

The back-end of Squarespace's platform is extremely intuitive and simple to use, even for complete technophobes! This means it's super easy to make edits yourself without having to get a developer/designer involved to help with small tweaks. Squarespace was designed with the do-it-yourself user in mind, making it easy for clients to maintain, update, and monitor their websites on their own. Building pages is a matter of dragging and dropping blocks in a page editor, and backend tasks are a snap with clearly labeled menus and panels.

  • Peace of mind

Squarespace is a self-contained platform that works seamlessly and is fully managed from top to bottom. This means there’s never any need to update software, plugins, or widgets; patch security vulnerabilities; or worry that changing one component might break something else. It also means there’s rarely any need to investigate or pay for third-party apps or plugins since most functionality is native to Squarespace. I have only now (nearly 6 years down the line) had to implement any coding. You can pretty much figure out how to do just about anything your heart desires with regards to your site design, without having to know any coding.

  • Free SSL Certificates

All Squarespace websites are given free SSL certificates, which means everyone can enjoy a secure connection throughout your whole website. This became a necessity in 2018, when some browsers started marking non-secure websites as a threat to users! Google also shows a preference to secure sites in their rankings.

  • Built-in search engine optimization (SEO) capabilities

Every Squarespace website is equipped with all the elements needed for a strong SEO strategy. Site descriptions, page titles, custom URLs, search-friendly formatting, and other key elements are all easily managed. Each site also generates a sitemap automatically that helps Google crawl, understand, and rank a website. So all of those Wordpress who tell you otherwise, simply don’t know what they are talking about ;)

  • Simple Pricing Structure

Squarespace's pricing is transparent and simple; you can pay monthly or yearly (from $12 per month when you pay annually for their basic plan…this is what I use…and $26 per month for large online store option) which includes absolutely everything you need. You can buy your domain within Squarespace, and this cost includes your hosting too - there are no extra costs! You can also purchase a custom email with Gsuite right in your Squarespace dashboard, so all of your billing is all contained in one easy place.


BeautifyYourBlog Ecourse for bloggers CityGirlSearching (31 of 67).jpg

So, if after reading all of this you’re interested in working with me, click below to find out more about my packages and how it all works to hire me for your website project.


The top 5 tools I use to run my online business

The top 5 tools I use to run my online business - CGScreative Citygirlsearching Blog 3.png

I’ve been at this online thing for a good many years now, starting with blogging, then photography (I also sell my photos online through Creative Market) and where I am now, a website designer. In the process I’ve used loads and loads of different tools to help make my life easier, and now I want to share my favourites with you. These are the tools and resources I use all the time, and while there are a lot more than 5 (I might do another post on all of them!) these are the ones I use just about every day.

{This is an honest, unsponsored post but affiliate links have been used. What this means is that if you do choose to sign up through one of the links in this post, then I receive a small commission. This helps me maintain this blog and keep it running with your support & it means you also get a discount…it’s a win-win! Please know I only ever share brands and businesses that I use and love.}


Email Marketing - Flodesk

When I first started blogging (way back when in 2010), I began my journey into email marketing with Mailchimp. At the time, it was the best platform for beginners, and while it had & has a lot of pros to it, I made the move to Convertkit once I really started to take my blogging seriously. Convertkit is an incredibly powerful platform, and AMAZING for anyone wanting to sell info products online, but it became too costly for me and my list of 2500 people.

I have since moved over to Flodesk, and I LOVE IT! Beautiful emails, seamless integration with Squarespace and a very user friendly dashboard mean that I’m spending less time trying to make my emails look pretty, and more time actually writing. They have gorgeous templates (and FYI having lots of images in the body isn’t affecting open rates) so now us creatives can have our cake and eat it!

It’s been a real game changer (and just a little heads up, here is a link that will get you 50% off their monthly plan, and you’ll be locking in that price for life…no matter how many subscribers you have!). I’ll be writing a full post on my move from Convertkit to Flodesk, as well as a post on what the Fodesk platform is like, so stay tuned for that.


Have you received an email from me lately? What did you think?

If you would like to see what my emails look like & join my list, you can sign up here:


Invoicing - Wave

When it comes to book keeping, I do wish I was a bit more of a wizz when it comes to accounts, but alas, numbers aren’t exactly my strong suite. I started off creating my own quotes and invoices in InDesign, mostly because I wanted to have complete control over how they looked, so that I could keep them as pretty as can be. But it became a huge pain keeping up with invoice numbers, making changes, and then as my service offerings changed, my invoices just got all muddled. Wave is amazing (and its FREE!) and I’m able to keep track of outstanding invoices, part payments, send reminders and their latest feature, email statements with amounts outstanding. Its super easy to use, and syncs with my bank accounts (something I can’t quote decide whether I like or not) but either way, its fantastic and simple, and perfect for small businesses.


Blogging & Website Design - Squarespace

Oh the amount of good things I could say about Squarepace…it’s the reason I actually got into website design in the first place. I started off on Blogger, dabbled in Wix, spend a good chunk of time on Wordpress (both versions) and then jumped to Squarespace and have never looked back! It’s beautiful, user-friendly, and did I mention beautiful? It’s a wonderful platform to work with, and the best part is once I hand over a site to my client, they are able to make changes and updates themselves, really easily. Click here to find out more about working with me, and to see some of the sites I’ve designed.

I run this site on Squarespace, and have been blogging with the platform since 2015. There are an infinite number of customisations that can be done to each template they provide. Without having to know any coding, you’re able to take one of the templates and really make it your own. Squarespace offers a free two-week trial so you can really dig into to the platform without having to commit.


Client File Management - Gsuite & Google Drive

Screen Shot 2020-05-13 at 6.05.25 AM.png

It’s taken me a little while to figure out a good system for keeping track of my clients’ files & documents, but I like Google Drive for this. I have separate folders for my photography & website clients, and then I order them by year, the month their project starts, and then by name. I also add a colour to their folder if I’ve wrapped up their project. It’s a nice visual way to staying organised. I share their personal link with them so that we both have access, and then there is less back and forth of sending files. I signed up with Gsuite through Squarespace, which means I get a custom email address, as well as storage space for Google Drive, and while I know I could be doing a LOT more with it as it’s very powerful, I’m enjoying it so far. I have a few Google drive accounts; the ones I use the most are my personal one…this is how I upload and access my photos on my phone and my business one.

I am always tempted by Asana, Dubsado and Trello, but it’s been a big enough learning curve for my clients to use Google Drive (and most of them know or have experience using Google) and so I worry the extra step of understanding how to use a very new platform just to communicate with me might be off putting. But I might be wrong! Please let me know if you use a business management tool for client communication & staying organised that you love!


Quick Social Media Graphics - Canva

I can’t believe I turned my nose up at this fantastic design app all those years ago. I liked to think I was a real ‘design pro’ having taught myself photoshop (I only really knew the basics!) and I was too good for the free app that claimed to help you make beautiful graphics, for free! Well, I certainly ate my words when I finally ended up trying it out for the first time, and now I use it just about every day.

You can make anything from posters, to Instagram Story templates, Zoom Virtual Backgrounds, Logos and Blog Banners & graphics…the list goes on and on. Oh, and did I mention you can do all the above for FREE! Their paid plan allows you to upload your own branding (logos, colours and fonts) and lots more.


So there you have it. My top 5 business tools that I use to run my online business.

What I haven’t mentioned above, but for anyone interested:

  • Camera: Nikon D750

  • Computer: Macbook Pro 15”

  • Photo editing Software of Choice: Lightroom

  • What I use to actually speak to my clients: Whatsapp Video Chat/Zoom/Facetime

Is there anything that I’m missing? Are there any tools that you can’t live without? Is there anything else you’d like to know about how I run my business? Leave me a comment below and I’ll get back to you right away…I’m always happy to share my ‘secrets’.


Night Nappies - different types of night time cloth & tips to help you get the hang of using cloth at night

Night Nappies How to use cloth at night tips to help you use nighttime cloth nappy-01-01.png

We’ve been using cloth nappies at night right from newborn days, because I thought to myself if I’m going to commit to this cloth nappy thing I might as well go the full hog and not do things by half measure. I know a lot of moms are scared of night time cloth, when in fact it’s MUCH easier than it looks.

A few things to keep in mind:

  • Once your baby stops pooping at night, you won’t have to change their cloth nappy during the night.

  • There are loads of great nappies that are designed to last 12+ hours, just like a disposable (and to be honest, I get just as many, if not more leaks when I use disposables at night!).

  • The trick with night time cloth is absorbency & fit.

  • You really can’t beat a hemp flat for night time (it’s trim, thirsty and easy to boost!) and I keep coming back to them, no matter how many other ‘easy’ nappies I try.

  • If flats seem a bit too out there for you and you just can’t get the hang of folding, there are also pre-folds (my favourite night time nappy) and fitteds.

  • How much absorbency your baby/toddler needs at night will change. Their output changes, as well their body shape. How they sleep also makes a difference, as tummy sleepers will need more absorbency in the front, and back sleepers need more absorbency in the middle. The same is true for girls and boys.

  • Don’t give up! You will need to troubleshoot. I still get leaks and have to adjust my fold/how much I boost, the type of boosting and the fit and I’ve been using cloth nappies for nearly 3 years and on 2 little ones.

  • Leaks are very frustrating, but don’t let them get the better of you. There are LOADS of options to try before giving up altogether. And there is no shame in using a mix of disposables and cloth while you get the hang of it. If Everly ever uses a disposable at night, I still put a hemp insert & cloth nappy cover over her disposable because they always leak anyway. Cloth saves the day every time!

  • Use fleece liners for a stay-dry feeling on baby’s bum. Fleece liners are the absolute BEST thing (you can literally cut up an old fleece blanket/piece of fabric into rectangles to use) to use as liners (don’t even bother with those fancy bamboo liners which are actually just a pain to use). Just use fleece, trust me!

  • Have fun experimenting!

    And just keep in mind, because you need a nappy to be lasting the whole night, it’s going to be much bulkier than a day nappy which just needs to last a few hours. This means a bigger bum, and this means your choice of pj’s might have to adjust too. Nighties for girls are great because anything can fit under there, but for colder night if your little one is wearing tops and pants, the pants can be VERY tight over that nappy…this is actually the cause of a lot of leaks. If you’re using a fleece cover, you can’t have anything tight, like a vest, over the fleece as it will pull the moisture making everything wet. So, if you’re using a fleece cover, a looser fitting onesie is best, and then for an older baby/toddler, fleece longies are perfect with a long sleeve top & socks. In Summer, Aaron sleeps with just a t-shirt and his nappy with a fleece cover over and Everly sleeps in a nightie with her nappy & PUL cover over.

Pokkelokkie Hemp Flats (10 of 11).jpg

My current night time cloth nappies:

Aaron (14 months): bamboo fitted with padfolded newborn sized hemp flat in the wetzone, hemp/bamboo booster, fleece liner & fleece cover. Alternatively a medium sized hemp flat folded in origami, with a newborn sized hemp flat in the wetzone, a hemp/bamboo booster, fleece liner & fleece cover/fleece pants.

Everly (2.5 years): hemp pre-fold with a large padfolded hemp flat with a hemp booster and a PUL cover. Alternatively, two hemp flats folded together in Origami with a hemp booster, fleece liner & a PUL cover.


My favourite night time cloth nappies & covers


I still use the small Pokkelokkie flats I bought when Everly was a newborn to boost her nappies now, and I use them all the time for Aaron. Pictured here is a large sized Pokkelokkie hemp flat and below that is a Large Hemp Pre-fold.

Fleece longies are fleece pants that are used over a night time nappy as a cover. They are water resistant, not waterproof, but as long as your nappy underneath is well boosted and secure, they work like a bomb. Super soft and comfy, perfect for Winter.

Pokkelokkie Cloth Nappies Night Time Cloth Photos by Roxy Hutton CGScreative (7 of 11).jpg
Pokkelokkie Cloth Nappies Night Time Cloth Photos by Roxy Hutton CGScreative (1 of 3).jpg
Pokkelokkie Cloth Nappies South Africa Photos by Roxy Hutton CityGirlSearching blog (4 of 55).jpg
Cloth Nappies South Africa photos by Roxy Hutton citygirlsearching blog (8 of 19).jpg
  • Sloomb Snapless Fitted:

I bought these overseas and had family bring them over when they visited. These need a cover…we use either a Blueberry Capri or a Fleece cover). Everly used to use these until they were no longer absorbent enough for her (around 18 months). Aaron now uses them.

  • Blueberry One Size Capri Nappy Cover

These are our absolute favourite PUL covers. They are soft and stretchy, and have fitted over a 3 month old and still fit Everly now at 2.5 years old. They are GREAT! You can buy them here in South Africa through TinyHiney.


And now for some tips from the pro…Kerryn is the owner of Pokkelokkie (and is just the loveliest lady, she has helped me troubleshoot nappies right from the very beginning, and I still contact her today when I’m having trouble):

  1. Use only a fully absorbent nappy for night time. 

  2. The nappy must be made of a good quality fabric. How to be sure of this? Opt for a locally made night nappy. 

  3. Two hemp flats is  a very affordable and very reliable night nappy solution if you are on a tight budget.

  4. Avoid PUL covers at night. A good quality fleece cover or fleece longies is 100% reliable.

  5. Do your research. Buy well, buy once. Buying cheap nappies often does not end well.

92463506_3098572250195494_1363907572544831488_o.jpg

Nightime cloth really doesn’t have to be scary, and is as simple as just giving it a try. And if you do get leaks, don’t give up! I still get leaks now and again, and have to re-adjust what I’m using (especially on Everly as she’s bigger and often the nappies I’m using don’t fit properly under the cover because they are so bulky…and this is because she has a lot of output and needs a nappy to last 12+ hours). But, as flats have proved to me time and time again, you really just CAN’t go wrong with a good hemp flat. And even though Everly is daytime potty trained, I am going to be purchasing a few more flats and pre-folds because they just work SO well.

Do you use cloth at night? if not, what’s stopping you? Leave me a comment below and I can help troubleshoot any issues you may be having.

Yours in cloth,

Roxy

x

Disclosure: some of the above nappies were sent to me as a gift to try & in exchange for photographs, but all thoughts and views are honest, and my own.

How to make Rainbow Spaghetti - A sensory activity for toddlers {that is safe for babies too!}

How to make Rainbow Spaghetti Sensory Activity for Toddlers Food safe-01.png

This was a really fun activity for Everly, and I’ve got lots of tips to share with to make sure this lasts longer than one play session (as was the case with us because I actually just winged the whole thing didn’t look at how to store and preserve the pasta). So, first things first, this is a food based project (i.e. you’re cooking pasta) and so don’t expect it to last for more than a couple of days. I assumed it would last just like our box of Rainbow Rice (which is still going strong 6 months later…but this is because the rice wasn’t cooked, silly me). So, as long as you know that going in, then you’re all set!

I used a whole packet of pasta (a bit of a rare commodity these days with us being on Lockdown here in South Africa) but perhaps you have a little stash and can spare one. We don’t really eat pasta (not because we don’t like it....I LOVE PASTA) but because we follow a loosely low carb way of eating so I made sure to buy a pack of spaghetti before Lockdown so I could do this activity with Everly. You could actually use any pasta, but spaghetti made really fun coloured worms.

Then you need oil of some kind…and then food colouring.

IMG_0386.jpg

There are two ways of going about this. You can do what I did (which was awfully time consuming) and boil separate batches of water for each colour you want to make. I thought this would make the colours more vibrant, but I’ve been told the other method does indeed work just as well.

Bring water to boil with a good dollop of oil (use more than you think you’ll need to keep the pasta nice and slimey) and then add your pasta and food colouring. Or cook your pasta first and then use separate plastics bags to make separate colours. Allow to cool and then place in a container of sorts. I used a big plastic box.

Some tips:

  • Rinse the pasta in vinegar after cooking to help preserve it for a few days (although I’m not sure if you should rinse it before putting the food colouring in…as I haven’t tried this step yet).

  • Dry it out a bit in the sun after playing, to help preserve it for a few more days.

Just bare in mind how squishy the pasta can get. I left Everly for a few minutes and came back to pasta pieces squashed into the mat by our front door…this wasn’t fun to clean up at all. So best to set up a nice big area to play on that you can clean up afterwards. Or better yet, set it up outside where the dogs can help ‘clean’ up the mess once you’re all done.

How to make Rainbow Spaghetti Sensory Activity for Kids (14 of 19).jpg

Happy playing friends!


Here are more fun activities to do with your little ones:

Beautify Your Blog - my free gift to you to help you up skill during the stay-home period.

Creative Business-01.png

A few years ago I launched an online course called BeautifyYourBlog. I can’t tell you the number of hours of work I poured into it, as well as all the knowledge I shared. It was really well received, but I didn’t give marketing it the right attention (I’m going to be honest and say the fear of failure is what stopped me from going full force with it) but I learned a lot and I loved sharing my blogging journey.

Because most of us are at home (or we should be! Apart from those essential service providers whom we don’t give enough credit and support to), now is the perfect time to up skill and work on all the projects you’ve had on your to-do list for like, forever. If you come out of this time without having leaned a new skill, without having accomplished a good chunk of things on your to-do list, then you only have yourself to blame because YOU HAD THE TIME. A lot of us are trying to juggle working from home with little ones and staying on top of housework, while it’s hard & challenging (on ALL the levels) it’s not impossible to carve out some time for yourself to work on your goals.

#BeautifyYourBlog Handguide for Bloggers byr Roxy Hutton of CityGirlSearching (10 of 25).JPG

Along with the online course, I created a workbook to be used alongside the course content. It sums up nicely everything that was inside the course, giving you the building blocks to take your blog to the next level. Full disclosure, there are one or two spelling errors (my followers will nod their heads because they know JUST how bad I am when it comes to spellcheck…but there are only a few…I think haha) and I did create this a few years ago. This means that there are a few tiny things that have changed, but the meat of it all is still 100% relevant. And I believe this is the perfect time to actually start a blog, if it’s been something that has been on your heart for a while.

I could launch into a million different reasons as to why blogging isn’t dead, and if you think it is then you probably wouldn’t be here reading my blog, so I won’t go into that. But if you are here, and you’ve often thought that you’d like to start a blog; then this post is just for you! Whether you' want to use this time to document your family’s every day adventures so Granny and Aunty Eileen can see what you get up to everyday, or whether you’ve really been battling with the isolation and writing down your thoughts and feelings would really help you to work through them, blogging is an incredible tool that gives a creative outlet and can be a jumping board for so many things. And if you’re just here for the free things, that’s okay too.

CityGirlSearching Styled Stock Photography  (9 of 13).jpg

MAKING YOUR BLOG LOOK IT'S SHINY BEST CAN BE A DIFFICULT PROCESS...BUT IT DOESN'T HAVE TO BE.

When I first started blogging, I wish I had had someone show me the ins and outs of branding and what it means to build a brand around your blog. I fumbled my way through my first 5 years of blogging, making so many changes and wasting so much time creating graphics for my blog that really didn't fit my style.

If someone had given me this when I first started blogging (10 years ago now), it would have saved me so much frustration, not to mention time.  This handbook goes through the how's and the why's of branding your blog and most importantly, it shows you how you can do it yourself.

THIS HANDBOOK WALKS YOU THROUGH ALL THE STEPS YOU NEED TO TURN YOUR BLOG IN A BEAUTIFUL, COHESIVE AND VISUALLY APPEALING SPACE THAT YOU CAN BE PROUD OF.

Perhaps your current corner of the web isn't what you hoped and dreamed it would be, and you're not sure how to make it stand out from the other millions of blogs.

Or perhaps, you've been putting off starting a blog because you have no idea how to make it look good; how to make it a place you can be proud of.

Inside I share with you super valuable secrets, tips and tricks that you will be able to implement immediately to beautify your blog, all by yourself. 

CGSBlogStockPhotography (27 of 28).jpg
 

WHAT'S IN THE HANDBOOK?

  • Lesson 1: Blog Branding - logo, fonts, colours & style guides

  • Lesson 2: Blog Layout - how to stand out and show off your content

  • Lesson 3: Blog Photos - how to take better blog photos

  • Lesson 4: Home, About & Contact Pages - the most important pages for your blog and how to use the space effectively

  • Lesson 5: Social Media Accounts - keeping your profile images & bio's consistent so you are instantly recognisable across all your social media platforms

  • Lesson 6: Branding for Pinterest - branding images/graphics for Pinterest


My goal when I created the Beautify Your Blog Handbook wasn’t to throw out a bunch of complicated theories and fancy sounding blogging terminology but rather to show you the best & most effective strategies for bloggers that will help you take actionable steps towards creating a better, more beautiful blog.

It’s jam packed with information you can make use of today, and all of that information is laid out in a logical, simple to understand way. I had planned to launch it as it’s own E-book (and I might still do this!) when I get the inspiration back to re-launch the course, but for the time being I would like this to be my gift to you. Pop your email adress in the form below, and the handbook will be on it’s way to you.

Here’s to creating beautiful things together.

The #CGScreative Corona Inspired Photo Challenge - Let’s tackle the Covid-19 stay home period, together.

The #CGScreative Corona Inspired Photo Challenge - Let’s tackle the Covid-19  stay home period, together.

There is no time like the present to grow your Instagram following, and I'm going to make it really easy for you! 

Introducing the CGScreative 30 Day Instagram Photo Challenge

This is the third challenge I have hosted over on Instagram, and I am delighted to invite you to join in the challenge for the month of August.

If you're wanting to learn tips on how to build a more cohesive feed, connect with like minded people and ultimately grow your Instagram following and influence, then you are definitely in the right place!

Read More

Our daily routine - a life update on being a stay (& try work from home) mom) to a two year old & a one year old

Our Daily Routine Trying to Balance kids and working from home citygirlsearching blog-01.png

Aaron Jack has just turned ONE, and I finally feel like I am slowly getting a little more into my groove when it comes to finding a work/life/home balance. I don’t always get this right, and I often feel like I have to decide which balls to drop as I can’t possible manage them all on a day to day basis (sorry to my darling husband, who often feels like it’s him who is dropped more often than not). But man alive this whole parenting thing is hard enough as it is, never mind when there is more than one child and then the next juggle of working from home (or rather when you TRY to work from home). And then us mamas are also supposed to fit in feeding the family, doing housework, giving the hubby the attention and care he deserves AND trying to fit in the elusive ‘‘self-care'“ that we all know is so important, but is generally the last thing on the list and the first to be postponed.

Today I want to share with you my current daily routine, and how I juggle all the balls in my life. This ‘routine’ is constantly changing, and I’ve had to work REALLY hard at being okay with things changing. Especially as what ends up changing things is my kids (ie waking up early from naps, being super clingy all of a sudden, teething, dropping a nap, wanting to do everything ‘by self mom!’ and the normal emotions that come with being a mom. Like some days, you just don’t feel like parenting, and you wish you could just go back to a moment before kids, even if it’s just for 10 seconds, to drink a hot cup of coffee and not be clung to by sticky fingers…I adore my little ones, but feeling like this is SOOOO normal. And, as long as we don’t wish we were back in those days all day every day, I think it’s healthy to have those feelings. Anyway, I’m going off on a tangent now, so let’s get back to the point of this post.

Here is my current daily routine for me and my family.

For anyone new around these parts, I am married to a dairy farmer and we live on his family dairy farm in a teeny tiny town called Creighton. The closest shops are an hour and a half away. I have two little ones (Everly Rose is 2.5 & Aaron Jack is 1), and we have a wonderful domestic worker who works Monday - Friday. I mention her, because she is essential to my mental and physical well being (because she is as dedicated to maintaining a clean & tidy house as I am) and is also here to lend a hand or two with both kids if I have to meet clients/have Skype meetings. Everly has just started going to play-school (she goes to school for two mornings a week…school is a good 40km ONE WAY and although I’m able to share one of the 4 lifts, I take her and fetch her and this takes up most of those mornings. It’s just not always feasible to take her, drive home, and then go and fetch her again and so I often take her to school and then run errands in the small town where her school is based. I actually often organise tea dates with friends in this time,as this is a wonderful way to get a little ‘me time’ in and make the most of the long drive. I had also only planned to send her to ‘school’ much later on, and to rather focus on more of a home based learning environment, but with another baby and trying to actually build my business, it works so well with her going to school. And she just loves it there.The wheels have yet to fall off in the 5 weeks she’s been going. We do cloth nappies (click here for all of my posts on cloth nappies), have 2 dogs (well, technically 3 as we just got a new puppy), have 2 cats and 6 chickens (this is where we get our eggs from…we eat A LOT of eggs, with both my kids eating two eggs for breakfast every day). We follow a REAL food diet (I used to say we followed a Banting/Low carb High Fat diet but we aren’t that strict anymore, and rather focus on eating real food, nothing processed, no added sugar and because of this I make 99% of my kids food…ie I spend a lot of time in the kitchen…click here for more posts on what my kids eat). I sleep trained both my kids from an early age (and because of this they sleep for a solid 12ish hours a night, and both still take naps…Everly is on the extreme side of the scale when it comes to sleep though, and has always needed lots more sleep than the average, but Aaron, who was much harder work getting into a good routine from 0 - 5 months, has been so much easier since that happened. I breastfed both my kids (and am still breastfeeding Aaron…they both wouldn’t take a bottle, and this is not something I forced because I didn’t need them to, as I was always able to be here at home…the boobs were always available haha and this meant no formula was needed). Gosh this is becoming a bit of an odyssey but bare with me! When I started weaning my kids (Everly at 5.5 months and Aaron at 6 months) they both went straight onto real food (no cereals!). They both only drink water & cows milk (although Everly is now very into Kombucha…a type of fermented tea…full blog post coming on this soon showing you how to make your own!) and we sort of follow a very loose Montessori approach to learning and play. Bedtime in our house is 6pm for the kids, which I know seems unattainable for lots of parents (and obviously won’t work if you are at work during the day and only get home at that time) but this has been key to my own mental wellbeing because I often collapse at 6:05pm and there are evenings where you will find me in bed by 6:30pm. I have been blogging for over 10 years now, and am a self taught photographer & website designer. I started my own online business in 2016, but it’s only really taken off in the last year…with this past month being my busiest month ever. I’m from Joburg, and have been married for nearly 8 years. I studied English Literature & Psychology at Rhodes University (this is where I met my hubby) and we both moved to South Korea to teach English for 4 years before settling back here in SA. I am also a qualified teacher & have a diploma in Online Journalism from the London School of Journalism. I also work for the farm, doing basic admin work as well as the payroll for the staff. We have been living out here on the family farm for nearly 3 years.

Whew! You made it…well done. Go grab yourself a cup of something & catch your breath before continuing with this post.

I say all of the above to help set the scene and knowing the above helps you understand more about my family and the choices we make, and why & how I structure my day. Things don’t always go the way I plan, and some days I just DON’T feel like standing in the kitchen at 10 o’clock at night making yoghurt..but for the most part I know that you have to be prepared if you want to feed your kids good food, and if you want to have a second to breath during the day you have to be strict about routine and be firm with little ones who like to test the limits of your patience. I think it is also VITAL to your marriage to have time together in the evenings, before your both exhausted from the day, to catch up & connect. Although this is something hubby and I need to work on, as I generally just feel like crawling into bed to switch my brain off while mindlessly watching series.

I hope you enjoy this post & that it offers you some inspiration to help make your day run a little smoother.


Here is my week-day schedule:

  • 04:30 Hubby goes to work, I snooze till 5am and then go make myself a cup of tea

  • 5am-6/6:30am I do client work, check emails, post to Instagram/reply to social media comments

  • 06:30ish - 7:30 Both kids wake up, change nappies, get them dressed and play time

  • 07:30: Zanele arrives for work (she comes in at 7:15 on the days that Everly goes to school as I have to leave the house at 7:30…she then takes over Aaron and has him until I get back from school at about 12:30.

  • 07:30 - 09:00 I make breakfast for the kids, I try and make a big portion of scrambled eggs & bacon so that hubby and I can eat that too…otherwise I generally eat a handful of nuts and lots of cups of tea.

  • 09:00 - 10:00 Aaron naps, Everly potters around outside/drawing/playing puzzles (here are some nice activities that encourage independent play). I am generally able to do a little but of non-focused computer work during this time. I often have to wake Aaron up from this nap, and I do this to ensure he still has a good nap over lunch time, which is more important to me as this is when both the kids are down.

  • 10:00 - 11:30 Play time with the kids

  • 11:30 - 12:00 Lunch time for both Kids

  • 12:00 - 14:30 Everly naps (if she’s been at school she will nap at 12:30/12:45 - 14:30. Although often I have to wake her up from the nap.

    12:45 - 14:00/14:30 Aaron naps. This is my sacred time during the day, because both kids are down and I get to rest/watch series/work on client sites.

  • 14:30ish both kids wake up, and it’s play time.

  • 15:30 is often a time when my kids will have a snack, or if they are super cranky we go for a walk down to the Willow tree with the dogs. We generally spend the afternoon outside in nature (nature for me is anywhere with grass…so even the front lawn is considered nature. I’ll often set up the water table with water and bubbles, or bring out our little blow up pool for the kids to splash around in. If it’s cold, we’ll stay inside and play with blocks or puzzles.

  • 17:00 Supper time

  • 17:30 Bath time

  • 17:45 Aaron has a feed, and straight down to bed.

  • 18:00 Everly changes into pj’s and then has quiet time (we have just started this to help prolong her evening…as she still takes a really long nap over lunch time and isn’t ready to drop it yet…haha although I’m sure it’s me who isn’t ready for her to drop it!) it’s not really fair for us to expect her to go to be bed at 6pm. But then it’s story time, prayers, and lights out. I watch her on the monitor and she generally sings, and talks to herself, only passing out around 7/7:30. I’m okay with this, because she’s happy to lie there quietly. It would be a different story if she was really upset and fighting us for that hour, but right now this works because she is quiet and content to lie there until she falls asleep, and this means hubby and I can begin out evening.

  • 18:30 Take dogs for a little stroll (this doesn’t happen every day) or this is generally the time that I start making yoghurt/making chicken stock/preparing food in batches for the kids ( I make big batches and freeze portions for every day). I try to also get supper ready for hubby and I for at least 5 out of 7 days of the week. Generally this is meat (chops/boerewors/mince/roast chicken/leftover stew from the kids) and veggies and sometimes a salad if I have the ingredients and feel up to it.

  • 19:30 - 21:00 Series

  • 21:00 Bedtime (if not earlier)

IMG_8518.jpg

The only difference over the weekends is Zanele isn’t with us (she goes home on a Friday afternoon) and so on a Saturday 7 Sunday I also feed all the pets (I have some form of help in a very eager & enthusiastic Everly) and collect all the eggs from the chickens. Zanele and I also ‘share’ the washing of the nappies, as I wash every 2 - 3 days, and this often falls over a weekend. I’ve only had her step in to help with the nappies in the past couple of months, as I was so determined to ‘do it all’ but I’ve realised there are certain things that you just have to relinquish control over, and accept the help that’s offered (this is actually one of the biggest motherhood lessons I’ve learned over the past 2 years). On the weekends when hubby is on duty, he is still generally around a bit during the day (depending on how busy the farm is) and so we are often able to at least have breakfast together in the mornings.


So, as far as a routine goes, the above has only really fallen into place since Aaron dropped down to two naps. Before this, everything was higgledy piggledy and I was often left feeling frazzled because there was never any downtown for me. I wasn’t able to get anything done (work-wise) during the day, I was too exhausted to wake up early (and actually both my kids took turns waking up at about 5 am on and off for a couple of months). This was killer for me, and considering I wasn’t able to get them on the same nap schedule I felt like I was being stretched far beyond my means. Luckily, one realises after the fact, that as with all things, there are seasons to everything, and the tough times don’t last forever…unfortunately this is also true of the easy times too. But up until Aaron was about 5 months old (click here for a post on the very early days of #TwoUnderTwo and click here for one 6 months in), I really didn’t think we would ever get to a point when I enjoyed both my kids every day. Now that he is crawling and pulling himself up on things, he is a different child, and far happier to play by himself (within reason haha and not for very long!) but at least it happens ever now and again.

IMG_8610.jpg

Some Tips for figuring out your routine

Accept (or be like me and at least ‘try’ to accept) that things change, and that the world won’t end when it does. When one (or both!) of my kids wake up early, my heart sinks. Especially if I’ve just say down to a hot cup of tea. I have to take big deep breaths, to help me ‘release’ the frustration I feel, and I remind myself that they are my babies and they need their mama. This helps a lot. In the early days, I had to often pick which little one to leave to cry during moments of the day, because I only have 2 hands and physically can’t feed a baby, change a nappy & prevent the entire bottle of powder from being shaken all over the carpet. Also accept that there aren’t any more ‘lie ins’ in the morning, unless you wake up at 2am and then have a ‘lie in’ from then till 5am ;) I’ve found the mornings that I don’t get up earlier than my kids, and if they are the ones to wake me up from my sleep…then I am a far grumpier and irritable person than the days I wake up intentionally earlier. Even if it’s just 20 mins earlier to have a cup of tea and let my brain log on for the day.

Decide on your priorities as a Mum and also a person. I decided very early on what my priorities were when it came to my kids. For me, I want them to eat the best food (this means I have to prepare it), I like a clean & tidy house (this means I am always picking up after them even though I have an amazing full time helper…the house is big and two kids make double the work…and for me, I can’t relax or function if things are chaotic. So this is a choice I make, to run around like a madwomen because at least when and if I get that cup of tea, I can enjoy it in a tidy space). I also have to be able to do something for myself, and this is my business. This means I need my kids to be on a schedule that gives me pockets of time to focus on this (ie my kids need to be in bed by 6ish pm and they need to be staying there until at least 6am…#hellosleeptraining which has allowed this to be a reality). My choice to breastfeed as long as I have has also meant I wasn’t really able to be away from Aaron for a good long time. But it wasn’t for that long, and it feels like I’ve blinked and here we are.

It’s either a good morning or a good afternoon. This was a wonderful saying that my friend Sophie told me in the very few weeks. She said she would focus on either having a good morning or a good afternoon, because it very rarely was every a good ‘day’. But, this means if the morning has been a dog show, the afternoon can only get better!

Be intentional with your free moments. Use them to focus on the things that leave you feeling rested/recharged. If this is scrolling through Instagram, that’s fine! If this is taking a quick shower, do it! Find something that’s just for you at least once a day, and be selfish with that time. For me, its the hour or so over lunch when both kids are sleeping. I try not to organise anything over that time, I don’t see friends, I don’t go anywhere, because I need that time to mentally prepare for the rest of the day.

Love on your kids. Kiss them, hug them, hold them, even if you feel like you are about to explode with frustration. I’ve found nothing makes me feel happier than my kids giggling because of something I have done. So in those moments where I feel like I just can’t parent (and there are lots, #justbeingreal) I take a walk outside around the house (because 30 more seconds of crying/winging won’t make a difference), take some deep breaths, and then I grab one (or both!) of my kids for a tight hug, put on some crazy music and we dance. This solves most things. And if that doesn’t work, snacks generally do the trick (always have some biltong on hand for these moments!).

It’s okay to live your life according to a nap schedule. This doesn’t work for lots of moms, and obviously if you have to work during the week (I am going to be honest and say there are plenty of days I wish I had a day job that took me out the house) you probably don’t want to be tied down by naps on the weekend and are more likely to be okay with naps on the go. I’m not this kind of free spirit, and you know what, for this season of my life I am okay with this. I know it’s just a season, and even though I’d love to be less fixated on naps and just go out for the whole day with my kids, as they are both so small, we ALL function better and are happier when they’ve had a good nap.

There you have it, a mammoth post on my routine. What’s your routine like? I’d love to hear how you make things work for you and your family, especially if you work from home.

x

Nursery Tour - a tour of Aaron's modern celestial inspired nursery

nursery tour of Aarons modern celestial inspired nursery baby room citygirlsearching-01-01.png

Aaron is nearly a year old (whaaaaat?!) and I have been wanting to publish this post since he was a teeny tiny newborn, mostly so that I could capture his gorgeous bassinet (a very special family hand-me-down) but alas, 12 months have flown by and here we are. I will share a few older photos of the room in those early days & months, as a few things haven’t changed. The biggest change came when moving him from the bassinet into the cot, as that is where Everly was sleeping once we took the sides down and converted it into a toddler bed (click here to read a full post on making the transition from a cot to a toddler bed).

When Aaron was sleeping in the bassinet, I had a single sized bed in his room which worked really well as a guest bed (mostly used by my Gran when she came to visit) and it worked nicely as extra seating when people came over to visit. I’ve got some very special photos of my mom and Everly & Aaron in the first few weeks, and that bed was the perfect place to sit and drink tea.

Once Aaron moved into his cot, the bed was moved into Everly’s room and she moved from the toddler bed into the big bed. It was a great swop!

Everly & Aaron (9 of 14).jpg

I spent, as I’m sure most pregnant ladies do, a fair amount of time on Pinterest trying to decide how I wanted to decorate Aaron’s room. I loved the idea of a space theme, but wasn’t very keen on the traditional rockets or planets, and then I stumbled across a beautiful lampshade that had the Ursa Major constellation , aka the famous polar bear and I fell in love. And so, I decided to follow a loose constellation theme for his room, with a lot of white, grey, blue and a touch of brown as those colours were brought in by most of the big furniture from Everly’s room.

When Aaron arrived early, just like his sister at 38 weeks, I didn’t have everything in it’s place and things stayed like that in those first few weeks. Once I took the pressure off myself, I was able to add little bits and pieces to really bring the whole look together…like the name plaque on his door.

I’ll link all the suppliers/brands at the end of this post to make it easy for you to look them up if you see something you like.

The details…

  • Feeding chair: a large wingback bought second hand on Gumtree and recovered

  • Custom quilt:a gift from Love DW (find them on Instagram by clicking here)

  • Custom designed bedding (scatter pillows, changing mat cover & wall art prints) by Riley & Fox

  • Nursery Thermometer Gro Clock: a gift from Tommee Tippee

  • Cot: Cozi Stijl from CoziCot

  • White Quartz Lamp: Crystal Geological at the Bryanston Organic Market in Joburg

  • Personalised poster: designed by me, printed by Nifty250

  • Sheep doorstop: Home Etc.

  • Grey rug: Rugs Original

  • White plastic laundry basket: Game

  • Wooden frames: Mr Price Home

  • Large blue satin pillow, blue candle & white clock: Mr Price Home

  • Black & white high contrast change mat dangles: Little Me Decor

Aaron's Modern Celestial Inspired Nursery Baby Room Tour by Roxy Hutton citygirlsearching blog (35 of 37).jpg

I’ve received so many questions from readers as to how I designed & printed the Nifty250 poster, which I’ll share in a blog post soon (hint…I used the Baby App & Canva to design all the graphics and then uploaded them in a specific order to Nifty250. It took a VERLY long time, but was very easy to do).

I hope you enjoyed this post! Look out for a proper tour of Everly’s Woodland themed nursery (I’m only about 2 and a half years late with that one haha) but writing this post has inspired me to go back through my photos and put hers together. In the mean time, click here for a post on her toddler room, and what it looks like now.

Click through below for more toddler blog posts:

Cloth Nappy 101 - The different types

Different Types of Cloth Nappies-01.png

Once you dive down the rabbit hole of cloth nappies, it can be so incredibly overwhelming to know where to even begin when it comes to what to buy first. I hope this post makes things a little clearer for you, and that you feel a little less overwhelmed. Please feel free to leave me a comment below with any questions you might have along the way, I could talk all things cloth for days!

Cloth Tip #1: Not all cloth nappies are created equal. There is a reason some are more expensive than others, and there is a reason why some brands are voted number 1 time and time again. I’m going to share my favourite brands and types of nappies in this post, but as always, bear in mind these are the nappies I’ve had first hand experience with and have used over the past 2.5 years with two kiddos.

Cloth Tip #2: the best way to start is just to start! It can be soooo daunting in the beginning, especially when it comes to putting that first nappy on, but just start! The worst that can happen is baby is comfy enough to leave you a lovely surprise in the nappy, and then you just whip it off and start again. And now you will have had experience with two nappies and suddenly it doesn’t feel quite so overwhelming.

Sizes

There are two ‘sizes’ of cloth nappies; newborn & OSFM (one size fits most).

Newborn Size:

Newborn size generally fits until about +-5kgs or around the 4/5month mark, all depending on the size and chunk of your baby. For flats, the newborn size is 50cm x 50cm.

OSFM (one size fits most)

This is the ‘regular’ size nappies, and unless stated, most people refer to this size when talking about nappies. Most babies fit into OSFM from around the 5 months mark, some sooner and some later, all depending on your baby’s body shape, chunkiness & weight. Most OSFM nappies will last until potty training, due to the snaps that can be ‘opened/closed’. Everly, who at 2 is currently potty training, wears OSFM nappies for nighttime & naps, and is still wearing the same nappies she wore at 6 months old. Aaron moved into OSFM from about 5 months. When babies move from baby to toddler, they generally slim down, and you might find you are tightening up your nappies again and that they can go on to fit much longer than you had thought they would. Here are some photos of Everly to show you how OSFM grows with your baby:

The same nappy at 8 months & 14 months:

The same nappy at 6 months & 25 months:

The different Types of cloth nappies

There are lots and lots of different types of nappies on the market today, and it is always suggested that you build of a stash of different ones to try before committing to one type or brand. This way you’re able to get a feel for them all, and you can get more of an idea of the types that you prefer, as well as what fits/works for baby. When I first started out, I bought a lot of my nappies pre-loved (second hand) from the South African Cloth Diaper Buy/Sell/Trade Facebook group, and this way I was able to build my stash on a budget. I also bought some of my nappies in the UK & Canada when I had family who could bring them over to me.

There are SO many different brands out there, and to help you, I’ve linked my favourite ones below. My recommendations are purely from experience, and there are lots more great brands out there that I haven’t tried so do keep that in mind when you start your cloth nappy journey.

types of cloth nappies

All-In-One (AIO):

The most expensive type of nappy, but also the most convenient & the most like a disposable with the ease of which they go on and off. They are ready to go on the bum straight from the washing machine & don’t need any fancy assembly. These are the easiest for first timers to use, and the ones that Dad’s/Grannies usually reach for first. If you don’t have a budget to consider, then AIO’s are the bomb! I found them to not be absorbent enough for my daughter until about a year, after which I would still boost with an extra padfolded small sized hemp flat. They are very trim, and great when out and about but they do take long to dry because all the parts are ‘sewn together’. I loved using AIO’s from about 15 months, and they became my most used after that. My favourite brands of AI'O’s are Biddykins, Smart Bottoms, Grovia & Thirsties. You can buy Grovia nappies here in SA through Biddykins & Little Sams.

Pocket:

A sleeve type nappy that you ‘stuff’ with different inserts (namely microfibre, hemp or bamboo) depending on much much/little absorbency you need. Come in a huge variety of prints & designs, they are quick drying (because the inserts and the cover are separate) are very affordable & you have control over the absorbency as you can add/remove inserts as you need.

Downside to them is it can be a pain to ‘stuff’ the nappies and they aren’t suited to night time (because you need A LOT of absorbency for nights). I love pockets for day time wear, and my daughter (2 years old & day time potty trained) uses these for her naps with a hemp & a bamboo insert as they are my most absorbent ‘day’ nappies). My favourite brand of pocket nappy is Biddyins.

Snap-In-One (SIO):

Basically an All-In-One nappy whose inserts ‘snap in/on’ as opposed to being sewn on. These have all the convenience of an AIO but they dry quicker because the inserts wash separately. My favourite SIO nappy is the Grovia O.N.E (which you can buy here in South Africa through Biddykins & Little Sams).

Another lovely local SA brand is KylieCo which makes GORGEOUS custom designed nappies, but they are on the pricier end at about R450 a nappy. Although they are beautiful (and their squishiness & prettyness justify their hefty price tags, I don’t find them to be as absorbent as my other nappies).

All-In-Two (AI2):

These are generally made up of a waterproof cover with inserts that lie/clip into the cover. In this way they are similar to SIO’s but their shell (the waterproof outside part) is able to be re-used in between nappy changes because you can simply give it a wipe unless it has been heavily soiled.

My favourite brand of AI2’s is Buttons Diapers (available here in SA through TinyHiney & Smitten Baby Boutique.

Fitted:

A full absorbent nappy that needs a waterproof cover. They come in different fabrics (usually bamboo cotton or hemp) and are an amazing night nappy. They do tend to be bulky (but this is the case with all night nappies) and are either snap-less (which means you need to use something like a snappy to close them) or they come with snaps/velcro for easy clipping open/closed. They take a while to dry, but are very absorbent. My favourite fitteds are:

-daytime: Pokkelokkie Dawnpatrol

- nighttime: Pokkelokkie Sleepy Dust & Sloomb

Hybrid Fitted:

Usually made by WAHM's (work at home moms) and they have a water-resistant layer (fleece) sewn in but do need a cover to be fully waterproof.

These are my least favourite nappies because both of my kids have been heavier wetters and so the beautiful prints that these nappies can come in are always going to have to be covered by a waterproof cover, and then I don’t see the point in having such a pretty nappy that you will never see. If you have a light wetter, you would get away with using these with no cover. In saying that these are my least favourite nappy, the fish print below has been one of my favourite nappy prints and has gone on both of my kids. I think there is a time and a place for hybrids, and as I mentioned, if you have a light wetter you could get away with not needing a cover.

I bought the nappy below preloved on the South African Cloth Diaper Buy/Sell/Trade group.

Flat:

These are the ‘old school’ nappies that our mums and Grans used to use (remember the ‘terry towel squares’?, but these days they come in lots of different fabrics. - The fabrics that are popular today are just trimmer than the old terry towelling nappies, and of course there are loads of different colours around nowadays. Flats are just that, a flat layer of fabric, cut into a square, that you fold and then secure with a snappy or a pin. They usually come in 3 sizes: newborn/small (50cmx50cm), medium (60cmx60cm) and then OSFM or large (70cmx70cm). I LOVE flats and have used them on both of my little ones from birth. They are the most versatile nappies for the newborn stage, and they make the best night nappies because they are trim, super absorbent and can be easily boosted. I use flats for both my kids at night, with a fleece cover for Aaron, and with a nice stretchy blueberry coverall cover for Everly.

My absolute favourite flats are Pokkelokkie hemp flats (the blue ones pictured below). I am STILL using Everly’s old newborn sized flats to boost her night & day nappies, and they are still going strong on Aaron.

Newborn Cloth Nappies Flats Pokkelokkie Mommy blogger citygirlsearching (1 of 7).jpg

Prefold:

These are similar to the flats as they are also square/rectangular, but they have an extra absorbent middle layer (basically the middle of it has already been boosted and sewn together) giving you more layers for absorption. They are fastened with a snappy/pin & need a cover. They can come with ‘wings’ cut out (making it much easier to fold onto baby, and I love using these on Everly at night and have done so since she was about 15 months old. These are easier for Dad to work with that a plain flat. My favourite prefolds are the winged help ones from Kanini (but mine are very well used as you can see from the pic below, and they have little holes from being fastened with a snappy).

I fold the bottom of the nappy up (pictured on the flat) to make it a bit smaller for Everly, and then padfold another small sized hemp flat in the middle before folding the sides over. I then put another small padfolded hemp flat between the nappy & the cover, and this is what I do for Everly for nights. It’s a very bulky nappy but works like a bomb for 12-13 hours of wear.

Well done if you go this far without feeling totally overwhelmed! As I mentioned in this post, it can seem very daunting but once you become familiar with all the different types, it all starts falling into place. The best advice I can give is to meet up with a cloth nappy mommy in your area who can show you the ropes and then you can see first hand how things work. It’s not as scary as it seems, and everyone who uses cloth nappies that I have come across is so happy to help you troubleshoot/share tips/troubleshoot/give advice.

Next I’ll do a blog post on the different types of inserts, which are the most absorbent, and my recommendations on which ones to use when. Stay tuned for that!

And, as always, leave me comment below if you’d like to as me anything cloth related.

Drakensberg Gardens resort - A fun filled family getaway destination

Drak Gardens Gooderson Drakensberg Gardens Resort Family Resort Berg South Africa Family Holiday South Africa citygirlsearching blog_Artboard 3.png

We were invited to stay at Drak Gardens (otherwise known as the Gooderson Drakensberg Gardens Golf & Spa Resort) a short time ago, and all of us can’t wait to go back there again soon. What a wonderful place to take the family, filled with every activity you can imagine, good food (they offer breakfast & dinner buffets) and loads and loads of open space for little ones to explore (and get well & truly worn out & ensure good sleep!).

We spent 2 nights in their family room, and what a treat that was. Hubby and I were blown away by the amount of space in their family rooms, as we were all gearing up to share one room. Sharing one room with a 2 year old and a 9 month isn’t really my idea of fun, but it can be done! But I was so excited to find out we could all have our own space for the weekend. Even though both kids were up at 5am each morning (I am very spoiled with their usual wakeup time of between 6:30 & 7am). This was easy to manage though, as the breakfast buffet opened at 6:30 and it was light at that time anyway, which meant it was easier to get out of bed and haul them both off for a nice walk before heading to the dining room for breakfast.

There was so much to do during the day…an animal area where Everly got to spend some time with the friendly goats, a very sweet & good natured pony that took little ones for a ride twice a day (for free!), and then the highlight for all of us…the swimming pools! As well as lots of slides (Everly is still a little small for them) the main attraction for all of us was the Cove…a heated swimming pool which felt like a bath, and it’s where we spent most of the day. Aaron LOVED the warm pool too, and had a ball splashing around while watching his sister and all the other kids play.

Saturday afternoon we all took a nice long walk to the Adventure Park (past the Putt-Putt…putting that on our list for when the kids are a bit older), past the Zipline & tree top adventure course (which looked AMAZING!!! Again, popping that on our list for when the kids are older) and to the climbing wall, jungle gym & bike zone. We finished off with a treetop stroll through the bird walk, and then headed back (chasing the thunder clouds!) to the heated pool for a last dip before supper & bed.

Both kiddos arrived happy & smiling (thank goodness for both of them napping in the car!) and off we went to check in and get a feel of the place. Our room took ages to be ready (they were doing some last minute renovations…while we were a little frustrated at first, once we saw the room and how much space we would have, we would have waited ALL day if we had to!). There was lots to see and explore while waiting, and all the staff we passed on our way were so friendly and welcoming.

The Family Room

What a lovely family room, perhaps the biggest we have stayed in before. It was basically two bedrooms (each with their own door /entrance to outside) separated by a little passageway with two adjoining bathrooms. One bathroom had a shower, and the other a bath, both had toilets.

The bigger bedroom had a double bed, as well as a fridge (super important for us as I had brought some food items that needed to be kept cold) and a kettle. This was a lifesaver for those early morning wakeups, ensuring Mommy & Daddy could at least get a well deserved cup of coffee at silly o’clock.

Things to do

At check-in, I was given a programme for the resort, which showed all sorts of activities for the whole family. I was most interested in the animal feeding zone and the pony rides, and I wished I had paid more attention to it (I forgot it in the car the whole of he first day!) and we missed out on face painting and rock painting on our last day…but, thankfully Everly was none the wiser.

Even without the scheduled activities, we were able to keep both kiddos happy and busy. And Mom and Dad were both able to have a few quiet seconds to jump in the pool once or twice (each!).

I was also SUPER impressed by the little shop, which was so well stocked! I know that the area is really popular for overnight hikes, and with the self catering accommodation options available at the resort, you really can find all the essentials for your stay.

Everly & Aaron had a ball, and we had such a special family holiday together, with lots of laughs (and only a few tears along the way). I didn’t get a chance to visit the Spa this time, so I’m adding that to my (every growing) list for next time!

Thank you so much to Gooderson Drakensberg Gardens Golf & Spa Resort for having us to stay. We all had a really lovely time, and will definitely be back again soon.


How to make your own Rainbow Rice - An easy & fun sensory Activity for Toddlers

How to make Rianbow Rice South Africa Sensory Activity for Toddlers-01.png

If you’ve even just spent 1 minute on Pinterest and searched for toddler activities, sensory bins are just about the first things that pop up. Basically, a sensory bin is a container of sorts that you put different things into that stimulate your little ones senses. One that has always intrigued me, and one that I have been wanting to do myself for AGES is a Rainbow Rice sensory bin. I finally got around to doing this, and it’s one of Everly’s favourite things to play with. And the best part, she doesn’t need me to help with anything and so it encourages independent play (click here for a blog post on 5 more activities that encourage independent play).

I had to do a quick google as to why exactly sensory play is so important, and I’m sharing some info I found on the CreativePlayUk site:

1. Sensory play builds nerve connections within the developing brain’s neural pathways, which trigger a child’s inclination for and ability in competing more complex learning tasks

2. Sensory play supports language development, cognitive growth, motor skills, problem solving skills, and social interaction

3. Sensory play aids in developing and enhancing memory functioning

4. Sensory play is great for calming an anxious or frustrated child

5. Sensory play helps children learn vitally important sensory attributes (hot, cold, sticky, dry, etc)

This sensory bin will trigger your toddlers sense of touch (the rice), smell (if you choose to use essential oils), sight (the bright colours) & sound (the rice makes the most wonderful sound when poured) making this a wonderful activity for just about any toddler.

Rainbow Rice Sensory Bin How To CityGirlSearching Blog (27 of 27).jpg

Now, a word of caution if you’re going to attempt making this WITH your toddler. There IS going to be mess (probably A LOT!), and there will probably also be tears. Take a deep breath, relax a little, and rather enjoy the process. And, in saying that, no judgement if you stop half way, put your toddler to bed for their nap, and use the quiet time to finish making the rice in peace and quiet!

Most of the instructions I found online talked about using Vinegar and food colouring, but I had these acrylic paints lying around and decided to give them a bash and they worked out soooo well. I also only used 1 plastic ziplock bag for all the colours, and I just washed it in-between uses so try and now mix the colours too much.

What you need:

  • Rice (I bought the cheapest, biggest bag of rice I could find…buy as much rice as you’d like to fill your container)

  • Airtight Plastic container (i.e. something with a lid). Looking back I wish I had bought a container that;s sides weren’t as high, because Everly can’t actually sit on the floor and reach inside it, she has to stand or sit on her knees…not a huge train-smash but it does mean she makes more mess…but this is probably just me and my OCD tendencies when it comes to cleaning up). In saying all of this, she actually likes to sit INSIDE the container too…so I’m glad I bought one as big as I did. But it does mean you need a lot of rice to make it worth the effort.

  • Ziplock bag(s)

  • Acrylic Paints (or food colouring, but I think gel food colouring would work the best if you go the food colouring route)

  • Essential Oil (optional…but does give the rice a nice smell, especially as my paint smell was rather strong…make sure you choose something you actually like the smell of. I just used what I had in my cupboard and I am now 100% sick of smelling this blend… I would have preferred a lemon grass or lavender).

  • A willing helper (OPTIONAL!!! haha)

There is no exact measurements for this…I started with a measuring cup, but it was too big for my little bag and ended up just making a mess. So in the end I just poured the rice directly from it’s bag into the ziplock bag. I needed an extra pair of hands for this though, and luckily had our Nanny nearby for this step.

Pour about 2-3 cups of rice into your ziplock bag, squirt in some paint (add white to your colours to change the shade a bit), add a few drops of essential oil if you’re using any and seal the bag.

Then squish the bag and the paint together until it’s all mixed in well.

Instead of using an oven to dry out the rice, I just put the different colours onto baking trays and left them outside for a couple of hours. I think the acrylic paint was the key to making sure the rice dried out really well without having to use an oven.

Then, get your toddler involved (if they haven’t already been a part of the process) to empty the trays into your container. I would suggest moving to the grass were cleanup won’t be as much of a worry. Although, I now put a big blanket under the box so that I can put all the rice back once she’s finished playing, otherwise there would be an awful lot of coloured rice all over my garden. And I’m pretty sure the paint would wash off the rice leaving pools of red and yellow all over the show. Not sure my grass would like that very much ;)

And then leave them to play and mix!

I change things up every now and again by adding plastic measuring cups and spoons (toddlers LOVE pouring activities), and then swop these out for plastic animals and other toys that she has fun burying and looking for. There really are so many different things you can do with the rice, and even I have spent my fair share of time pouring rice into and out of a cup…it’s soooo relaxing!

So there you go. And easy and fun way to keep your little one entertained. Please do let me know if you make this yourself, and post some photos (tag me in them over on Instagram!) I’d love to see your little one’s enjoying their own rainbow rice.

Everly's Bedroom - A Toddler Room Tour

Everlys Bedroom A Toddler Girl Room Tour-01.png

We have been living in our new home for just under a year, and in that time, Everly has moved bedrooms, moved from a cot into a toddler bed, and then into a regular sized bed and she’s also gained a little brother. That’s an awful lot of change for one little girl to go through in a year, and she’s handled it all so well. Click here if you’d like to read my post on transitioning from a cot to a toddler bed, it doesn’t need to be a long and scary process, and I am 100% certain your little one with surprise you with how well they adjust.

Today I want to share with you what her bedroom looked like once we converted her cot into a toddler bed. We did this at about 17 months, and she has now just turned 2. Her room now looks similar to these photos, except she is now in the big bed and the toddler bed has gone back to being a cot and is in Aaron’s room. I’ve kept the room as simple and open as possible, as I really like ideas behind the Montessori method: a child should have freedom of movement, and should be able to move independently around his (carefully childproofed!) room.

In a traditional Montessori room, there is no cot, but rather a bed/matress on the floor that the baby goes straight to sleeping on. I’m not quite that brave, and really loved our cot, but I was pleasantly surprised at how easily Everly did transition from being confined in a cot, to having complete freedom in her room. You can read more about how we did the transition by clicking here.

The Bed

This is the Stijl Cot from Cozi Cot (which included the toddler panels to convert the cot into a little bed).

Everly Rose Toddler Bedroom CityGirlSearching Blog  (1 of 49).jpg

I JUST loved how cute the bed is, and how perfectly sized it was for Everly. She could get on and off the bed herself (she only actually fell off the bed once, much to my surprise, and got back on within a minute and carried on sleeping). My only concern is the edges are a bit ‘sharp’ and little one’s are more likely to bump their heads, but Everly didn’t actually ever do this more than once or twice. What I particularly loved about this set up was I could carry on using Everly’s cot sheets, as you are still using the same matress as the one that was in the cot. This means we didn’t ever actually need to buy separate toddler bed linen, as she carried on using what she used in her cot, and then she went into an actual regular sized single bed and has used regular sized linen since then.

Also a note on bedding, Everly has always kicked her blankets off, and so she hasn’t ever (and still doesn’t) use a duvet. I just dress her really warmly, and then she goes to sleep with a woollen blanket that always ends up either on the floor or at the bottom of the bed. But it’s there in case she needs it. She also doesn’t actually use the pillow (the idea of a pillow is a bit like the idea of the duvet…us adults can’t imagine not using them, but they are ‘learned’ necessities and if they have never has them, toddlers/babies don’t know what they are missing. The pink fluffy pillow below is more for decoration that actual use, although I use it when I lie with her in bed for story time.

Chest of Drawers/Clothes Storage

This chest of drawers is actually an old piece from my moms house which she painted for Everly. It’s only now (at 2 years old) that Everly has been able to open her drawers (they are really heavy) and even now she doesn’t generally take everything out…but then again, she is a girl and I can imagine a boy might do things differently haha.

I keep her nappies (we do cloth nappies…click here to read more about that) in the top 2 drawers. Then the second two drawers are for her cloths, and the bottom drawer is filled with the next stage of clothes as well as shoes.

On top of the shelves you can see her pink Rose Quartz night light (although this doesn’t get left on at night…click here to read where we got ours from), a clock, a few meds, tissues, and her video monitor. The video monitor has been an amazing thing to have since she moved into a big bed, because now we can keep an eye on her and see what she’s up to when the door is closed. Everly has always been really quiet when she wakes up from her naps, and so I’ve always assumed she was just sleeping. Now with the monitor, I’ve watched her wake up, head to her book shelf and easily spend 30 minutes ‘reading’ her books. I say reading in inverted commas, because up until the last month, she hasn’t once tried to open her curtains or turn on her light and so would be ‘reading’ her books in the darkness. I don’t actually mind what she does in her room, as long as she’s quiet. Obviously, first prize is that she is actually napping, but on the days when she wakes up early/doesn’t actually sleep…it’s great that she is happy to amuse herself relatively quietly.

Toy & Book storage

Everly’s books are kept on a little old pine shelf we had in her old room. I had soft storage boxes from H&M (the pink and white ones you can see on the open shelf below) which I have always kept her toys in. Now these still work really for her toys and blankets (please tell me I’m not the only person whose child loves blankets?).

The plastic box under her books is where her linen, spare changing mat blankets (i use pretty receiving blankets over a waterproof change mat to change her nappy as they look so much prettier than the actual boring old grey change mat that came standard with our Dischem Nappy Bag) & box of blocks stay. Since moving our compactum to Aaron’s room, we change her nappy on the big bed in her room. It’s not at the greatest height, but it works none the less.

I don’t like clutter (although I’m sure close family are shocked to read that as I have been known to be a bit of a hoarder) but I’ve always tried really hard to keep my kids’ rooms free from clutter. As you can see from Everly’s toy shelf (my father-in-law built this above shelf for guests to use for their clothes when the house we now live in used to be a guesthouse…click here to see what it looked like before we moved in!), I try to keep things very minimal. I love wooden toys, not just because they seem to have become really trendy again, but because there is something timeless and magical about a wooden toy, as opposed to plastic. I then swop out her toys every now and again (from the small collection she has) and she loves this as it’s like she’s getting new toys to play with.

I keep her toiletries (wipes, bum cream, powder etc) on the shelf above her toys, and this is also where her ‘DooDoo’ and dummy are kept. She' only gets these things for nap & bedtime, and keeping them high up out of her reach helps to keep them just for sleep time. It’s also become a fun part of our routine, she she hands them to me when she wakes up and we put them on the shelf together when she wakes up, and she helps me take them down when it’s nap time.

And then at the very top of the shelf is the special Nifty250 poster I made to document my pregnancy with her. This came out so much better than I imagined it would, and I have since made one for Aaron too!

Hanging Space

I have one set of hooks that hubby put up near the door, this holds Everly’s towels, hats, and a few other little bits and pieces.

And then behind the door I found this door hanging rack that fits over the top of the door. This is where I hang her nappy bag and our beloved UbuntuBaba Stage 2 carrier. I don’t use this carrier much, as I’m generally carrying Aaron in the Stage 1, but hubby uses this often, and Everly loves riding on Daddy. It’s also got space to fit her wet bag (the waterproof bag we take with us when we travel that holds her nappies in for the day…we got ours from Trendlings.

Decor pieces

It is nearly impossible to drill into our old sandstone walls, and as the inside walls are actually mud walls, you risk huge chunks of wall falling out & crumbling when you do. So, I have had to make use of the original nails in the walls, and hubby managed to put up two more for my near the door. But what I do have a few things hanging on the walls in Everly’s room and they bring me such joy to look at them.

The first is this beautiful custom wall hanging by Woven Whimsy, which matches Everly’s room perfectly. Danielle is just the sweetest (she’s also a molecular geneticist by day…how amazing!) and set about to find the perfect shades of blush to make my order.

The second piece on her wall is one of my photographs of our cat Amber, as a kitten. This photo was actually on her wall in her nursery, and I love that it still fits her toddler room.

I also have a custom made pouffe and mat, both hand crocheted by the most wonderful lady called Jabu who runs Zende Handmade Creations. I met Jabu a few years ago at the Creighton Aloe Festival, and since then have bought so many beautiful things from her, and share her work on all my social media platforms so that other people can find her. She’s wonderful!

And lastly is Everly’s birth announcement, which was made by the loveliest lady I know, Jess from Watercolour Heart Illustration. It details Everly’s date of birth, her weight and height and is just so pretty. You also can get one done any time (I only actually ordered it when Everly was nearly a year) and I still need to get one for Aaron.

All of the wooden frames you can see are from Mr Price Home.

And lastly, perhaps my most favourite thing about her room is her custom made name plaque on her door. I actually had one made for Aaron’s room first, and then once that was put up, I realised I just HAD to have one made for Everly’s room too.

27A22CDB-7AC7-441A-8134-8C52E1307A44.JPG

Taneille, from Liv Bespoke was just so wonderful to deal with, and send me endless messages with ideas and then step by step process photos so I could make sure it was exactly what I had in mind. And it came our perfectly! I can’t recommend Live Bespoke enough.


So there you have it, a tour of Everly’s toddler room. As it stands now, her room pretty much looks the same, except the cot is no longer there and we’ve moved the big bed into the corner where the cot was. I plan on getting an actual wardrobe for her room next, as her clothes are getting bigger and she needs some hanging space, but for now, everything is still very functional for her.

I’ll do a full room tour of Aarons room soon too (I better actually get on that before he’s a toddler!) so look out for that post soon.

Toddler Activities - Quick & Easy activities that encourage independent play

Toddler Activities to encourage independant play-01.png

I’m sure we’ve all spent our fair share of time on Pinterest, scouring through millions of different blog posts with ideas for keeping toddlers entertained…and if you’re anything like me you’ll also be looking for activities that you don’t actually have to be 100% involved in because #thatbusymomlife.

Today I’m sharing some of my favourite activities that encourage independent play, which I truly believe is the best sort of play your little one can do (and that’s not just because it might give mom 5 minutes to actually drink a hot cup of coffee for once). What often happens with us parents, is we end up ‘playing for’ our children, showing them how toys should be played with, and how things work, thereby taking away all the creative fun and self teaching that automatically happens when you leave a child to figure out a toy/activity for themselves. I find this to especially be the case with a puzzle…I found it SO hard not to get involved when I first gave Everly a puzzle, and I found it even harder to step back and not tell her she was placing the pieces in the wrong places. It’s such a good skill for us to learn as parents, I’d say almost as important as the skill of independent play that we want our kids to learn and enjoy.

Independent play doesn’t always come naturally to every child, and is a learned behaviour that some kids take to almost instantly, and others need more help along the way. So, to help you, here are some of our favourite activities that lend themselves really well to independent play:

  1. Play Dough!

We have tried all sorts of brands (including homemade variations) of playdough, and the one i recommend highly is the Giotto be-bè play dough (you can find it on Takealot) as it’s got the nicest consistency, and doesn’t have any weird smell. It’s definitely pricier than most of the other brands, but I think the quality is 100% worth it. I bought Everly a little PlayDoh tool set a while ago, and she just loves all the little bits and pieces, and uses them with all the play dough she owns. She also uses the knife as a spoon when making tea ;)

2. Chalk

This has got to be one of the best activities I’ve set up for Everly. As you can see from these photos, she’s grown up a lot since I took them, but she still plays with her chalk all the time. She has just as much fun with a wet cloth, wiping & cleaning the boards, as she does actually drawing. I bought these magnetic chalk boards from the Crazy Store, and then use a little plastic bucket to store her chalk and eraser in.

The best part about chalk…it can easily be wiped off of surfaces, so if you have a toddler who is a bit too spirited when it comes to the walls in the house, chalk is a dream to clean up. In fact, I actually only had chalk in the house for Everly to draw with right up until she was about 18 months old.

3. Water Play

There are MILLIONS of different variations of water play, but Everly is pretty content with a bucket of water, a brush, and a cloth. Then I sometimes add some hand soap for bubbles, and often chuck in random bits and pieces that float/sink that she has fun ‘painting’ and cleaning. This activity is great for the warmer weather. Just make sure to lather on sunscreen and pop a hat on during the hottest times of the day.

I also bought a pack of plastic animals from the Crazy Store, which she has fun playing in the dirt with them and then cleaning them in the water and bubbles.

Everly & Aarom Augusy 2019 (1 of 32).jpg

When in doubt, go outside.

Kids don’t actually need any toys or planned activities to have fun. It might take a bit longer if your toddler is used to mommy or daddy always being around to play with, but the more opportunities you give them to be bored, the quicker they will learn to make up their own games and fun.

I have always left Everly to her own devices (always making sure she is in a safe space to explore and that I am close enough to hear her if she get’s into any trouble) and more so now that she has a little brother that needs me a lot more right now. I find that when I’m not hovering around (or in sight of her) I can literally see her brain clogs whirring as she potters around the garden planning her next adventure. The moment she sees me is when suddenly ‘Mommmm’ and it’s like she can’t play without me. But, when I’m not around (I often watch her from a window so make sure she’s happy and safe) it’s just her and her imagination, and it’s the most amazing thing to watch.

CGS_0955.jpg

In our home, there are always a few ‘toys’ in reach wherever she is. And I say ‘toys’ because most of the things aren’t your usual toys but rather household items she likes playing with.

For when she’s outside, she can always help herself to her wooden trolley, her gardening tools and a bucket with plastic animals, lids & cups as well as a box of Duplo. We are still working on the whole ‘pack away when you’re finished’ rule, but having less junk lying around means she has to work a little harder to make up her own games and activities.

I keep the Duplo in a big plastic container, and then dump out the contents onto a mat (our favourite play mat is this gorgeous big Love Baby one I won in a giveaway on Instagram last year. It’s HUGE and fits both kids and their toys, but being so big it is a bit of a pain to store. So I sort of fold it & shove it onto the bottom shelf of an old metal gardening set of shelves we use to also keep our boots on.

Duplo Activity for Toddlers (1 of 1).jpg

Inside the house, she has a shelf in her room with her books, and then another shelf with wooden toys always on display. She can take these out to play whenever she wants to, but she doesn’t generally take them out of her room (yay for having less things to pack away around the house). When thinking about her toddler room (this came about when we moved her from her cot into a toddler bed…click here to read the full post) I really liked the Montessori approach of having things open for the toddler to be able to explore and help themselves to. This can be very scary for the parent, because one does assume this means your toddler will be up in the middle of the night playing with all their toys, just because they can, but we have yet to have that problem. When she wakes up early, she is now able to entertain herself by reading books or playing, and isn’t that the goal? Well, not the waking up early part, but the part about them being able to entertain themselves.

I’ll write a whole post on her full room set up after we converted her cot into a bed, but here are a few photos so you can see her toy set up. Now that she is in an actual bed (we converted her cot into a toddler bed at 16 months…just before Aaron was born) and then she moved into an actual bed (the one you can see here in the photo above) at about 20 months. Once she had gotten used to the toddler bed, the transition to the big bed was really quick and easy. Some people go straight to a big bed from a cot, but as I had bought a cot that converted into a toddler bed, I wanted to at least get a little use of it before her brother needed it as a cot.

In the lounge, I have just set up a little space for her with one or two wooden toys, her table and chairs, and her playdough. I’ll share some photos of this Montessori inspired space soon.

So there you have it, a few ideas of activities that encourage independent play. I hope you enjoyed this post and found it useful, let me know in the comments below if there are any activities your little ones enjoy doing by themselves.

#AaronStartsSolids - The start of our weaning journey with baby #2

#AaronStartsSolids Weaning Baby #2-01.png

It’s been a hot minute since I last wrote a blog post, but seeing as I am currently on a little holiday at the beach with Granny and have some extra hands, I’ve had a few moments to write this in between the general chaos of life with #twoundertwo.

As I did with Everly, we’ve done & will carry on doing a mixture of puree’s & baby led weaning, but as I really want to make sure that Aaron is getting loads of nutrition, we are doing more puree’s as opposed to him playing around with food. I do love the idea of ‘Food before 1 is just for fun’ but as you’ll read below, we have needed to really get into proper solid meals quite quickly, and mashing up stews and mixing lots of different food is the perfect way to do this.

So, let’s dive straight into sharing how Aaron’s journey to solids has gone so far.

First of all, I must say that looking back, I actually think that Aaron has been ready for real food for quite some time. I delayed it, because I started with Everly a little too soon, and I wish I had waited until she was 6 months old. Because of this, I thought waiting was the best way forward with Aaron. But, as we all know (but us moms don’t aways really internalise) ALL BABIES ARE DIFFERENT, and starting later with him hasn’t been the best thing for him.

For the last couple of months I have been a little concerned with Aaron’s weight gain, and decided to see the Paediatrician for his 6 month vaccinations (I usually just pop into a pharmacy and see the nurse for the routine jabs but this time I thought it might be worth seeing a doctor). While Aaron’s weight hasn’t dropped off, he hasn’t been gaining as much as he should be (according to his other measurements) and it seems something happened around his 3rd month, as that is when he stopped gaining weight well. I think what happened was a combination of the stress of having two little ones, Aaron stopped being a sleepy newborn and really started fighting his day time sleep, and the biggest thing for me, I think his nutritional needs were not being 100% met by my milk. In saying this, I don’t believe there was anything wrong with my actual milk supply or milk quality (something the Paed mentioned to be the issue…but something I don’t really think is an actual issue as I believe your body always makes exactly what your baby needs…but when your body makes breastmilk, it does draw from your own ‘supplies’, and so it’s always moms body which is left depleted as opposed to your milk). Anyway, her advice was to take better care of myself (no skipping meals…something I was doing not because I wanted to, but because I genuinely wasn’t finding the time to make myself food) and to get Aaron on to solids pronto. We had started him on solids a little bit here and there, but now I am fully into the swing of things and will share what, when and how we are going about it this second time…as well as sharing what you need to get started.

#AaronStartsSolids .JPG

Equipment

Recipe Books & Inspiration

These are my go to books for weaning advice, recipes & inspiration:

  • The Nourishing Traditions Book of Baby & Child Care by Sally Fallon and Thomas S. Cowan (slightly alternative ideas in here but I take what I like out of it and leave the rest)

  • Real Meal Revolution: Raising Superheroes Book by Bridget Surtees, Jonno Proudfoot, and Tim Noakes

  • Weaning Sense by Meg Faure & Kath Megaw

  • Real Food, Healthy, Happy Children by Kath Megaw

I used the first 3 books with Everly (Nourishing Traditions, Raising Superheros & Weaning Sense) and recently bough the Real Food, Healthy, Happy Children and it’s great too! From the titles of these books, you may have seen that we follow a slightly non-traditional approach to starter foods for baby. As with my daughter, we are be introducing Aaron to REAL food from the get go…this means no baby cereals, opting for egg yolk, veggies & iron rich meat. The ‘blandest’ food he gets that is the most like cereal has been oats, but I give this to him with lots of cream, cinnamon & fruit puree.

**NB I am not a Pediatrician, or a dietitian or any other form of the 'tion' family, so please use your mommy guy when it comes to food for your little ones. We also have no family history of allergies, and both Farmboy and I loosely follow a LowCarb/HighFat or Banting lifestyle and so my babies eat accordingly. If you are feeling nervous about giving your little one something I mention in this post, rather chat to your Doctor/Paed. I'm simply sharing what I do and what my little girl has loved eating, and what her brother now loves too. We follow the school of thought that encourages the introduction of ALL food groups before the age of one (this includes all allergenic foods from fish to peanuts to eggs). The only exception to this is raw honey. As for cow’s milk, I give Everly & Aaron full-cream dairy yogurt (preferably homemade), cream cheese, cottage cheese etc. Please listen to your mommy gut, and if your family has a history of allergies speak to your paed about introducing allergens.


Something to prepare food with:

While you can absolutely use a pot to steam food & then a hand masher, I am all about time saving gadgets. We have both the Philips Avent Combined Steamer and Blender and the Tommee Tippee Steamer Blender (this was sent to me to review when I started solids with Everly) and I’ve loved them both. I’ll eventually get around to doing a comparison of the two, but they both have pros and cons and so I use them interchangeably. Both of these awesome gadgets steam & blend food, making preparing your little one’s meals a piece of cake.


Something to store food in:

I use ice trays to freeze pureed food in once it’s been steamed and blended. Then once frozen, I pop out the cubes and put them into little zip lock freezer bags, label them, and then pop them in the freezer. I find ziplock bags take up less space in the freezer, and help keep things nice and organised.

These pastel coloured ice trays are from Plastic Land, and I use the Woolies mini ziplock freezer bags to store the cubes in.


Something to sit in:

We have a few different things that we used with Everly that we are now using with Aaron. You don’t need to have all of these, or even any of them, but this is what we have used and found worked well for different places & traveling:

  • High Chair (the plastic Little One from Game is wonderful! Super easy to clean and it’s neat and tidy)

  • Bumbo (we don’t actually have a Bumbo, but I do have the Baby Throne potty haha which works just like a Bumbo so this gets used often when Everly is using the high chair)

  • ‘Counter/Table’ chair from Safeway - we use this when traveling and it works like a bomb. It’s similar to the ones that restaurants usually have.

  • Bouncy chair - this is what I used when we first started as Aaron spent a lot of time in it anyway.


Something to eat with & eat out of:

  • I’ve used a mixture of Tommee Tippee Essential Food Pots & their Pop Up Freezer Pots that I was sent to try when Everly started solids. These are great for freezing food in, as well as serving out of.

  • Avent breastmilk storage post (these are the BOMB!) I still use these for storing Everly’s food when we are out and about, and they hold a lovely sized portion too. I bought mine at Clicks, but you can buy them at BabyCity and Dischem too. I have the Avent Manuel breastpump, so I use these pots all the time, not just for food.

  • Munchkin White Hot Spoons are the perfect size for little mouths (Everly still uses them) and are soft tipped too. They also change colour to show when food is too hot. We have used these for years and I love them! I bough mine from Mr Price home.

  • Then I also use any and all small glass/ceramic bowls at home to heat the food up in/serve out of…so no need to buy any thing fancy, you can make do with what you already have at home.

  • Tommee Tippee Magic Mat which keeps bowls from being flung off the table with it’s lovely suction base.

  • Once Aaron gets older, we will use the Tommee Tippee Bowls which are also great for putting snacks in and you don’t have to worry about them shattering when they get thrown off the table.


Something to keep baby (relatively) clean:

I LOVE these long sleeve bibs from Trendlings, and used one for Everly (she still uses it even though it’s getting a bit small for her) and now Aaron has one too. They just help moms (if you’re anything like me) with the anxiety that comes with baby led weaning and food going here, there and everywhere. While food still ends up in places you didn’t think possible, these bibs take care of most of the mess.

Trendlings also sell wet bags in matching prints! Wet bags are basically waterproof bags for storing wet things (like cloth nappies when you are out and about, or even swimming cozzies). I’ve got the matching wet bags in the feather print, and the polar bear print.

But, I also have a stack of regular fabric bibs on hand too. These get REALLY dirty and stained, and so I just keep a pile of old ones near the high chair to grab for meal times.


Aaron’s current (rough) milk & food schedule at 6.5 months old:

  • 6-7am wakeup & breastfeed

  • nap

  • +-9:30 am breakfast (oats/egg yolk & veggies/liver & veggies)

  • nap (breastfeed on wakeup)

  • +-1pm lunch (pureed stew/veggies & meat followed by some yoghurt & nut butter/fruit puree)

  • nap (breastfeed on wakeup)

  • +-5pm supper (pureed stew/veggies & meat followed by some yoghurt & nut butter/fruit puree)

  • 6pm bath, breastfeed, bed

  • plus one or two night feeds depending on whether he is super grumpy/teething/grouchy/missing his mommy

So, Aaron has +- 5/6 milk feeds, and then 3 solid meals in 24 hour


Weaning your baby

All of the books I posted above have great guides & ‘meal plans’ for starting solids, and how you go about it is up to you and your baby. Lots of moms like to add in one ‘thing’ at a time for about 3 days to see if baby has any reaction to that food, others go right on with adding mixes of food from the very beginning. A few things to bear in mind when starting solids (and to encourage you that you aren’t doing anything wrong):

  • There WILL be LOADS of waste in the beginning! Think about it, your baby has had nothing but milk/formula for his whole life, and now you’re suddenly giving him something new. Aaron took two weeks of pulling his nose up at everything , and then suddenly it was a light switch went on and he is devouring anything and everything I can throw at him.

  • Some babies need longer than others to get used to solids, and that’s okay. Listen to your baby, and watch for their signs of being full/not being interested.

  • Follow your baby’s readiness. I don’t think Everly was quite ready for solids when I started with her (just over 5 months) but looking back, Aaron has been ready since about 4 months old. Try not to compare (as hard as it is!!!) and remember that your baby has their whole life ahead of them to eat, so don’t rush them if you aren’t showing any interest.

  • Some foods take time to get used to. Keep offering the foods that your little one turns their nose up at, it can take up to 10 introductions of certain foods for baby to get used to it, and to realise they do actually like it.

  • You don’t have to follow any set rules for starting solids. Some moms like the idea of baby led weaning and hate the idea of preparing purees. Other moms are scared of the idea of their baby chocking on food and so like to go the puree’s route. Follow your gut, and do your research. Find other moms who do things the way you would like to do them.

  • Enjoy the journey! It’s a really exciting & new journey for you and your baby (not matter how many times you’ve done it before). Relax and have fun with a whole new world of flavours, textures and smells for your little one.

More posts on Starting Solids

Please feel free to ask any questions you might have on starting solids. I love hearing from you, and always reply to all comments posted.

Happy weaning!

Two Under 2 - A life update 6 months in

TwoUnderTwo Life update 6 months in-01.png

Whew! We’ve made it to 6 months as a family of four, and I think we all deserve a high five (or rather, Mommy & Daddy deserve a night of uninterrupted sleep, or maybe just a 10 minute lie-in, or wait, maybe just a hot cup of tea, I’d settle for that!). The past 6 months have been crazy, filled with nappies…and more nappies and then a few more nappies on top of that. And even though it feels like the days dragged ooooonnnnn and ooooonnnn this time has really flown past. Everyone said that it would be hard, and to be honest, I didn’t really believe them

Or rather, I didn’t really understand what hard would look like.

My first born, Everly, was (and still is) a unicorn baby…you know the ones that sleep like the book says they should (and then some!) who eat anything and everything, who play independently for hours at a time…the ones you don’t believe really exist. And so I really thought I had it all down pat when it came to having another baby. I just assumed that Everly turned out the was she did because of how we had parented. And while I think part of this is true, a whole lot of it has to do with her being a girl, being our first baby, and of course the things we have no control over, her nature and personality.

July Granny Visit  (17 of 59).jpg

Life since Aaron has been hard. It’s been hard for lots of reasons, not just because he has been a colicky baby, but also because of things like the small age gap between him and his sister (17 months) which means effectively I have two babies to care for. Also, with your second baby, you have far less time to sit and coo over them, and I was able to rest more when I had Everly (I spent the first 6 weeks REALLY taking it easy after her birth) and with Aaron, I was basically up and about and picking up a busy toddler after barely a week. It’s also been REALLY hard trying to co-ordinate two little schedules. I am very routine orientated, and somewhere over the past couple of months, Everly has needed to drop from two to one naps (I know, I should be thanking my lucky stars that she has made it this long on two naps) but that transition was quite tricky. Anyway, we made it and she has now settled nicely into her new one nap a day schedule, and thankfully still sleeps through the night (even through Aaron’s bad nights…long may that last!).

Aaron Jack 5 months old July 2019 (8 of 8).jpg

I really don’t believe that my little boy is a very difficult baby, he has just been really different to Everly. A big component has been that I actually have forgotten what Everly was like in the early months. But, in saying this, Aaron is a whole lot busier than Everly was, he has already got 2 teeth (and two more are breaking through and he HAS not been a happy chappy for days on end before and after those pearly whites broke through…unlike Evs who only got her first tooth at nearly 8 months and ever since then barely makes a peep when they do) and from what I can tell from my friend’s with boy babies, he is a typical boy. He just wants to be close to his mommy, and he likes intense one on one interaction about 90% of the time. It’s not always easy for me to mentally sit down on the floor and play with him, when I feel torn between work on my computer and then the things that I love doing (photography, blogging and sharing our behind the scenes farm life on Instagram…but gosh writing that out here really does sound terrible…I’m basically saying playing with and talking to my baby is taking me away from doing the things I love doing…and that pretty much sums up parenthood haha). But I do think all of these thoughts are normal (please tell me I’m not alone!) and while the first 4 months for us were the hardest, the last 6 weeks have had way more happy & sunnier days.

Aaron is giggling and laughing, and developing his own sense of humor (typical boy style, the fist full on laugh was over ‘fart’ noises) and he LOVES being thrown up into the air. He is getting really good at sitting, and his slow-to-smile nature means that every smile you do get hits you with ALL THE FEELS.

Here is our new #TwoUnderTwo schedule, for anyone who might like to know how we (try!) to do things most days:

  • 06:30 - 7am both kiddos wake up (generally at the same time, which is chaos, but some days Evs wakes up before Aaron and then I get to spend a bit of quality time with just her while I get her changed for the day). I feed Aaron & change his nappy, and then pop some music on for him while I change Evs nappy and get her dressed.

  • 8am Everly has breakfast while Aaron sits in his bouncy chair (he gives me about 10 - 15 mins before he starts getting bored).

  • 08:30 - 10am Aaron has his nap. Everly and I go an play in the garden, read books, potter around the house.

  • 10:00 Aaron wakes up, I feed him, change his nappy and then geenrally pop him in the pram and take him and Everly for a walk.

  • 10:45 Everly has a filling snack (usually homemade yoghurt with nut butter/blueberries)

  • 11:00 - 13:00/14:00 Everly has her nap (which can be anywhere from 2 - 3 hours long).

  • 11:00 Aaron has his solids (we just started about a week ago)

  • 11:30 Aaron goes down for his nap, which can be anywhere from 1 - 2 hours long.

    From 11:30 - 13:00 is generally when I get to have my only break from both kiddos. I don’t usually get longer than 45 mins, but there have been a few days when I’ve had 2 hours to myself. It’s wonderful! But it did take 6 months to get here, as usually Aaron would wake up as I was putting Everly down, or vice versa.

  • 13:00/14:00 Everly has lunch when she wakes up from her nap, and then the three of us play together until Aaron’s next nap.

  • 15:00/16:00 Aaron will have some sort of nap at this time, some days he has a short 30 minute nap, other day an hour. Other days, my wonderful Nanny will put him on her back while she does the ironing and I’ll take Everly out into the garden to play.

  • 17:00 Everly has supper

  • 17:30 I start running the bath, getting the kids pj’s and nappies laid out (this may sound strange, but as we use cloth nappies, the night time nappy is always a bigger one that has lots of layers, and so I go and fold them/get them ready.

  • 18:00 Bath time. I bath Everly while hubby get’s Aaron undressed and baths him. Then I take Aaron to his room to change and feed him, and then pop him down for the night. Everly gets changed and has story time and what she calls ‘talk time….soooo cute’ with Daddy, and I usually get to pop my head in to say goodnight.

  • 3:00-4:00am Aaron wakes up for a feed, and then goes right back to sleep till the morning.

It’s taken us a while to get to this point, and I’m so proud of my family! We had about a month recently of Aaron waking up multiple times a night, me feeding him often, us leaving him to cry and eventually settle himself to sleep (again, this has only been doable because Everly sleeps through the noise) and just general rough nights, but with lots of perseverance and consistency, we are back to a good nighttime routine again. I have no doubt this is going to change again, and I’m okay with that, because I know we will get back to our ‘normal’ again.

July Granny Visit  (45 of 59).jpg

In other news, I’ve been quite busy again lately with branding shoots & website design, which always pulls me in two directions. I also am in charge of our farm’s BEE certification, and we have our audit coming up in the next 2 weeks which has been crazy stressful, and really, really, really hard to juggle with two little ones. It’s the kind of work that needs uninterrupted focus time (haha yes I hear the moms in the back laughing along with me at the though of uninterrupted focus time when you have kids) but I’m getting there, and once this audit is done, hopefully it will be a while until I need to work on it again.

So all in all, we are getting into our groove and the latest fun milestone has been giving Aaron solids and starting his weaning journey. I’ll be doing more blog posts on that soon, but if you’ve got a little one and will be starting solids with them soon, here are all my blog posts on what we did with Everly:

Some goals we have now for our little family are to go on a hike, and when the weather warms up, to go camping. Are we crazy or is it doable? Do you have any tips for doing any of the above with two little ones? I’d love to hear from you!

Biddykins All-In-One Cloth Nappies - A review of these Easy on & Easy Off cloth nappies

Biddykins All in One cloth nappy review by Roxy Hutton CityGirlSearching Blog-01.png

We are on to our second baby in cloth, and have been using cloth nappies for nearly 2 years now. I started with newborn cloth for Everly (she will be 2 in September) and went straight onto newborn cloth with Aaron (who is 5 months old now) and I’ve loved every single moment! We have used more disposables on Aaron than we did on Everly (mostly because #2under2 is no joke and traveling with two babies in nappies is just crazy), but Aaron is in cloth about 85% of the time, and Everly is in cloth 99% of the time when we are at home.

Here are my other posts on cloth nappies that you might enjoy reading, with a post on newborn cloth, how to wash cloth nappies, how I store dirty nappies and a detailed post on the nappies we used and loved for Everly over her nearly 2 years of being a cloth bum:


While I was sent some of the AIO’s pictured here in this post, all thoughts and views on them are my own. I have spent thousands of rands of my own money on Biddykins throughout the past 2 year s(I also LOVE their pail liners to store dirty nappies in, and am a firm lover of their breast pads!) and so you can rest assured that although I was given the pretty nappies in this post, my review is 100% honest.


I mainly used flats, pre-folds, fitteds and covers for both my babies until they fitted into their OSFM nappies (this was at about the 5 month mark with Everly and when we get back home next week I will start Aaron with them), and then I moved onto pockets, snap in ones (SIO) and my all time favourite nappies, all-in-ones (AIO’s).

While it’s really hard to recommend one type of nappy to anyone (this is mostly because each baby’s shape is different, their output is different and changes as they get older, if they are tummy sleepers, how sensitive their skin is, what climate you live in also affects how often you wash & dry nappies…the list goes on!) all in one nappies are a firm favourite for lots of moms because of how easy they are to use. While they don’t offer the most absorption (newborns wee A LOT and need to be changed more often than say a 5 month old because of how much and how often they wee) I loved using them on Everly from about month 6 - 9, and then again from about a year to now. All-in-one nappies are just what their name suggests, they have all their parts built into the nappy so there is no stuffing inserts like you do with pockets, no folding like flats, no added covers to put on…you literally just snap them on. They are the closest to disposable nappies and so Dad’s & Granny’s love them.

If all-in-ones are so amazing, why doesn’t everyone use them?

There are only really two downsides to AIO’s…they are the most expensive of cloth nappies, and they take a long time to dry.

You can’t stick them in the tumble dryer (although you can do this with some brands, always read the label!) but I often stick them in for about 20 minutes if I’m running out of nappies.

If you don’t have a budget, then drying time won’t be an issue for you as you can buy have enough to cover 2 - 3 days of wear and over wash day. I always recommend that people buy a variety of nappies when they get started, and to always have a few (3 - 5 is a nice amount) of AIO’s in your stash so you can get a feel for them. Also, as your baby becomes a toddler, they tend to use less and less nappies in they day, and then AIO’s are wonderful! They are also great for traveling and being out and about because they are so quick and easy to put on. Once you’ve given them a good try, then you can add more to your stash.

I wouldn’t personally recommend AIO’s for the newborn stage, simply because you go through nappies at such a rate, and getting a good fit around those skinny legs to prevent leaks is much easier to do with flat and covers. Also, as you can end up going through 10 - 15 nappies a day, it would cost you a small fortune to buy AIO’s that really would only last you a few months at most. That’s why I recommend buying OSFM (one-size-fits-most) all-in-one’s to use once your baby is about 5ish months old.

In terms of worrying about leaks…you can also add more inserts/flats to an all-in-one nappy to increase the absorption. Everly is now 22 months old and I mainly use AIO’s. I just pad fold a newborn sized hemp flat underneath the inserts for her nap time, as that’s when she really needs more of a boost to prevent leaks.

We have gone through our fair share of leaks with AIO’s, but this has mainly been due to not fitting the nappy properly, and then troubleshooting when she has increased her output during the day and over nap time. Both my babies have been medium to heavy wetters, and so we have definitely not been able to use AIO’s for nighttime. Everly is in all-in-ones 70-80% of the time during they day, with the other 20-30% of the time being in pockets as the covers dry super fast and I can tumble dry the inserts.

My favourite brand of All-in-one Nappies

My favourite brand of All-in-Ones are local South African label, Biddykins. I always rave about Biddykins to my friends because they are well priced, great quality, and the prints are AMAZING! I own about 10 girlie print pockets, and then about 10 girlie print AIO’s, and that’s not even counting Aaron’s collection!

Here are a few photos of Everly rocking her pretty Biddykins AIO nappies:

The Biddykins AIO’s have the following features:

  • a tummy strip that help prevent moisture creep along the tummy.

  • various insert layers, size and positioning are carefully researched to offer the best possible blend of absorbency AND trimness, ensuring that the inserts fit INSIDE the nappy, regardless of the size adjusted setting! Being custom designed, they are able to periodically tweak the size of the inserts slightly as they continue to work towards achieving the optimum combination of trimness & absorbency.

  • a 5-layer bamboo blend top insert, which includes a suede-cloth "StayDry" layer, ensures baby feels dry and comfortable.

  • a 4-layer bamboo pure lower insert ensures maximum absorption whilst remaining as trim as possible.

  • the suede-cloth "StayDry" lining that continues right up to the back elastic not only keeps baby feeling dry, but also ensures that 'everything' is contained within the nappy.

Price wise, the plain one-coloured nappies are R130, standard prints are R140 and then there are a few special print nappies that are R150 each.

Everly Rose Toddler Bedroom CityGirlSearching Blog  (46 of 49).jpg

We love our all-in-one nappies, and I can’t wait to get out my boy stash for Aaron when we get back home to the farm next week. We’ve been using disposable nappies while traveling (one has to be practical sometimes), and I’ve missed my cloth SO much! If this sounds like a strange concept, I urge you to give cloth nappies a try. I am 100% sure you will become a #clothconvert in no time at all!

Life with a Baby - Week 15 of Baby #2

Life With A Baby 15 weeks - What's been different so far with baby #2-01.png

While scrolling through the hashtag I made for my little girl (please tell me I’m not the only one who scrolls through their own hashtags!), I came across the photo I shared of Everly at 3 months, and the corresponding blogpost I wrote on her at 15 weeks. As Aaron is 15 weeks old now, I thoroughly enjoyed reading through it and comparing my two babies. I’m so glad I have kept up with blogging, as it has become a wonderful walk down memory lane on so many occasions.

Here’s a comparison of Everly & Aaron at 3 months old:

My pregnancy with Aaron was a very happy and relatively easy one. I stayed as active as I could (going to Pilates for as long as I was able to) and Everly pretty much kept me active all day every day. We also moved house when I was 7 months pregnant (fun & games that was!) and Everly only officially started walking the day I gave birth to Aaron…so having to carry her around all day also helped keep me fit and strong. Although my birth didn’t go according to plan, again (I was hoping for a VBAC but my cervix just wouldn’t play ball…again) this time around the whole experience was a lot more peaceful because I had been through it all before. I was very grateful to go into labor naturally, at 38 weeks on the dot (just like when I had Everly) and I was up and about in the hospital the very next day, which really helped with my recovery time.

Here are all the posts I wrote on my second pregnancy, including a post on what to pack for hospital for both mommy & baby:

Not that I can really remember, but from what I wrote in my post on Everly at 15 weeks, she started really resisting her day time naps at this stage. This is nothing new for Aaron, as he has been cat napping like a champ for a good 2 months now, and surprisingly is actually now starting to settle into more of a predictable routine.

So…the total opposite of Everly.

I also thought Everly was an amazing sleeper at night, but it seems that Aaron is even better than her, and has been sleeping 11 - 13 hours a night since about 7 weeks old (I’m going to say that he is making up for his lack of daytime sleep…or perhaps he gets more than his fair share at night and needs less during the day?? Who ever really knows!).

While I haven’t read/re-read any baby books this time around, here is what I shared in Everly’s post that could give some reason for the unsettledness that happens at about this time:

  • The dreaded 4 Month sleep regression (in reality I feel like babies make up their own timelines when it comes to sleep regressions/growth spurts)

  • A growth spurt

  • Teething (I laugh looking back at this as Everly only got her first tooth at 7 months…so the fact that thought she was teething at this age really gives me a good giggle)

  • A Wonder Weeks developmental leap

  • Travel or disturbance of environment/routine

  • Transitioning out of a bassinet and into a cot (we made the move with Aaron today!)

  • Vaccinations (here in South Africa there are shots at 14 weeks)

  • And the most probable one...babies just being babies, growing and changing with no real explanation as to why they do what they do!

Kapas Baby Autumn Winter Collection 2019 Photos by Roxy Hutton CityGirlSearching Blog (63 of 72).jpg

Up Until Now

Aaron’s first few weeks were relatively smooth sailing, and he pretty much ate and slept all night. He slept about 2 -3 hours during the day, and stretched to about 5 hours at night. From about week 5 - 9, he had terrible gas & tummy trouble (I want to say he was colicky…but I now know that Colic is the word used to describe unsettled babies who generally are just not very happy/have sore tummies/are more on the niggly side of things). I tried every drop/liquid under the sun, but didn’t really notice much of a difference, and he eventually grew out of that at about 10 weeks.

We have also gone through a very hazy 6 weeks or so of crazy cat naps during the day, ranging anywhere from 20 - 50 minutes in length. I tried 3 days of intense sleep training, which I didn’t find to work very well, and then both kids got colds and I put all that on hold. Throughout all of this, Aaron continued to sleep REALLY well at night…sleeping from 6/6:30 - 7/8am with one feed at about 5am. But the days were shocking, and I rememeber pretty much crying at some point every day. I feel like things escalate from 0 - 1000 in a split second, and hubby would leave the room and I would be all cheerful and smiley, and come home 10 minutes later to find me in a complete heap, two screaming babies and lots of tears all around. But thankfully, each day seems to be getting easier, and I hope this continues.

In terms of routine & schedule, we follow the same bed time routine that we started (and still do) with Everly:

  • 6pm bath time (depending on the afternoon nap I’ll either feed him one side right before bath time or when he wakes up from his last nap which can be anywhere between 4 & 6pm). Then once out the bath it’s a quick massage, a nice big clean nappy (we use cloth nappies on both kiddos...click here to read more about our cloth nappy journey so far) and pyjamas.

  • +- 6:15pm feed the other side, burp & then straight into the cot by 6:30pm

D47666AD-4E17-430F-88AE-B8852ED9AE0D.JPG

Here's how I put Aaron to sleep at night:

After his bath & last feed & burp, I pop him straight down in his cot while he is awake but drowsy, put his dummy in and walk out the room. Aaron sleeps on his tummy (unlike his sister who HATES being on her tummy…not matter how much I tried). If he’s fussing a bit, I may go in a few times to pop the dummy back in and give a few reassuring pats on the bum. This is the only time of the day that I feed before sleep.

And during the day:

I try to follow a 'wake-eat-change-play-sleep' routine during the day so that he doesn't associate sleeping with feeding, as feeding before sleeping makes life really hard as baby ends up refusing to go to sleep without a feed. This has become much more of a challenge with short naps. For the first few weeks of his sleepy newborn state, he would sleep about 3 hours at a time during the day, which meant every time he woke up it would be time for a feed. I roughly follow a 3 hourly breastfeeding schedule. I do the same sleep routine during the day as at night, Except this time he gets put down after play time. I generally try to follow the following wake time schedule, which is based on age appropriate periods of awake time:

  • morning wakeup

  • 1 hour of awake time

  • nap

  • 1hr 15mins of awake time

  • nap

  • 1.5 hrs of awake time

  • nap

  • 1.5hrs of awake time

  • bedtime

Up until now, it’s been really hard to follow a ‘eat, play, sleep’ routine, as the short day time naps inevitably mean I’m feeding him just before his next nap, otherwise I would be feeding him every hour. I am not against demand feeding, but I find we are all happier when we are following more of a set routine, and 3 hourly feeds works well for this. When (or IF) Aaron’s naps consolidate (apparently this generally happens naturally around month 5) then this will be much easier to follow. So in the meantime, I pop him in the carrier is he wakes up early and it isn’t time for a feed, this way he is happy to either be close to me, or nods off for a bit more.

LittleMe High Contrast Mobile Dangles Photos by Roxy Hutton of CityGirlSearching Blog (3 of 11).jpg

And Now

Sometimes it still feels like all Aaron does during the day is cry…I know this isn’t the case, but gosh it sure does feel like it some times. He is a typical boy (at least, from what I have been told and seen with my friends boy’s) he just wants to be held and is happiest when being worn in the carrier. This is completely the opposite to Everly, who could lie on her play mat for ages and ages, and was very content to just be. She also woke up happy after every nap, whereas Aaron wakes up rather grouchy and is happiest only once he has been fed.

Even though I feel frazzled most of the day (I’m sure this has less to do with Aaron and more to do with the fact that I have two kids to take care of and I work from home) each and every smile from him warms my heart and makes it all worthwhile.

I’m also SO thankful his nights are so good #longmayitlast.

Ubuntu Baba Baby Hemp Carrier South Africa Photos by Roxy Hutton CityGirlSearching Blog  (7 of 28).jpg

NOW FOR THE FUN STUFF...

Current favourite nickname: Arrow

Loves: being in the carrier & watching his big sister

Hates: day time sleep (haha) being taken out the carrier

Teething: Not crazy amounts of drool, and not too much sucking on his hands yet

Eye Colour: Grey? Dark Blue? Hazel?

Hair Color: Dark Brown 

Weight: Weighing in at 6.2 kg's, the same weight as his sister at this age. I have gone through a week or so of worrying that I am no feeding him enough as I only feed him on one side per feed. He was 3.6kgs at birth, and Everly had doubled her weight by this time, so I’ll keep an eye on this. I’m trying to drink more water and make sure I eat a lot more oats (any other suggestions to increase your milk supply?)

Feeding: Breastfed

Sleeping Aids: His hands & a dummy

Current clothing size: 3-6 months

Currently eating/not eating: I’m eating & drinking everything I did before being pregnant, as well as when I was pregnant. I’m drinking regular coffee (although I try not to drink caffeine after 3pm) and I’m also still drinking my homemade kombucha. Although a lot of people talk about diet affecting their breastmilk, I really don’t believe it makes too much difference, and find I am a happier mom when I eat what I like.

Kapas Baby Autumn Winter Collection 2019 Photos by Roxy Hutton CityGirlSearching Blog (35 of 72).jpg

And that’s where we are now friends. Here’s hoping Aaron continues to settle more during the day, and that he keeps up the wonderful nights (I’m hoping he sails through the 4 month sleep regression!) but if not, I’m going to just try to remember that these are all such short seasons, and before we know it, he will be up and running after his big sister in the blink of an eye.

Chat soon!

x